Pages

Showing posts with label Sheltering Tree. Show all posts

Tuesday, 24 September 2019

Hello, old friend

Hello crafting friends!

When I returned to stamping after that four year break, I SO missed my library of stamp sets. I loved making today's card because it uses a stamp set I adored. It disappeared, of course, in The Great Stash Cull but, recently, a kind, kind lady sent me a box of goodies that she 'didn't need any more' (bless her generous heart!) and there it was: Sheltering Tree. It was like re-uniting with an old friend. Come and see:


This is a long, tall, thin card 8 cm x 20.5 cm (8" x 3 1/8") an unusual size for me but I had an envelope that size! I used a mask made with circle punches and sponged with Crumb Cake ink to make a sort of fantasy landscape background.


When it came to stamping the trees, I wanted smaller ones towards the top to create a sense of perspective. So I used a Soft Suede marker to ink up only the inner part of the tree image and stamped that at the top; the next tree was inked up with the same marker, covering slightly more of the tree; then, finally I was able to stamp the full-sized tree in the foreground.


The leaves are a separate stamp and I did exactly the same thing, using a variety of rust and brown markers. Some of these leaves look green in the photo, but they are actually added with a gold marker and add a pretty glow in real life.


The panel was finished with a pretty sentiment from Clearly Besotted and then matted onto Cajun Craze card stock before attaching to the card base.

(Click here if you'd like to see other cards I made using Sheltering Tree - quite a trip down memory lane!)

I was inspired to make this tall skinny card when I saw The Paper Players' challenge this week; I kept the colour palette to the browns and rust colours of this month's Rainbow Card Challenge,  so will also be linking up there.


AND IN OTHER NEWS
In case anyone is wondering how my youngest son is getting on at uni, he has sent me photos of how he's made his room look fabulous - he really has a talent for this :) He added that he didn't have time to chat as he was going to a party! I don't think I need to worry too much about him, do you?!

Thanks for popping in today. Do you have a favourite stamp set that you'd hate to lose? Do let me know what it is in the comments below!

Hugs,

Wednesday, 10 June 2015

Sheltering Tree and not so White Christmas!

Yesterday I decided to make some quick Bohemian Borders thank you cards, which I was going to show you today, but then oops! This happened instead:


I had a sudden curiosity about mixing the trees from White Christmas with Sheltering Tree and giving them a good old summer vibe!


I propped the bicycle against one of the trees as a nice focal point but it made me giggle - there wouldn't be a chance of me cycling to this idyllic spot as Eva pup would either have hidden from, or eaten the bike, one or the other!


Stamps, inks and sponges is my idea of a happy crafting session :) How about you?

BUY THE SUPPLIES TO MAKE THIS CARD NOW!
Click on any item to be transported to my online shop!

If you have any queries, or prefer to speak to me, I'm happy to help.
You can contact me by email or phone on 01280 820593.

This was only supposed to be a snatched 3 minute crafting session but, as I was sponging away, Eva came up and sat in front of me with a look that clearly said: "It's definitely my walkies time - I know it is!" She allowed her gaze to fall on my crafting table. "Of course, I could always find something to chew if you'd rather...!" She is actually usually very good around my crafting things, although we did recently have a difficult moment with a new spool of lace trim which proved too much for her self control!
Now, are you looking for birthday inspiration at all? Because, if you are, the Stampin' Up Artisan Design Team has got you covered! We'll all be showing off our birthday ideas tomorrow, using gorgeous new goodies from the annual catalogue - see you then!

Thursday, 7 May 2015

Sheltering Tree faux pointillism tutorial - Stampin' Up artisan blog hop

It's Thursday, and time for another fabulous blog hop organised by Stampin' Up's crack team of artisans! You're in for a treat this week as some of the artisan designers have sneak peeks of some new and exciting products to show you!

GOING A BIT DOTTY!
I've had to contain my own excitement sadly, as my box has been delayed, but hey! it gives me the perfect opportunity to talk you through a card I made with a faux pointillism background using Sheltering Tree. Come and see:


What do you think? Would you like to know how I made it?


Okay! So, I mounted the blossom image from Sheltering Tree, inked it up with So Saffron ink and stamped my panel. TIP: Stamp off once before adding colour to the panel at first, then add more intense colour where you need it, at the bottom and round the edges.


This stylised plant from Mum's Love is gorgeous isn't it?! I used Mossy Meadow ink to stamp it over the bottom half of my panel.


This leafy in-fill stamp is perfect for adding a bit of foliage. I used a lighter green, Wild Wasabi, so that it receded into the background a little.


I coloured my plant heads in with a Tangelo Twist marker. This fabulous colour is great for adding a lovely pop of colour! When I stamped the plants, some of the stalks ended up 'floating' so I used the Mossy Meadow marker to extend them.


Sponging ink around the edges of the panel really draws the eye into the centre! I always chop my Stampin' Sponges into quarters and staple a piece of coloured card to them so that they act as handles and so that I can see at a glance what colour ink it's for.


All it needs is a sentiment... There! (I'm in love with the gorgeous ribbon fonts in the Butterfly Basics stamp set!)


I hope you've enjoyed my faux pointillism tutorial and that I've encouraged you to get artistic with Sheltering Tree.

And if you've stayed with me, bless you, because I know you're dying for some sneak peeks! Off you go and check out the excitement with Allison Okamitsu!
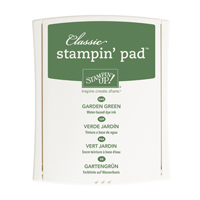


SHOP FOR THE SUPPLIES TO MAKE MY CARD NOW!
Click on any item to be transported to my online shop!

If you have any queries, or prefer to speak to me, I'm happy to help.
You can contact me by email or phone on 01280 820593.

Spring seems to have been interrupted by a load of wind and rain here in the heart of England! Eva is not remotely concerned by this - walkies is walkies whatever the weather! She always comes back with pretty little crimped ears when we've been walking in the rain. I come back looking as if someones stuck some colourless candy floss on my head!

See you tomorrow,

Thursday, 16 April 2015

Guy Greetings for an engagement - Stampin' Up Artisan blog hop

It's Thursday and that means another round of fabulous inspiration courtesy of Stampin' Up's global Artisan design team! I love working with these talented ladies and am constantly amazed by the projects everyone comes up with each week. I know you will be too so grab a cup of something delicious, settle back and enjoy :)

A BIT OF VINTAGE ARTINESS
Spring has got to me this week I think! I spotted the Guy Greetings stamp set in our box of goodies and it occurred to me to put that gorgeous vintage car into a romantic arty setting. Come and see:


Wouldn't this make a charming engagement card?! In my head, the car has been parked in a quiet spot and a happy couple have unpacked their picnic in the spring sunshine with blossom floating down from the trees like confetti. Perhaps you can hear the pop of a champagne cork - she has said YES!


I love the nostalgic feel of the car. It was stamped with Basic Black ink, heat embossed with clear embossing powder and coloured with Garden Green ink and a blender pen to turn it British Racing Green! But what about the background?


It's all been done with the blossom stamp from Sheltering Tree to give a pointillism effect! Isn't it fun?! (And if you're wondering what on earth pointillism is, find out all about it here.) This is much simpler than real pointillism - you just ink up (and stamp off if necessary), then stamp repeatedly where you want the colour. TIPS: You can always add colour but you can't take it away so start pale! Sponging ink round the edges of the panel draws the eye in to the scene.

I hope you've enjoyed my romantic moment! Now it's time to hop off and see the rest of the team's work - just click the button below to whizz over to Allison Okamitsu!


BUY THE SUPPLIES TO MAKE THIS CARD NOW!
Click on any item to be transported to my online shop!

Blender Pens
£8.95
If you have any queries, or prefer to speak to me, I'm happy to help.
You can contact me by email or phone on 01280 820593.

Thanks for joining me today. I'll be back tomorrow with a look at some of the amazing Weekly Deals. See you then!