Pages

Showing posts with label Be Merry (WPlus9). Show all posts

Friday, 4 October 2024

Christmas in Bloom

Hello, crafting friends!
 
It's a brand new month and a brand new challenge at The Flower Challenge! This time we are concentrating on stenciling.
 

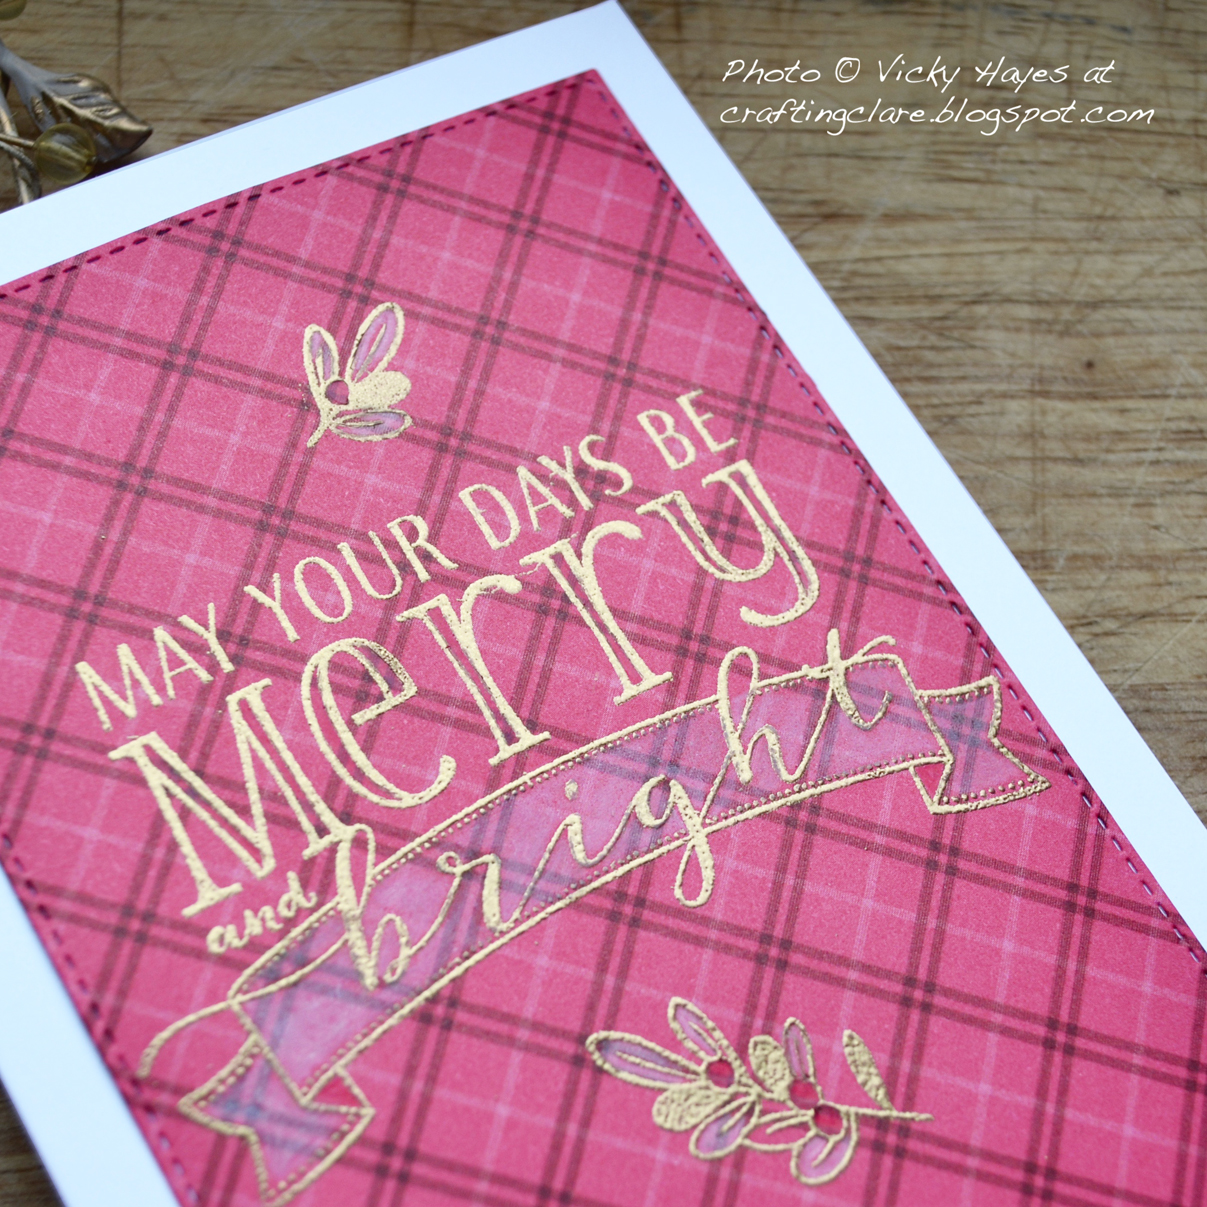
If you are a regular here you will know that I am a massive fan of stencils and particularly like using them to create designs different to the way they were intended! Today I used The Greetery's Always in Bloom layering stencils to create a Christmas card.
 

First, I made a swatch-style background using Funky Fossil's Postage Frame stencil. This required some measuring up a grid, masking with low tack tape and then sponging with pale blue ink. On these little swatches, I stenciled lots of different flowers and berries and leaves, using distress oxide inks and drying with my heat tool between each inking.
 

I did smudge a little of the blue ink but covered it up with the sentiment banner! I made that with the banner from WPlus9's Be Merry and used my stamp positioner to curve a sentiment from The Greetery to fit it. The finishing touches were made with my white Posca acrylic paint pen - LOVE how this stays white on the distress inks!

Okay, now it's your turn! Do hop over to The Flower Challenge blog to check out the gorgeous samples made by the rest of the design team. When you're ready to make your own card, don't forget to make flowers the focus of your creation and include stenciling. You can share with us using the blue Linky button at the bottom of the challenge post.
 
CHALLENGES
I'm linking this card up at the Stencil Fun Challenge where there's an optional halloween theme but I didn't go for it! I'm also joining in at Allorts Challenge where the team are celebrating their 800th challenge - wow! They have an Anything Goes challenge this time.
 
AND IN OTHER NEWS
Poor Eva is fed up with having her paw prodded about and we are no further on in discovering what the problem is. Clipping her claw right back so there is no pressure there has made her much more comfortable and she is able to go careering about over the countryside with her fluffy sister again.
 

We have had some grim weather and the mud is back with a vengeance, so I am doing a lot of bathing dogs and am paying particular attention to that paw. I am going to leave it at that for the time being and monitor the situation; her paw is a bit lumpy and bumpy but we love her and in our eyes she's perfect!

Sending hugs,

Wednesday, 19 October 2022

Framed festive florals

Hello, crafting friends!
 
Sometimes I invest in additions to my stash which I tell myself will be brilliant because I can use them in all sorts of different ways. And then I don't have time to try all the ideas I was excited about. Does that sound familiar to you?
 

For example, I was so excited about The Greetery's Banner & Bough stencil and stamp set but although I used it to make a whole batch of cards in the way they were designed to be used (check out the cards I made with it here) I just never got round to a proper play with it. Until today!
 

Choosing a slimline card base, I started with a large bold sentiment from WPlus9's Be Merry, then stamped three of the wax flowers from Banner & Bough. I measured up and drew a frame around this using a ruler and a black fineliner pen, then added stenciled foliage with coloured pencils in three different shades of green.
 

I added to the foliage and flowers with stamped pine branches and berries, also from Banner & Bough. To finish the card I added black stalks and white highlights to the berries and coloured the flower centres and the word 'merry' with a gold pencil.
 
CHALLENGES
I was intrigued by Less is More's challenge to include a hand drawn frame on a one layer card and this is the result; Peace on Earth have a lovely inspiring mood board and I'm linking up there; I'm also joining in with Happy Little Stampers Christmas challenge where Anything Christmas Goes with the optional theme of Frame; Also, since this is quite the sentiment, I'll enter again at Allsorts challenge where Pauline's theme is Add a Sentiment.


AND IN OTHER NEWS
My head might be full of Christmas but there is no doubt that the autumn season is in full swing.
 

Here's my fluffy young lady enjoying a leafy lane. It would have been great as a video as leaves were gently fluttering to the ground as I was taking the shot.


Sending hugs,

Sunday, 27 March 2022

Playing with pink and plaid

Hello, crafting friends!
 
Happy mothers day to all who celebrate it in the UK today :) In a display of contrariness, I have a Christmas card to show you! Come and see:


This simple design fulfilled a sudden desire to see what would happen if I introduced a white coloured pencil to some bold pink plaid paper! I cut a piece of the paper with a stitched rectangle die from Heffy Doodle, swished an embossing buddy over it to get rid of any static, used versamark ink to stamp onto it with the large Christmas sentiment from  Be Merry by WPlus9, and heat embossed with gold embossing powder. There are some flowers and foliage images in the set and I chose two sprigs and gold embossed those above and below the sentiment.

 
When I used the white coloured pencil to colour the banner and the leaves of the sprigs, it turned the bright pink into a paler pink as I'd hoped! I used a darker pink pencil to add definition to the word 'merry', the berries on the sprigs and the back of the banner before attaching the panel to a card base.

CHALLENGES
I hope this card is CAS enough for Less is More which inspired my colour choices with its Pink and Gold theme; Jingle Belles inspired the plaid with their We Wish You a Plaid Christmas challenge so I'm joining in there; I'm also linking up at the ABC Christmas Challenge where Carol is hosting three more letters and I've chosen E for Embossing; I'm also playing along at the  Rudolph Days Challenge where we must make an Anything Goes Christmas card on the 25th of each month (and link up by the end of the month.)

AND IN OTHER NEWS
My favourite mothers day story was told me by a friend: He learned to knit one year when he was a little boy and decided to make his mum a scarf, only he got a bit bored after a while and thought the scarf was probably long enough at 6 inches. On the big day he planned to present it to her at breakfast which he was going to cook himself. He didn't really know how to cook anything except frozen peas so he made those, put them in a bowl and brought it to his mother in bed on a tray. What I love about this story is that she was so thrilled with the scarf she put in on immediately (it rested on one shoulder) and ate the peas with apparent delight while her son sat on the end of her bed. Isn't that the best story?!

Sending hugs,

Wednesday, 24 March 2021

One layer poinsettia on kraft

Hello, crafting friends!

Looking out at all the birds and flowers in the garden and feeling the beginnings of warmth while walking with Eva makes it hard to think of Christmas but that's what I'm doing today!


I found some weird sized kraft envelopes - I've no idea where they came from! - so I cut this card base slightly smaller than usual. The edges were masked off with sticky notes and I stamped the poinsettia (a retired one from Uniko) over one corner. This was coloured with coloured pencils and the centre highlighted with a Posca white paint pen. The background was sponged lightly with white craft ink, working in from the edges. I dried this with a heat tool before removing the mask. After sweeping the area with an embossing buddy, I stamped a sentiment from WPlus9's Be Merry with Versamark ink and heat embossed it with white embossing powder.

For some reason, I found it so hard to get decent photos of this card - this is the best I could come up with!

EDITED TO ADD AN AWARD
This card was showcased at Jingle Belles :)

CHALLENGES
The CAS Christmas card challenge is celebrating three years of fabulous inspiration and Loll has chosen a Kraft, Red and White colour challenge so I'm linking up there. I'm also linking up with Merry Little Christmas where Anything Goes and Jingle Belles where the theme is Festive Foliage - and poinsettias are technically leaves as Stephanie kindly pointed out!


AND IN OTHER NEWS
Christmas is LITERALLY just a few months away! 
Well okay, nine months away - but it will creep up before you know it.
This is an example of the kind of exaggeration that amuses my family. But it galvanises me into action and now I have another Christmas card ready to be written. In fact, I might make another one while I'm in the mood... watch this space!

Sending hugs,

Thursday, 22 October 2020

The doves from above

Hello, crafting friends!

Like everyone else that is reading this I love playing with stamps, but my favourite thing is to find a surprising way to use them!


The bird in the recently-released Christmas Characters stamp set from Funky Fossil usually carries an envelope but it occurred to me that if there were two of them, they could carry a festive banner! 


So, I stamped one bird, then used the mirror technique to stamp another, shaded them with an alcohol marker and fussy cut them, snipping off the envelopes as I didn't need those. You can see what the stamp usually looks like from the image on the right in the photo above.


The banner is from WPlus9's Be Merry and I used an appropriate sentiment from Uniko's Pure Florals Poinsettia (retired), curving it slightly to fit. To give a suggestion of church, I stamped a stained glass window image from Stampin' Up's retired Painted Glass (retired) and added a rough plaster wall courtesy of their In Good Taste designer paper.

CHALLENGES
I shall link my doves from above up with this month's bird-themed challenge at CAS Christmas; I'm also joining in with Merry Little Christmas where as always, Anything Goes.


AND IN OTHER NEWS
I have decided The Craft Square Metre needs an overhaul! My crafting space is in the living room, so I have to be very tidy. I had cunningly interspersed the books on the bookshelves with tasteful boxes and baskets concealing a variety of exciting crafting goodies but the shelves were beginning to groan a little! So I have decided to move the crafting things to some stronger and deeper shelving in an alcove and move the CDs (yes, we still have those!) and paperbacks over to the other side of the room. I may be some time...!

Sending hugs,

Saturday, 25 July 2020

Summer colours for winter

Hello, crafting friends!

Today's card is the result of it being summer, with all its bright colours and tropical vibes, mixed in with the fact that it's the 25th of the month and so a Christmas card is required! Come and see:


I've used one of the trees from Spruce Trees by Inkylicious combined with a beautiful sentiment from Be Merry by WPlus9.


I started with the sentiment, stamping the 'Christmas Wishes' in red ink directly onto a nice thick card base, then adding the banner in black using my stamping platform. I made a mask byy stamping the banner again onto a sticky note, cutting the top of the banner shape out and positioning the mask over the original.


Then it was time to stamp the trees in their lovely bright colours! I chose Crushed Curry, Melon Mambo and Bermuda Bay, all from Stampin' Up. Once the mask was peeled away, I added some coloured gems and voila! What an quick and easy card this turned out to be :)

EDITED TO ADD AN AWARD
Delighted to get a shout out from Stephanie and Lauren at Jingle Belles


CHALLENGES
I was fascinated by the inspiration photo at Jingle Belles, so I'm joining in there. I was inspired by the bright colours and the bottle brush trees. Less is More has a One Layer Card Christmas in July challenge, so I'm also playing along there. And finally, it's Rudolph Day over at Scrappy Mo's, so I shall link up over there too. Happy Rudolph Day!


AND IN OTHER NEWS
I've taken my youngest son back to his new house where he can settle in and be ready for when his university opens up again in September. He gave me a lovely hug when I left him and patted me on the shoulder. "Don't worry!" he said bracingly. "I'll be back at Christmas, The 'Rona permitting!" Needless to say, I felt quite tearful on the way home!

There's always crafting therapy though and my adorable assistant...


... pass the glue Eva!

Hugs,

Wednesday, 13 May 2020

Bloomin' cards!

Hello crafting pals!

Do you remember this post when I tried out a new die that had slithered into my shopping basket when I was supposed to be buying sensible things like glue and white card stock? I wasn't happy with the outcome but I am not one to give up, and today that die had another, more successful outing :) Come and see:


The die is Country Garden by Gemini and I used it to make two cards that are very different from each other. It's a large ornate die that could cover a card front, but I chose to use just parts of it today.

CARD ONE


The first card uses a piece of the die cut with all the little bits and pieces taken out to give a pretty lacy look. I used a restrained colour palette of white on cream and covered the die cut with a wide bordered frame cut with two of my Heffy Doodles stitched rectangle dies.


The sentiment uses a gorgeous banner from Be Merry, a WPlus9 Christmas set that I HAD to have for this very reason :) I stamped the congratulations from Clearly Besotted's Simply Said, snipped it out with paper snips and added it to the banner.

CARD TWO


To make the second card, I created a background on a card panel by masking off the edges and sponging ink gently from the edges into the centre. When the masks were removed, there was a nice crisp semi-frame.


The die was passed through my Big Shot three times using pink, blue and green card and I cut various parts out and grouped them together onto the background. The card was finished with a block sentiment from Uniko's Simply Said.

CHALLENGES
Both these cards use the same die, on different designs and for different occasions, so I'm linking up with the Twofer Challenge; I'll also enter both into the Happy Little Stampers Die Challenge where Anything Goes.

With Card One, I'm also joining in with Less is More, where the colours required are White and Cream.

Card Two was made with the fabulous bright colours from this week's Paper Players challenge; I'm also joining in with AAA Cards CAS challenge, where we are to use up to one third of the card front with the optional twist of a repeating image; last, but not least, I'm playing along with Addicted to CAS, where the code word is Flower.


AND IN OTHER NEWS
The Lockdown measures have been lifted slightly in the UK in a rather vague and confusing way. For example you can sit two metres away from two people in a park but, oddly, not if you know them! I think we just have to use our common sense and carry on behaving as if we are carriers of the virus and not wanting to put others at risk. I shall be going up to my favourite bluebell woods, a 15 minute drive away, but staying away from anyone else. That seems pretty safe to me and oh my goodness, I'm a bit giddy about the prospect of a trip out!

How are things going in your area? Do you have any plans to go out?

Be safe won't you,

Sunday, 26 April 2020

Aaaaargh!

Hello crafting friends!

Under these lock down conditions, you could be forgiven for thinking that all the excitement has gone out of life. Well if that sounds like you, my recommendation is to go and get your trainers on and limber up for a spot of speed stamping, courtesy of the As You See It Challenge! Come and see:


I'm quite a fan of speed stamping and love challenging myself to make a card in 10 minutes or less as requested by the site. I started my card by sponging a quick background across one corner of a card panel, green on the bottom bit and blue fading upwards. That was when the first thing went wrong! I used a sponge that I'd obviously accidentally used for green ink previously! But hey - a greenish blue sky is okay isn't it?!


All the stamps are from Concorde & 9th's Enjoy It All, except the small yellow flower; that one is from Be Merry, a Christmas set by WPlus9 that was out on my desk from yesterday. I stamped the flowers and leaves over the green part of the sponging, adding the detail stamps over the top of the larger flowers in the same ink, and not trying to be too perfect about anything. That's when the second thing went wrong! The pink ink showed up okay in the same colour, the red didn't. So I had to scramble about looking for a darker red to go over the roses... the seconds ticked by at a millions miles per hour and sweat began to bead my forehead!


I used my stamping platform to position the sentiment - and there was a bit of time wasted here too! The 'your day' part was added in red ink but got mixed up with the descenders of the 'enjoy' part, so I had to stamp it again on a scrap of card stock and snip it out. The clock was really racing at this point and I just had time to trim the card panel and attach it to a card base with seconds to spare. PHEW!


CHALLENGES
As I mentioned, this speed stamping challenge is the brainchild of the As You See It challenge and I think they do one every 5th challenge. Do try it - it's fun and certainly gets your heart pumping! I was also inspired by the brightest, happiest photo at Just Us Girls - isn't it gorgeous?!

AND IN OTHER NEWS
With all this beautiful weather we've been having in the heart of England, Eva has become used to the French doors to the garden being open and has enjoyed wandering in and out as she pleases. When she finds it closed now she looks at me reproachfully with her enormous soft brown eyes.


"Mum, a sad thing has happened. Someone has accidentally closed the door and I don't seem to be able to walk into the garden!"

How have you been spending your weekend?

Hugs,

Saturday, 25 April 2020

Oh deer!

Hello crafting friends!

How are you all getting on? I'm on a crafty roll which feels so good - I would much rather have card designs on a loop in my mind than anything Covid-related. Today is the 25th of the month which means it's Rudolph Day, the day lots of us get together (virtually of course!) to make a Christmas card for the 2020 stash. Come and see:


I knew exactly what I was going to do today - use some fabulous die cut Christmas trees that my lovely friend Sarn sent to me to play with! (They're Sissix dies, Woodlands by Tim Holtz and I love them!) I started by taking a card panel, masking off a snowy foreground with a torn sticky note and sponging Weathered Wood distress ink upwards from the horizon so that it faded out nicely. I added snow shadows with a pale blue alcohol marker.


The fir trees are so beautiful and perfect for inlaying, but today I tried two quicker techniques: I used the negative of one of the trees as a stencil and sponged green ink into it, then just sponged the positive of the other tree with the same ink, which showed off all its lovely jigsaw effect. The stag is from Winter Post, a long ago retired Stampin' Up set which I'm so glad I kept. He's stamped onto the snow and I added shading and dapples on his hind quarters.


The panel was cut out with a Heffy Doodles stitched rectangle die and mounted onto a dark red card stock. I finished the card with this gorgeous sentiment from WPlus9's Be Merry and added gems for a bit of festive sparkle.

CHALLENGES
As well as playing along with Rudolph Day, I'm joining in with The Christmas Kickstart Challenge where the theme is Winter Wonderland (create a scene.) I think this is definitely a wonderland as the stag is wondering whether it's going to snow!


AND IN OTHER NEWS
Someone has a very nice tummy!


Hope you're having a peaceful weekend and are staying safe and well.

Hugs,