Pages

Showing posts with label Silver Bells (WPlus9). Show all posts

Monday, 14 August 2023

Decorated pine

Hello, crafting friends!
 
Where do you store your Christmas cards that you make throughout the year? I use a box. It has been sadly empty for most of this year but I'm happy to say it's filling up nicely now! 
 

The stamp set I used on this card was from The Greetery's Banner and Bough stamp and stencil set. First I stamped two flowers in pink and covered them using masks I'd made using sticky notes. Then it was time to stamp the foliage: I used a paler green for the background leaves and a darker green for the pine branches and holly. I also sponged a little blue ink around the edges of the foliage but you can't see it in the photos very well.


The berries were added by hand with a red marker (I find it quicker than stamping them) and given 'shine' with a white acrylic paint pen and detail with a black fineliner. The sentiment is a favourite from WPlus9, stamped in two colours. Once that was done, I stamped the larger flower on a snippet of card, fussy cut it and popped it up on a dimensional pad. The final touch was a little 'snow' added with the paint marker.

CHALLENGES
I see that the Christmas challenge has come round at Addicted to Stamps and More so I'll link up there; I also used Jen's gorgeous sketch at Freshly Made Sketches; I'm also joining in with the Anything Goes option at Happy Little Stampers Christmas challenge; Jingle Belles are asking for Christmas cards featuring pine trees or branches so I'm also playing along there too.
 

AND IN OTHER NEWS
I remember the days when my OH went away and would return with some elegant chocolates or some other delicate little fancy. He was away in the north east this weekend and returned with a gift...
 
 
... a large smoked haddock from the North Shields Fish Quay! And what's more, I'm delighted!!

Sending hugs,

Tuesday, 28 February 2023

Bobbin' Robin!

Hello, crafting friends!
 
We're heading towards the end of the month and there were a couple of challenges I've been wanting to join in with. This card covers both bases|!


I started by cutting a card panel with a stitched rectangle die from Heffy Doodle and sponging lots of blue ink onto it. Funky Fossil's Snow Flurry stencil was positioned over the top and I sponged the same colour blue into it for a soft tone on tone look. I stamped the pine branch from The Greetery's Budding Beauties Winter at the bottom of the panel, adding extra pine needles and doodling in extra branches with a marker.
 

The adorable robins are from an old set from Clearly Besotted. I coloured two of them with coloured pencils, layering up the colours and blending them. I perched one robin on the branch and the other in the air as if he was dive bombing his friend! 
 
 
The sentiment was put together using two sentiments from WPlus9's Silver Bells. Once I'd stamped everything, I mounted the panel onto a slightly bigger green panel and attached it to a card front. I'm excited to see my Christmas card stash growing!

CHALLENGES
I'm linking this card up at  We Love Stamping where the challenge is Anything Goes with optional Add a Stencil; and Rudolph Days for the monthly Christmas card challenge.
 

AND IN OTHER NEWS
I realised the other day that although I think of this house as 'the new house', we have lived in it for over twenty years! I had a sudden memory of the boys playing together. The two of them were inseparable when they were little and played all sorts of extraordinarily detailed imaginative games. If they wanted their characters to have something, they drew it on a piece of paper and cut it out with scissors. They didn't bother to colour it in or anything, their imaginations did everything! In case you're feeling sorry for them, they did also have plenty of toys!

Sending hugs,

Wednesday, 24 November 2021

A frozen wave

Hello, crafting friends!

I have a one layer Christmas card to share with you today :)


I've been on the lookout for a snowman that makes me smile and although I don't usually go for cling stamps, I couldn't resist this unmounted red rubber chap from Purple Onion Designs! 


It's a very simple card design - I stamped him in black ink and shaded him with grey pencil before adding some splashes of bright orange on his nose and scarf using a water-based marker. I didn't want my snowman floating about in space (!) so I added a snowy ground with black and grey pencils.


The card was finished with a sentiment from WPlus9's Silver Bells. This will be an easy one to mail!

CHALLENGES
I'm joining in at with the Whimsical theme at the ABC Christmas challenge where the letters are W for Whimsical and X for Xerox; the colour palette is from Color My Heart Color Dare 471 where we are asked to use Black Grey and White with 1 extra colour; Cathy is hosting the All Things Masculine challenge at Watercooler Wednesday and as this no-frills card is destined for my nephew, I'm playing along there; I've used a Never Before Used Schtamp so I'm linking up at Darnell's NBUS challenge too.


AND IN OTHER NEWS
It's been a very mild autumn here in the middle of England but the temperatures are beginning to drop, especially at night. It'll soon be time to get my woolly scarves out - although I think I might hold off on the bright orange nose! Never a good look unless you're a snowman!

Sending hugs,

Wednesday, 25 August 2021

All is bright

Hello, crafting friends!

Clean and simple stamping has always been my favourite card-making style but just lately I find myself inclining towards bright colour and maximalism. It's much harder but kind of fun!


This card is very frugal! I didn't have any circle stamps so I used the rims of glasses to stamp them; I didn't have the right coloured card stock either so I swiped ink over the edges of the card base; and I used up snippets of card stock for the ribbons and the sentiment. 


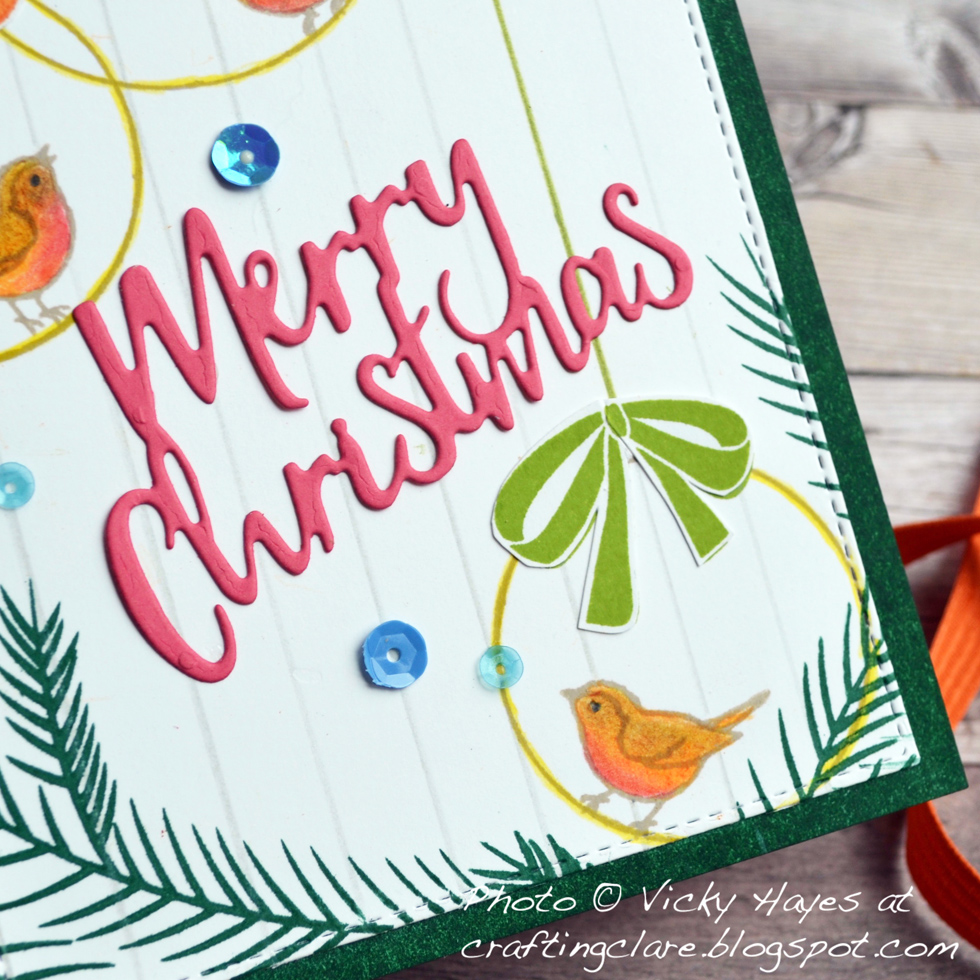
The circles were stamped onto a panel first and I added the birds from Stampin' Up's Quite Curvy. I stamped and cut out the ribbons from WPlus9's Silver Bells, and drew lines with matching coloured pencils to look as if the circles are hanging from ribbon too. A grey pencil was used to create the board effect on the background and I coloured the birds with pencils too as well as their circle perches.


To frame the hanging circles, I stamped the fir branch from Uniko's Winter Foliage several times. The same ink was swiped over the card base to add depth. I finished the card with a Hobbycraft die cut sentiment cut out of a snippet of pink card stock, and a sprinkling of blue sequins.

CHALLENGES
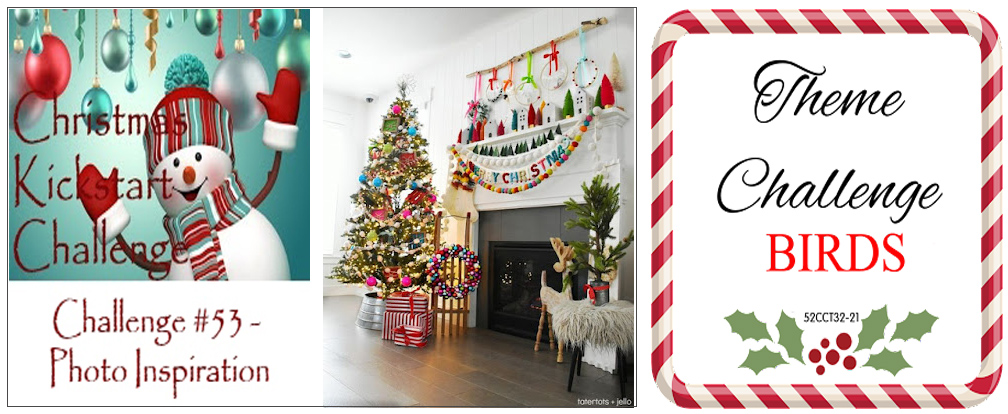
I'm linking this card up with the Kickstart Christmas challenge where there's a fabulous inspiration photo (I used the circles tied up with ribbon from the top of the photo, the bright colours and the fir branches); I'm also joining in with the Christmas Card Throwdown where the theme this week is Birds; I'm playing along at the Rudolph Day challenge too - the goal is to make a festive card at the end of each month, starting on the 25yth. Edited to add: There's no Rudolph Day challenge this month as Maureen and her family are ill. I know you will join me in sending love and get well wishes.


AND IN OTHER NEWS
Sometimes, after a morning of romping about with friends, tucking into a bowlful of meaty chunks, tearing up tissues and rummaging through the laundry basket...


... it's good to find a sheltered spot in the garden and zzzzzzz

Sending hugs,

Thursday, 17 December 2020

A special snowflake

Hello, crafting friends!

I am so happy to be guesting at the wonderful Time Out Challenge today! There's such a gorgeous photo prompt there today - why not come and join us? You can never make too many Christmas cards and if you've already made enough for this year, you can always start next year's stash while you're in the mood!! Here's the challenge prompt:


Isn't that photo beautiful? The thing that leapt out at me was the chair with that fabulous snowflake on the back. (Although not literally of course!)


Stampin' Up's Sahara Sand was a good colour for this and I used my last precious piece for the card panel. Using white embossing powder, I heat embossed a sentiment from WPlus9's Silver Bells onto the bottom of the panel, then mounted it onto an off cut of grey card stock that I trimmed to fit.


This was attached to a card base made out of Sahara Sand card stock that I'd once made for another project but then never used. To finish the card I added a white snowflake found in my stash, and topped that with a white enamel dot. A really quick card - and well worth looking in your snippets box for making last minute cards! Quite a dimensional card too but it will be delivered by hand :)

EDITED TO ADD AN AWARD
So pleased this card was awarded a Top Cup award at Sunday Stamps!


CHALLENGES
I used only snippets and things from my stash for this card so I shall toodle along to the Snippets Playground with it, and a plate of sossidge rolls, and say Merry Christmas to Miss Di and the gang :) The sketch is from Sunday Stamps, so I shall link up there; and I'm also joining in with AAA cards where they want to see cards made in minutes with an optional twist of Christmas.


AND IN OTHER NEWS
No sign of any snow here or even frost. In fact it is so warm I have done several of the dog walks without a coat! It IS December isn't it?

Sending hugs,

Saturday, 14 November 2020

Leaping through the snow

Hello, crafting friends!

What a great crafting day it is today - the wind and rain beating at the windows while I sit cosily surrounded by Christmas craft stash! There may not be snow outside but I'm not finding it hard to imagine a cold winter's afternoon I can tell you!


To create this one layer card, I simply masked off a snowy ground and a moon and sponged in a northern lights-inspired sky. Once the masks were removed I added snowy detail to the foreground with my sponge and a torn piece of paper.


The little stag is the smaller of the two that feature on the Leaping Stags stencil by Funky Fossil. I sponged black ink into him and extended his antlers with a fineliner pen. To cheer things up a bit, I added a bright red sentiment from WPlus9's Silver Bells.

CHALLENGES
I used the sketch at CAS Colours and Sketches. I flipped it over and I must say I took a bit of 'artistic' liberty with those lines so I hope you can still recognise it!  I'm also linking up with CASology where the cue word is STAG. I keep missing the challenges there as my email subscription doesn't appear to be working but this fortnight I saw that a friend had made a card for the challenge :)


AND IN OTHER NEWS
Never mind dashing through the snow, it was more of a wading through the mud situation out on our walk this morning! The grass on the field has grown so long though that it had washed most of it off Eva by the time we got home! A quick rinse off and a rub down with a warm towel and she was ready to direct crafting operations from a very cosy spot on the sofa!


Eva, could you pass me the glue please. Er... Eva? Zzzzzzzzzz!

Sending hugs, 

Saturday, 24 October 2020

Checked circles and peonies

Hello, crafting friends!

It's the start of another weekend and I'm hoping for a calm, uneventful one, with plenty of time in the Craft Square Metre! I have a pretty floral birthday card to show you today.


To get this card started, I cut three circles in a card panel using three different sizes of circle punch. Then, laying it against the card base, I lightly traced around each circle with  a pencil as a guide and masked off the edge of each. Blue ink was sponged through Funky Fossil's Arched Window stencil on each circle to create a checked pattern.


Once the masks were removed, I gently removed the pencil with an eraser and glued the panel over the stencilling. The peonies are from Clearly Besotted's On Your Day, stamped, coloured with Spectrum Noir alcohol markers and fussy cut.


I layered my flowers over the circles, popping the top ones up with dimensionals. The birthday sentiment was made from WPlus9's Silver Bells and the word 'Birthday' from MFT's From Me To You and I finished the card with green sequins.

CHALLENGES
Circles is the theme at the Flower Challenge this month - and I couldn't miss their 4th birthday celebrations could I?! Congratulations ladies! I'm also joining in at Seize The Birthday, where the optional topping is Texture but I'm sticking with Anything Goes; and Allsorts where it's Celebration Time this week; and a last minute entry to We Love Chocolate Baroque where Anything Goes (thanks for suggesting Brenda!)

AND IN OTHER NEWS
The crafty reorganisation has gone well I think. My aim was to have everything to hand but, because it's in the living room, either hidden or arranged in a way that is pleasing to the eye. OH did notice it but his only comment was 'That's colourful!' so I'm taking that as a sign of approval!


Here's a photo. My beloved Spectrum Noir markers and Stampin' Up inks and card stock are out on display (with room to spare to expand my collections!) Stamp sets, embellishments and other colouring media hidden away in boxes and baskets. 

Hope you have some fun crafty time this weekend! Sending hugs, 

Wednesday, 21 October 2020

To absent friends at Christmas

Hello, crafting friends!

This year, there is a possibility that some people will be missing the usual crowd at Christmas, and a toast to absent friends and family was the idea behind today's card.


I started by masking the bottom off a card panel and sponging soft pink ink through Funky Fossil's Funky Circle stencil, fading it out towards the edges. The mask was swapped to the top of the card panel and I sponged the same ink across the bottom to create a 'ground'. The panel was trimmed with a stitched rectangle die by Heffy Doodle and mounted on dark pink card stock.


The glasses and bubbles from Clearly Besotted's Raise a Glass were stamped onto the background and I added colour with alcohol markers. The finishing touches were a bow from WPlus9's Silver Bells on one of the glasses, shimmer on the drinks courtesy of a Wink of Stella pen and some gems.

CHALLENGES
Every year in October, Stephanie and Lauren from Jingle Belles raise money for breast cancer research by donating $2 for every card linked up to their Pink Christmas Card challenge so I'm linking up there. I'm also joining in with The Christmas Kickstart Challenge where the theme is also Pink Christmas.


AND IN OTHER NEWS
Eva is, I'm glad to say, on the mend and is getting lots of TLC. She did suggest that extra snacking might be an effective convalescent treatment but I vetoed that idea firmly. She might have become a little gloomy after that but luckily she found the clean laundry and made an interesting arrangement of socks up the stairs which cheered her up no end!

Sending hugs, 

Monday, 12 October 2020

A comforting card

Hello, crafting friends!

Like many of you, I've been struggling with a lack of mojo recently but at 9.30 last night a card idea struck me and I spent a little while trying to bring it to life. When I looked at it again in daylight this morning, it didn't seem too bad, so here it is!


One of my favourite ways to start a card is to stencil a background, and that's what I've done here, sponging pink ink gently through Funky Fossil's Knitted stencil and fading it out at the edges. I wanted it to feel as comforting as a soft knitted throw.


Over the top, I stamped some foliage and berries from WPlus9's Silver Bells and tied them together with one of the bows from the set, stamped in pink and fussy cut. What a brilliant stamp set this is! It's one of those rare Christmas sets that you can leave out on your desk and use every day, all the year round! After adding a bit of detail with markers, I finished the card with a sentiment from Stampin' Up's Today's Tiles and some sparkling green sequins.

EDITED TO ADD AN AWARD
This card was showcased at The Color Throwdown and goyt Honours at Time Out too :)


CHALLENGES
This week's beautiful colours at The Color Throwdown inspired this card, as well as the theme at Time Out Challenges where they are raising breast cancer awareness with cards of encouragement featuring optional pink - my pink bow is a nod to the iconic pink ribbon.


AND IN OTHER NEWS
In the absence of a crafting mojo, I've been escaping into books more. I've re-read Lord of the Rings, that epic tale of good versus evil, and now it seems appropriate to be reading novels set in wartime as that is the last time people's lives changed so dramatically. The Cazalet Chronicles by Elizabeth Jane Howard, a family saga covering the period before, during and after WWII, and told mainly from the home front perspective; and The Camomile Lawn by Mary Wesley, a similar perspective but quite different in tone. Does anyyone who has read these have any recommendations for me?

Sending hugs,

Sunday, 20 September 2020

Experimenting with trees

Hello, crafting friends!

Well, I have had fun in The Craft Square Metre today! I took a small tree from a Christmas stamp set and had a good old play with it in a couple of non-festive ways! 


The set I found the tree in was Stampin' Up's From Our House To Yours. In the first card I stamped it on a smooshed background and in the second card I used it as part of a stamped autumnal border. 

CARD ONE
Here's the first.


I dripped inks in various purples onto some cling wrap, spritzed it with water and placed a card panel into the result. Once the panel was dry, I masked off a horizontal line and watercoloured in a ground. Once THAT was dry, I masked off the ground and repeat-stamped the tree in dark purple, varying the heights. A matching purple marker was used to fill in any gaps.


The most interesting part of the panel was trimmed using a tall, thin stitched rectangle die by Christina Griffiths. To represent the moon, I punched a small hole in the sky and filled it with the same-sized circle punched out of shiny card stock, taped at the back to secure. I added stars with a white gel pen and stamped the sentiment (from Stampin'Up's Today's Tiles) in dark purple ink. The panel was attached to a card base with dimensionals.

CARD TWO
For the second card, I tried using the tree as twiggy branches in a leafy border. I think it works!


The foliage and berries mostly come from WPlus9's Silver Bells but I also used a leaf that was out on my desk from Reverse Confetti's Fall Foliage. I tried the stamping out on scrap paper first and then copied the design carefully onto a card panel. 


For the sentiment, I cut a strip of card stock and trimmed it top and bottom with a stitched rectangle die. The bold sentiment is from WPlus9's Hello and Thanks, stamped in dark brown ink. I thought I had stamped my borders so carefully but when I put the card together, I noticed a red blob on my pristine white card... that's why there are lots of gems on this card!!!

EDITED TO ADD AN AWARD
So happy that the twiggy autumnal card was chosen as a Weekly Winner at CAS Colours and Sketches!


And that both cards were Honourably Mentioned at The Twofer Challenge!


CHALLENGES
I'm linking both cards up with The Twofer Challenge where the theme this month is Trees, and we are asked to use the same stamp/die/stencil, on two different designs, for two different occasions.
I'm also entering Card One into this month Stamping Sensations challenge where the theme is Great Outdoors; and also joining in at Less is More's Shades of Purple colour challenge.
Card Two was made with those amazing colours at CAS Colours and Sketches (my second entry!) and I'm also linking it up at Just Add Ink where the challenge is to Just Add 'A'. My 'A' is autumn of course!


AND IN OTHER NEWS
Forgive the rubbish photo but it really does sum up our weekend...


Yep! This weekend we have mostly been cavorting about the countryside in the sunshine :) How about you?

Hugs,