Pages

Showing posts with label Simply Pressed Clay. Show all posts

Wednesday, 17 December 2014

Decorate your Christmas tree with Stampin' Up clay ornaments!

This year, my daughter and I challenged ourselves to decorate our Christmas tree entirely with Stampin' Up crafting products! And I have to say it has been as easy as pie (well, easier actually!) We made designer paper baubles yesterday and today I'm going to show you some pretty snowflake decorations. Come and see:


These rustic medallions are made with Simply Pressed Clay, stamped with the snowflake from Stampin' Up's Trendy Trims stamp set.


Fancy making some yourself? They don't take long! Here's what you'll need.


I pressed out the clay with the heel of my hand and stamped the snowflake in the middle. TIP: I've tried this before with wood mount stamps with great results but when using photopolymer, tapping the stamp into versamark before imprinting the clay gives a cleaner image.


I pressed a circle framelit round the snowflake. This doesn't cut the circle out but it leaves a perfect imprint to trim round with sharp paper snips. It's easiest to do this when the clay is dry (I left it for about half an hour while I had a cup of tea and a revivifying chocolate brownie!)


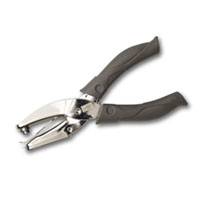
Once the circle was cut out, I punched a hole in the top of the medallion and threaded it with cotton.


And that's how to make cute snowflake clay decorations for the tree!

BUY THE SUPPLIES TO MAKE THIS PROJECT NOW!
(Click on any item to be transported to my online shop!) 


My shop is open 24/7 so you can buy Stampin' Up products from me any time, day or night.
If you have any queries, or prefer to speak to me, I'm happy to help.
You can contact me by email or phone on 01280 820593.

In our house, whenever anyone annoys us, we say: "Hisses at you!" which relieves our feelings rather nicely! Yesterday I said this to my youngest son who, despite the house rule that says No Crockery In Your Bedroom, had no fewer than three cereal bowls in his room. He came over and pecked my cheek. "No hisses," he said. "Only kisses!"

Christmas is coming and there's still plenty of excitement going on here this week. The Artisan Design Team will be getting together for the last blog hop of the year tomorrow - don't miss that! And then on Friday, it will be my last blog post before Christmas and I'll be revealing our Stampin' Up tree in all its glory!

Thank you for keeping me company in the run up to Christmas. See you tomorrow!

Tuesday, 26 November 2013

A fabulous time with Stampin' Up in Manchester

It all started with nearly missing the train but things went much better after that! A lively party of five of us Pinkies met up on the train, arrived at Manchester in what seemed like no time at all and set off to our hotels. I met up with some of my Inkredibles team at the beautiful Midland Hotel to exchange the swaps we'd made.


This is what I made for my lovely group - a hanging heart decoration made from our Stampin' Up clay, tied onto a label cut from the Natural Composition designer paper (it's more of a card stock in fact) and tucked into an embossed vellum envelope.


It's easy to make these textured hearts: I rolled out some clay, pressed a heart framelit into it as a guide before cutting the heart out with paper snips and stamping it with the swirl from the Creative Elements stamp set. While the clay was drying, I made the labels, cutting a decorative top using one of the Labels framelits. The heart was punched with a hole and threaded with linen thread and I tied it onto the label with beautiful Pool Party seam binding.


I was delighted to receive all these wonderful swaps back from Lizy, Jacqueline, Jan, Helen and Victoria. Do pop over to their blogs and leave them some love.

We had tea together in the beautiful surroundings of the Midland Hotel...


... before dashing off to various functions. Stampin' Up had laid on a fun Mix and Mingle event for convention goers but I had been invited to a special Silver 2 reception because I have promoted this year!


There I was greeted with magical floating drinks... (not really, but it looks as if they are because they're on a glass console!) and got to chat with the others. We were presented with our convention bags, stuffed full of freebies, memorabilia and my awards - I am so proud of these!


There were more gifts on the tables when we went through to the reception room, decorated with beautiful Stampin' Up ribbons, stamps and embellishments and while we dined, we were entertained by this handsome chap...


...who turned out to be the son of my lovely blogging friend Suzi B from The Making Room! What a talented man he was - move over Frank Sinatra!

After the reception we went back to the Midland hotel for a meet up with the Pinkies group with all the chatting and swapping and hugging and laughing that entails! For a lady whose usual evening's entertainment is nodding off on the sofa with a blanket over her knees, it's no wonder I was ready for my bed!

Here's what you'll need to make the heart decorations
Stamps: Creative Elements
Card stock: Natural Composition designer card stock, vellum
Other: Hearts and Labels framelits, Big Shot, Northern Flurry embossing folder, 3/4" and 1/2" circle punches, Pool Party seam binding, linen thread, Simply Pressed clay, paper snips

Crafting Clare online shop, shopping with Vicky Hayes, Stampin Up clearance rack
You can order from my online shop any time, day or night,
but if you have any queries, or prefer to speak to me, I'm always happy to help.
You can contact me by email or phone on 01280 820593.

I'm sure you've heard enough of my wittering for one day but I'll hope to see you tomorrow for more convention stories and pictures. And if you're wishing you could have been there - we'll be doing it all over again next year in Brussels, 16th-18th October 2014! Why not join my Inkredibles team and we'll do it together!