Pages

Showing posts with label Big Shot. Show all posts

Monday, 11 August 2014

Easy teen and male birthday cards using Stampin' Up's Little Letters dies

It's lovely to be home again (even if it did rain for most of the weekend!) but while we were away we had a major family celebration: my eldest son turned 16! I brought all his parcels along, cunnningly disguised as a boring old suitcase, and although he would never admit it, I think my son was slightly worried that we'd forgotten about his birthday! Come and see the card I made for him:


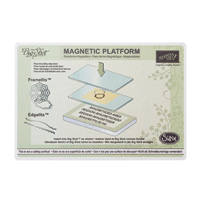
My son is planning to be a graphic designer so I went for a very clean look using Stampin' Up's new Little Letters thinlits dies. The word was cut out of the panel and layered over a piece of Basic Black card stock. TIP: To keep the dies really firmly in place as you line the letters up, I recommend using the magnetic platform for the Big Shot. This makes all your thin metal dies easy to use.


Before deciding on the black and white theme I'd planned to use blue and the backing card here was given an ombre effect using my Coastal Cabana blendabilities. This card design would work just as well for a girl, perhaps with a floral designer paper backing - what do you think?

HERE'S WHAT YOU'LL NEED TO MAKE THESE CARDS
Click the product to find it quickly in my shop


Click any item to place an order any time, day or night,
but if you have any queries or prefer to speak to me, I'm always very happy to help.
You can contact me by email or phone on 01280 820593.

These Little Letter thinlits dies are very useful for male cards, especially teenage males where a single terse word seems appropriate! Although you won't be able to believe I could say such a thing about this gorgeous young man...


... who combines being strong and silent with a kind and cheerful nature and a great sense of humour. My lovely boy!

See you tomorrow.


Friday, 18 July 2014

Mothers Day card using Something for Baby by Stampin' Up

While I was making yesterday's card I noticed that the duck in Embellished Events was a similar design to the one in Something for Baby, only smaller. Perfect for mum and babies I thought, and set to work on today's card! Come and see:


How adorable are these ducks?! I coloured them with markers before stamping them, so that they could have cute orange beaks, and cut them out with one of my oval framelits. The same framelit was used to cut a piece of card stock for the pond too, trimmed with the small scallop blade on my Rotary Addition.


I went a bit framelit-tastic on this card! The card base was embossed using the next size up of oval (I describe how to do that in this post) and the sentiment was stamped and cut out with one of the Bitty Banners framelits.

Check out the rest of my Something for Baby creations here - what a very versatile set this is!
• You can see more Embellished Events inspiration here.

HERE'S WHAT YOU'LL NEED TO MAKE THIS CARD
(Click on each item to find it quickly in my shop) 
Ink: Soft Sky, Tangelo Twist classic inks, plus markers
Click above to place an order any time, day or night,
but if you have any queries, or prefer to speak to me, I'm always happy to help.
You can contact me by email or phone on 01280 820593.

After making this card I sat down at the computer. As I settled down to work, I asked my son to tidy his room. He usually makes a spirited attempt to get out of this task but on this occasion he was surprisingly quiet. When I turned round he was gone but I found this on the table:


Have a great weekend. I'll be back here on Monday - hope to see you then!

Monday, 14 July 2014

A card for a man - using Something for Baby by Stampin' Up!

A card for a man using a baby set? There's some mistake surely! But no - Stampin' Up's Something for Baby stamp set is so versatile, you can make a card for pretty much any occasion (except possibly Christmas!) Come and see my man card:


Don't ask me why there would be a tie in a baby set - perhaps the designer of Something for Baby was having a senior moment! I stamped my tie in Pacific Point ink and teamed it with a shirt made out of one of the papers in the new Moonlight designer paper stack.


I hung my shirt on the coat hanger that also comes with the set and hooked it over a strip of dotty paper that coordinates very nicely with the tie - Stampin' Up does coordination SO well!


For a bit of interest I added some contrasting stripes of washi tape, marker and card stock and used my stamp-a-majig to position the sentiment in the shape made by the shirt.

Click here to see more ideas for using Something for Baby.

HERE'S WHAT YOU'LL NEED TO MAKE THIS CARD
(Click on each item to find it quickly in my shop) 
Ink: Pacific Point, Smoky Slate classic inks, plus Daffodil Delight and Tangelo Twist markers
Card stock: Whisper White
Click above to place an order any time, day or night,
but if you have any queries, or prefer to speak to me, I'm always happy to help.
You can contact me by email or phone on 01280 820593.


Of course this card will only confuse the many male people who suppose the floor is the natural home of the shirt but I believe in leading by example!

Have a happy Monday and I'll see you tomorrow with something much prettier!


Tuesday, 8 July 2014

Using Something for Baby by Stampin' Up - for a little boy

I love making baby cards and Stampin' Up's new Something for Baby stamp set is the best set ever for doing so! It has matching framelits too so that you don't have to cut complicated shapes by hand and you even get 15% off if you buy both together! Here's a cute card I made to welcome a little boy:


The canopy was made with dotty paper from the Subtles designer series paper stack. You can get every single Stampin' Up colour in these paper stacks and I can't tell you how useful it is to have tone-on-tone designs that match the colours in your projects! I trimmed the edge with the Scallop Edge border punch for a decorative finish and popped it up on my card base using dimensionals so I could suspend my baby socks from them.


How cute are these sockies?! It was lucky my teenage children weren't around while I was making this card because I felt the urge to pinch someone's cheeks! I made a hole in each sock with my handheld 1/16" punch and threaded bakers twine through, fastening it to the back of the canopy with tape. The bow is added to the front of the canopy separately. The socks aren't heavy enough to dangle so I pulled the twine taut and fixed the socks into position with dimensionals.


That's the Ticket is another great Stampin' Up set and this gorgeous sentiment is a favourite of mine for baby cards - because they are all 100% perfect and precious to us mums aren't they?! You can cut these tickets out with the coordinating Ticket punch and I stapled mine to the canopy.

HERE'S WHAT YOU'LL NEED TO MAKE THIS CARD
(Click on each item to find it quickly in my shop) 
Card stock: Whisper White
Click above to place an order any time, day or night,
but if you have any queries, or prefer to speak to me, I'm always happy to help.
You can contact me by email or phone on 01280 820593.


Sports fans were treated to all sorts of excitement in England last weekend with the Tour de France starting in Yorkshire, an amazing Wimbledon men's final, and plenty of drama in the Grand Prix at Silverstone. The Silverstone race track is not far from us and the weekend starts with busy roads and a sky full of helicopters as people are flown in for the race. We always walk up to a local vantage point and watch the Red Arrows perform at the start of the race.


They never disappoint! It was even better this year though as we were standing near a man who had a radio tuned into the frequency of the Red Arrows leader and it was just brilliant to hear him - he was obviously really enjoying the performance and whenever he turned upside down or went into a spin he laughed like a plastic bag!

See you tomorrow.


Monday, 7 July 2014

Something for Baby from Stampin' Up - for a little girl

I mentioned last week that Stampin' Up's Something for Baby is my new number one favourite stamp set! I've been having a whale of a time with it so you'll be seeing lots of ideas here - and not just baby cards either! Today I do have a baby card to show you though - come and see:


I just love the little safety pin in this set! I used markers to colour the rubber before stamping, missing out a little part of the pin so that it looks as if it's been pinned onto the label. The two part sentiment from Petite Pairs seemed to fit round the pin perfectly.


The label was cut using one of the Deco Labels framelits and I used one of the papers from the Subtles Designer Paper Stacks as a background to set it off. The card is made using Pink Pirouette to welcome a baby girl but it could easily be swapped for Soft Sky for a little boy.

I'll just going to have time to link this card up with The Card Concept where their Oh Baby theme is about to close today; and I'll also enter the Make Your Mark challenge at Addicted to Stamps and More as I used markers to create the pin effect.

HERE'S WHAT YOU'LL NEED TO MAKE THIS CARD
(Click on each item to find it quickly in my shop) 
Card stock: Whisper White
Click above to place an order any time, day or night,
but if you have any queries, or prefer to speak to me, I'm always happy to help.
You can contact me by email or phone on 01280 820593.

We had such a lovely weekend helping my husband celebrate his birthday. On the Saturday (or should that be satyrday!) we visited the Hell Fire Caves at Wycombe (which, for one reason or another, we seem to have missed!) It was with some trepidation that we approached the caves...


... although this sign reassured us slightly. Homemade cakes and cream teas didn't sound too hellish! Things got much scarier on the pathway to the caves though when we encountered a pair of devlish-looking creatures:


What a pair of loons!

The story of the caves themselves was extraordinary and it occurred to me that those 18th century aristo chappies probably had rather too much money and time on their hands!

See you tomorrow.


Wednesday, 11 June 2014

Bright birthday with Bright Blossoms by Stampin' Up

Have you checked the Stampin' Up retirement lists yet? Loads of items are retiring to make way for new items in the new catalogue and there are some real bargains up for grabs! Are any of your favourites on the lists?


One of the sets on the Retiring Stamps list is Bright Blossoms. I find this set handy for a whole range of cards, from summer invitations to Christmas cards! (See more of my Bright Blossoms ideas here.) Today it features on a bright, happy birthday card - come and see:


I've been cutting up some card stock to use to make my own Project Life cards (see this post for why!) and of course they come in very handy as card toppers too! This one's 4" x 3" with rounded corners and I love the way it contrasts against the Wild Wasabi card base.


I used a stamp-a-majig to position my flowers and leaves and drew in a stem with a marker. The flowers are grounded with the wonderful Gingham Garden washi tape (also retiring and a bargain at  just £3.15 for three coordinating reels!) I embellished the flowers with candy dots and added a banner-style sentiment from Stampin' Up's Itty Bitty Banners stamp set.

The inspiration for this card came from the layout at Retro Sketches and the colour palette at CAS Colours and Sketches:


HERE'S WHAT YOU'LL NEED TO MAKE THIS CARD
(Click on each item to find it quickly in my shop) 
Card stock: Wild Wasabi, Whisper White
Click above to place an order any time, day or night,
but if you have any queries, or prefer to speak to me, I'm always happy to help.
You can contact me by email or phone on 01280 820593.


Talking of bright, I thought you might like to see a book that my husband recently found in a second hand book shop and brought home for my youngest son to read.


As well as such essential skills as polyphany and wireless telegraphy, the 'bright boy' is expected to excel at all forms  of sports and the book recommends building up the muscles for this...


... although I can't help thinking that the local farmers would take a dim view of their methods! There's also a section on 'mumming'. Isn't that my department?!

See you tomorrow,


Thursday, 5 June 2014

Make a Cake from the Stampin' Up Retirement list

I've been going through all my stamp sets and giving the retiring ones a little love. Today it's the turn of Make a Cake, a cute little set that I haven't used nearly enough! Come and see what I've made with it:


There are seven stamps in this set and you can mix and match them to make a whole variety of gorgeous cakes. Mine is a three-layer, melt-in-the-mouth lemon chiffon cake with a delicious tangy frosting... oh dear, I'd better stop right there!


I've arranged my cake on a platter, decorated it with flags and placed it in the spotlight created by a split panel front with an oval aperture. I backed the panel with Midnight Muse card stock and added So Saffron candy dots for a fun touch.

I'll be linking this card up with Addicted to Stamps and More where there's a Make Your Mark challenge.

HERE'S WHAT YOU'LL NEED TO MAKE THIS CARD
(Click on each item to find it quickly in my shop) 
Click above to place an order any time, day or night,
but if you have any queries, or prefer to speak to me, I'm always happy to help.
You can contact me by email or phone on 01280 820593.

Some of the items in the annual catalogue are retiring to make way for new products. Don't miss out on your favourites! Some of these items have been discounted too - check them here.


When we were walking past a bakery the other day my youngest son became quite pensive. "Do you ever feel the overwhelming temptation to go in and buy a custard cake just so that you can push it in someone's face?" he asked. Er, no, I don't actually. And oh my goodness, just think of the lucky escape I've had all these years of passing bakeries with him!

See you tomorrow,


Monday, 2 June 2014

Papaya Collage in the frame

I love using tags on my cards and I'm intrigued by the current trend for layouts with an offset element too. Today's card combines both! Come and see:


Does this large tag remind you of Project Life by any chance? Not long to wait now - I am SO looking forward to using this quick and easy way to organise my photos with Stampin' Up colours and everything coordinating!


The big, punchy 'thank you' from Stampin' Up's Simply Celebrate was my starting point for this card. It was stamped and heat embossed with clear embossing powder so it would resist the ink when I stamped the frame from the retiring Papaya Collage over the top. I masked off the frame and stamped the foliage from the same set inside, finishing it with a bit of light sponging.


As well as the frame and the foliage, there are heaps of other elements in this gorgeous stamp set! This butterfly for example - he was stamped, sponged and stapled to the tag (but he felt nothing I promise!)


To finish the card, I stamped and heat embossed this decorative swirl, added a little banner (remember that gorgeous banner punch from Sale-a-bration?!) and embellished with a die cut button and some white bakers twine. Yes, the wonderful Sweet Buttons embosslits die is retiring - don't miss out on that for goodness sake!!!

I used the beautiful sketch at Freshly Made Sketches to make this card and the gorgeous colours at the Colour Throwdown.


HERE'S WHAT YOU'LL NEED TO MAKE THIS CARD
(Click on each item to find it quickly in my shop) 
Stamps: Simply Celebrate wood or cling, Papaya Collage (retiring) wood or cling
Ink: Strawberry Slush, Sahara Sand, Coastal Cabana
Card stock: Sahara Sand, Whisper White
Other: Banner punch (available soon), corner rounder, Sweet Buttons embosslits die (retiring), Clear embossing powder, heat tool, white bakers twine, stamp-a-majig
Click above to place an order any time, day or night,
but if you have any queries, or prefer to speak to me, I'm always happy to help.
You can contact me by email or phone on 01280 820593.

Some of the items in the annual catalogue are retiring to make way for new products. Don't miss out on your favourites! Some of these items have been discounted too - check them here.


What a wonderful birthday weekend I've had! My family really do know how to spoil me and the sunshine was an added bonus. We spent yesterday exploring the beautiful city of Cambridge with its interesting mix of Georgian architecture, cows on the common, many bicycles, punting on the river Cam, a brilliant arts, crafts and food market and fascinating shops and cafes. I  might be another year older but perhaps I'll stop worrying about my 'senior moments' after overhearing a conversation between two young ladies in one cafe:
"When are you going on holiday?"
"August."
"When's August?"

Hope you had a lovely weekend. See you tomorrow,