Pages

Showing posts with label Designer paper. Show all posts

Saturday, 29 July 2023

Make Shapes

Hello, crafting friends!
 
Welcome to some crafty Saturday fun courtesy of Addicted to CAS! Jaydee has chosen the code word for the next fortnight:
 

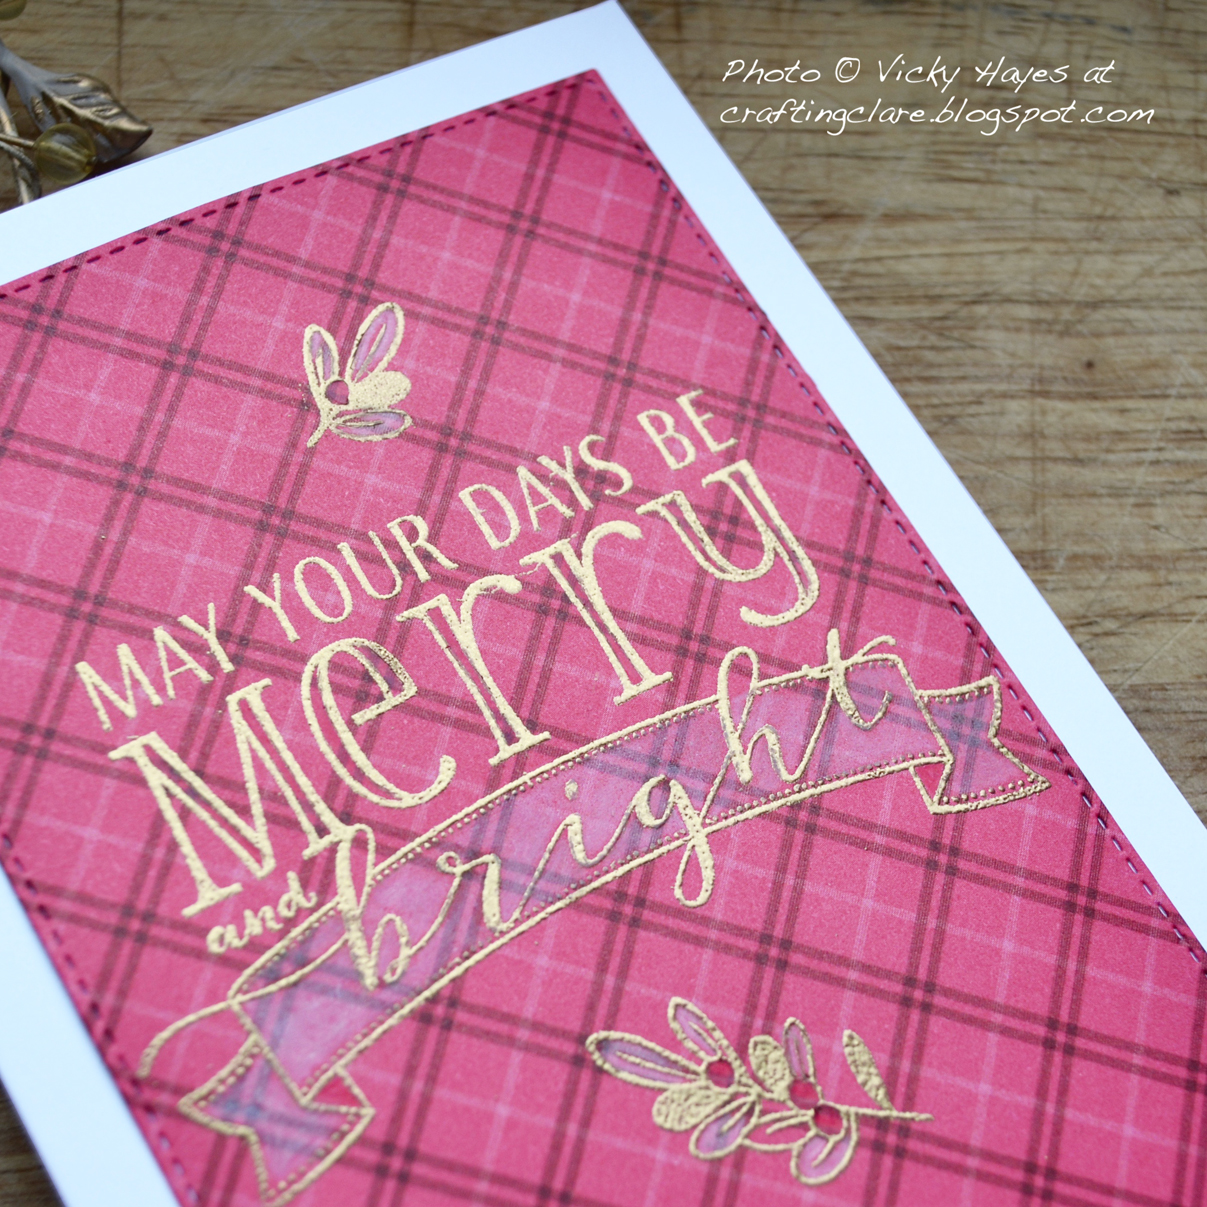
How fun is this?! It could mean a shaped card or a card using shapes as part of its design or a card that uses shapes as part of its decoration... it's up to you! I was inspired to make a masculine card using a bold striped background stamp from Uniko to create skinny rectangles.
 
 
I used waterbased markers on the stripes and then added coloured pencil over the top to increase colour intensity and this created an interesting texture. Isn't the sentiment fun?!  It's from All Year Long by Concord & 9th - a set I have finally hunted down after a long, long search! I didn't want my card to be too symmetrical so I offset the 'happy birthday' part of the sentiment and added some coordinating enamel dots and star.
 
 
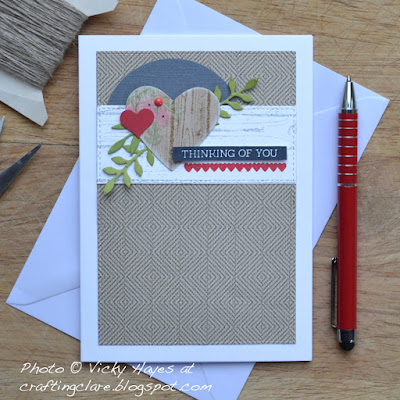
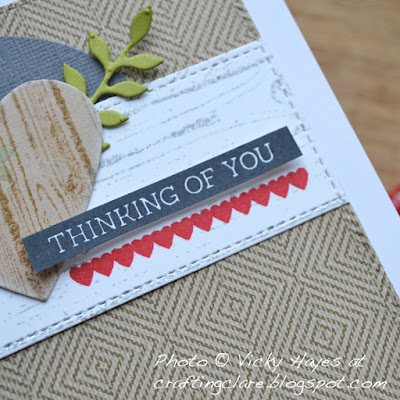
I was sending a gift with this card and, after making the card, decided to make a pouch to put it in. A quick look in the designer paper drawer brought this fabulous paper to light - a pretty good match wouldn't you say! Love when that happens :)

Okay, so now it's your turn to interpret the word Shapes - I can't wait to see what you come up with :) Do hop over to the Addicted to CAS challenge blog to check out all the great samples the design team have made to inspire you. You'll find the Linky Tool at the bottom of the post and you can use it to share your creation with us when you're ready. Do remember that we are a clean and simple challenge and make sure there's plenty of nice clear space on your card and minimal layers. Have fun!

CHALLENGES
I'm linking this card up at Seize the Birthday where Glenda's optional Topping is book-related themes or you can go for an Anything Birthday Goes. My mind jumped to a fable called How the Zebra got his Stripes but my more colourful stripes fit in better with Anything Goes! I'm also joining in at Little Red Wagon where Doni has chosen the theme of Boys Will Be Boys or in other words masculine cards!


AND IN OTHER NEWS
The story of the Zebra really sent me down memory lane. If you have small children or grandchildren and are looking for a great story with a good message, look no further than this one - How the Zebra Got His Stripes!
 
 
The story is about a greedy baboon who decides that the watering hole that all the animals need to survive is his property and he isn't going to share. The zebra, who had a plain white coat in those days, tells the baboon that his behaviour is unjust and that he will fight him for the right for the animals to use the pool. The baboon lights a fire next to the pool to ward the animals off but the brave zebra goes to fight him. Zebra defeats the baboon by kicking the baboon away from the pool but gets too close to the fire as he does so. Some of the sticks burn into his coat. I love the message that some things are worth fighting for and that we bear those scars with honour. Zebra's sacrifice bought back the life-giving pool for the other animals.

Sending hugs,

Friday, 3 March 2023

Spring in the country

Hello, crafting friends!
 
I've been having such a lovely time playing with the 3D embossing folders I recently acquired! Today's card started life as an experiment and I kept adjusting it and adding to it until finally I think it works!
 

I started by embossing a card base with the Daffodil Delight embossing folder by Altenew, letting the image hang off the edge. I wondered if I could watercolour it and so I coloured the flowers with water and inks, adding a wash of colour on the background and finally some splatters of ink. I let this dry. Of course the main problem was that I had used a standard card base and the image warped badly so I left it under a pile of heavy books and forgot about it :)
 

When I eventually came back to it, I was surprised at how well it had flattened. It looked all wrong though; the top of the card was all empty and not in a good 'white space' kind of way! I came up with the notion of scoring a pair of lines to separate the coloured area with the top of the card but it wasn't a great solution. That's when I suddenly thought of raiding the snippets drawer!
 

I gave the card a country look with a snippet of fabulous gingham paper and added a strip of coral card. I found a sentiment which fit the space perfectly and coloured it with a marker. The final touch was a bow, die cut from another snippet of coral card with an MFT die.
 

Here are the snippets I used.

CHALLENGES
I am linking this card up with Four Seasons where March sees the shift to spring! Happy Little Stampers Birthday is back with an Anything Birthday-themed Goes challenge so I'm playing along there; and This card is also my homework for the Snippets Playground where I hope there's some hot chocolate left because my hands are freezing!
 

AND IN OTHER NEWS
Isn't springtime wonderful? The flowers, the sunshine, the animals becoming frolicsome...
 

Here is a frolicsome dog for example. She is dripping wet because she has just frolicked in the river and now she is about to frolick in the earth. That face is saying "Promise me extra meaty chunks for tea, or I roll!"

Sending hugs,

Wednesday, 1 February 2023

Hugs and puppy snuggles

Hello, crafting friends!
 
What a couple of weeks it has been! But February is here now and I'm happy because I've had a chance to get busy with some snippets:
 

I often ink around the edges of the front of my card bases and this one was one I changed my mind about. The little dog was in my snippets box too. It's from a wonderful Anita Jeram image (see a card made with it HERE) but I really messed up the background of my first try. I saved the dog by snipping it out of the quilt and put it in the snippets box to use on another project. All the other bits are tiny snippets of designer paper and card.
 

I trimmed the white card down with a stitched rectangle die by Heffy Doodle. This was attached to the ink-edged card base and topped with the green floral paper and the wooden plank piece. Eva prefers to be on the hard floor (when she isn't taking up all the space on a sofa!) but I gave my little pup a soft place to sleep by trimming the coral piece of paper with a cloud border die.
 

The letters were cut with The Greetery's Slim Alphabet dies but I found they got lost against the green floral. Luckily I hadn't glued everything down yet!
 
 
The solution was to wrap a snippet of vellum round the floral paper, securing it behind, and glue the sentiment over the top. I finished off with a few enamel shapes.

CHALLENGES
I kept my colours to the palette in the Color My Heart Color Dare challenge #531 (choosing the top row Papaya/Peach/Sage and adding in Honey Butter and Toffee) so will link up there; I'm also joining in with The Alphabet Challenge where Debbie has chosen V for Vellum; and of course I'll be heading over to The Snippets Playground with my homework and to play 'Pinch, Punch, First Day of the Month' with any unsuspecting playmates!!

AND IN OTHER NEWS
Its been a Golden Girl day today! I took them to a favourite place that has a stream running though it AND a river at the bottom AND a melted ice rink!!
 

And no, in case youre wondering, there can NEVER be enough water for a Golden Retriever to career about in!!

Sending hugs,

Thursday, 26 January 2023

Flowers in the snow

Hello, crafting friends!
 
It's Thursday and time for another fun board to inspire you at the Tic Tac Toe Challenge! Joanne is in charge of the board this time and we are certainly spoilt for choice!
 

I chose the diagonal from bottom left Pattern Paper/Flowers/Ribbon or Bow to make a winter birthday card.
 

I started with a snippet of 'plaster texture' paper from a favourite Stampin' Up pack. This was trimmed to size with a Crimped Frame die from the Greetery and stamped with a leaf spray (from a long-ago retired SU set) and a birthday sentiment from Pinkfresh Studio.
 

I topped the stamped leaf spray with my latest favourite thing: some die-cut wildflowers from a new-to-me Greetery die set. I cut these from white paper and coloured them with sponge daubers and then attached the flower heads to the stems and I can't tell you how much fun that was!! Finally, I added a bow from an MFT die set and attached everything to the card front.

CHALLENGES
I'm linking this card up at Little Red Wagon where the theme is Happy Happy Birthday; and also TGIF where there's a birthday challenge too.


AND IN OTHER NEWS
In early January we had a lot of rain and the river burst its banks as it often does in the winter. When the temperatures dropped below freezing, the floodwater completely iced over, creating a natural ice rink! It's wasn't deep so wasn't dangerous at all, so I took a couple of lads from church to play there. They had a wonderful time skating (with non-grip shoes) and playing 'ice hockey' with a pebble and two sturdy sticks. Eva tried to join in and made us all laugh by doing Bambi impressions!
 

We went back there today and it has pretty much all melted. Eva was able to walk on the ice that was left without her legs splaying about!

Sending hugs,

Saturday, 14 January 2023

Snippety collage

Hello, crafting friends!
 
I was amazed to read that Miss Di has been running The Snippets Playground for no less than ELEVEN YEARS! Wow! I was around in Blogland when she took over but surely it was yesterday...?! I am enjoying a little free time at the moment so I immediately tipped out my Snippets Box and prepared to join in with the celebrations! 
 

We have been asked to include a photo of the snippets we used for this challenge and here are mine above. I made a collage style 'welcome home' card with them:

 
I started with the background snippet. This was an offcut from a piece that had been stamped with Stampin' Up's Hardwood background stamp. I taped pieces of coordinating washi tape on one side of it for a bit of extra interest. The leaves were a practice run of a Greetery die I bought last year and then *hangs head* have never used since. I tore the leaves into sections and glued them to the background. 


Next I die cut the little house from the tiny white snippet using an X Cut die. I taped some yyellow washi tape over the middle of the tiny wood effect strip of DSP then glued the house over it so the washi 'illuminated' the windows. I added the gem-embellished heart (found at the bottom of the Snippets Box) and popped the whole thing up on the background using dimensional pads. Finally, the sentiments were added.

Apologies for the appalling photos - light levels are very low :/

CHALLENGES
I'm heading over to The Snippets Playground with this card and a large cake piped with 'congratulations on eleven snippety years' in pink icing! I'm also nipping over to Darnell's NBUS Challenge as the Side of Greens die can now officially be removed from the Never Before Used Schtuff box!
 

AND IN OTHER NEWS
Yes, January is dull and dreary, but if you're a dog...
 
 
... there's still plenty of squirrel hunting fun to be had!

Although I have a feeling the squirrels were all blowing raspberries and cat-calling the 'hunters'!!

Sending hugs,

Monday, 27 June 2022

In the globe

Hello, crafting friends!
 
I couldn't help but notice it was the 25th the day before yesterday, and that brought to mind another month where the 25th is a major celebration! I tried to imagine what it might feel like to be cold and this card was the result:
 

I hadn't used this Snow Globe stencil from Funky Fossil before and I'm already thinking of other scenes I can fill it with! For this one, I taped the snow globe part of the stencil over a card base and covered up the base section. Inside the globe, I stamped one of the houses from an old Stampin' Up set called Holiday Home. This was covered with another house I stamped on a sticky note and cut out. I also cut a little circle out with a circle punch and placed it in the sky area.
 

While the masks were in position, I used a fir from Inkylicious to create a woodland scene around the house and then sponged navy ink into the sky and, with increased pressure at the base of the trees. When the bits of sticky note were removed, a moonlit scene was revealed! I used a navy coloured pencil to colour the house and add detail to the snow and added snow with a Posca acrylic paint pen.


Once that was dry I was able to position the base of the globe and stencil it in. I grounded my globe with a strip of neutral plaid paper that I sponged with the same navy ink. The card was finished with a die cut sentiment from Tonic Studios, a strip of red card and a bakers twine bow.

CHALLENGES
I'm linking this card up at Happy Little Stampers Christmas challenge where the optional theme is Snow Globe; also Addicted to Stamps and More where the challenge cycle has come round to Christmas; I'm also joining in with Rudolph Day where we make a Christmas card on the 25th of each month :) I'm also linking up with The Snippets Playground - I used a scrap of plaid DSP and, from my snippets box, a tiny strip of red card, a left-over bow and a sentiment cut from a small off-cut of the same red card.


AND IN OTHER NEWS
You know that weird feeling you get sometimes, when you can't shake the feeling that someone is watching you?

And then you turn round and...


Oh. Hello Eva and Lion Fren! :)

Sending hugs,

Monday, 30 May 2022

Bags of snippets

Hello, crafting friends!
 
Yesterday evening my sister took me out to dinner and I wanted to bring along a little thank you. I found quite a big off-cut of SU designer paper, which must have been around for quite some time, so I used it to make a little treat bag to fit a mascara I knew she had been wanting to try. There was just enough of the paper to get a thank you card out of it too.


Here's the bag and the card together. It was so quick to make them using just die cuts and no stamping.


THE BAG
I used my Simply Scored to create a simple bag shape. (For those that are interested, the paper was trimmed to 6.5" square, then vertical scores made at 1.5, 3, 4.5 and 6". The paper was turned 45 degrees clockwise and scored at 1.5".) I assembled the bag using strong red tape, popped the mascara inside and secured the top with a tiny enamel bulldog clip tied up with coordinating twine. I made a label from a scrap of vellum, cut with a stitched rectangle die by Heffy Doodle, and decorated with some leaves that were in my snippets box.
 

THE CARD
It was a tight squeeze, but I was able to trim the left-over bit of paper with another of the stitched rectangle dies. The same die was used to cut out a piece of green card from my snippets folder. I fussy cut the bottom of the designer paper along the scallop design, layered it over the green card and attached it to a card front. This was topped with a scrap of vellum cut with a stitched circle die by Waffleflower, and a sentiment die cut from a black snippet. Simple!

CHALLENGES
I'm linking these projects up at The Snippets Playground where Miss Di and Head Prefect Sarn are preparing for Jubilee celebrations; The Sisterhood of Crafters want to see Bag projects so I'm joining in there too. I'm sharing the card at Happy Little Stampers Die Challenge where Anything Goes, and at Addicted to Stamps and More where the theme is Die Cuts and/or Stencils.


AND IN OTHER NEWS
My sister and I dined at a posh restaurant where there was a 9 course 'tasting menu', and a waiter whose accent became more and more French as the evening wore on. There was even an 'amuse bouche' which made us go a bit giddy! 'Well, that certainly amused MY bouche!' we declared at regular intervals and giggled like silly school girls.


My sister had told the staff beforehand that it was my birthday and, at the end of the meal, this plate was brought out! Those little sweetmeats are handmade white chocolate fudge and passion fruit jellies - and oh my goodness they were delicious!

It was a lovely evening but I can tell you that staggering about in high heels used muscles that I had obviously forgotten I had!!

Sending hugs,

Sunday, 27 March 2022

Playing with pink and plaid

Hello, crafting friends!
 
Happy mothers day to all who celebrate it in the UK today :) In a display of contrariness, I have a Christmas card to show you! Come and see:


This simple design fulfilled a sudden desire to see what would happen if I introduced a white coloured pencil to some bold pink plaid paper! I cut a piece of the paper with a stitched rectangle die from Heffy Doodle, swished an embossing buddy over it to get rid of any static, used versamark ink to stamp onto it with the large Christmas sentiment from  Be Merry by WPlus9, and heat embossed with gold embossing powder. There are some flowers and foliage images in the set and I chose two sprigs and gold embossed those above and below the sentiment.

 
When I used the white coloured pencil to colour the banner and the leaves of the sprigs, it turned the bright pink into a paler pink as I'd hoped! I used a darker pink pencil to add definition to the word 'merry', the berries on the sprigs and the back of the banner before attaching the panel to a card base.

CHALLENGES
I hope this card is CAS enough for Less is More which inspired my colour choices with its Pink and Gold theme; Jingle Belles inspired the plaid with their We Wish You a Plaid Christmas challenge so I'm joining in there; I'm also linking up at the ABC Christmas Challenge where Carol is hosting three more letters and I've chosen E for Embossing; I'm also playing along at the  Rudolph Days Challenge where we must make an Anything Goes Christmas card on the 25th of each month (and link up by the end of the month.)

AND IN OTHER NEWS
My favourite mothers day story was told me by a friend: He learned to knit one year when he was a little boy and decided to make his mum a scarf, only he got a bit bored after a while and thought the scarf was probably long enough at 6 inches. On the big day he planned to present it to her at breakfast which he was going to cook himself. He didn't really know how to cook anything except frozen peas so he made those, put them in a bowl and brought it to his mother in bed on a tray. What I love about this story is that she was so thrilled with the scarf she put in on immediately (it rested on one shoulder) and ate the peas with apparent delight while her son sat on the end of her bed. Isn't that the best story?!

Sending hugs,

Monday, 14 February 2022

Bits and bobs

Hello, crafting friends and a happy valentines day!
 
When I made THIS card by tipping up my snippets box and putting some of the contents together, a lovely lady commented that she'd like to see more of this kind of card. Haha, well I need no encouragement at all I assure you!  Here are some items I selected from the snippets box:

 
And that snippet of designer paper on the left has been in my paper drawer since before the old King died (as we say around here when we mean a long time ago!) Here's the result:


The first thing to do was layer the wood-stamped rectangle over the designer paper and trim both to the same width with a stitched rectangle die from Heffy Doodle (still my most-used frame dies!) I tucked the textured grey circle-ish shape behind it and secured everything with glue.
 

The heart was rescued from a card I made ages ago (before the old King died!) and which subsequently got wet and was ruined. I arranged some left over die-cut leaves behind it and embellished the front with a punched heart and an enamel dot before attaching it to the panel.
 
 
I stamped the wood-stamped rectangle with a row of hearts from Uniko's Simply Said Blocks, then popped the sentiment up on dimensional pads above it. Finally, the paper panel was glued to a card base.

CHALLENGES
I'm sharing the love at the Snippets Playground with this card - thank goodness it's always sunny there!
 
 
AND IN OTHER NEWS
Today, as a special treat for being my bestie, I threw a juicy marrow bone into the garden and sent Eva to find it. She lay on the grass in the garden in the freezing cold and gnawed at it for literally HOURS! I finally called her in, worrying about the cold, and she came, said a quick hello and then stood by the French doors looking at me pointedly.

 
"Could you open the door for me please? Yes, I'm afraid you'll have to excuse me. I'm rather busy today as there is A Bone in the garden that needs my attention!"
 
Sending hugs,