Pages

Showing posts with label gift bags and boxes. Show all posts

Saturday, 29 July 2023

Make Shapes

Hello, crafting friends!
 
Welcome to some crafty Saturday fun courtesy of Addicted to CAS! Jaydee has chosen the code word for the next fortnight:
 

How fun is this?! It could mean a shaped card or a card using shapes as part of its design or a card that uses shapes as part of its decoration... it's up to you! I was inspired to make a masculine card using a bold striped background stamp from Uniko to create skinny rectangles.
 
 
I used waterbased markers on the stripes and then added coloured pencil over the top to increase colour intensity and this created an interesting texture. Isn't the sentiment fun?!  It's from All Year Long by Concord & 9th - a set I have finally hunted down after a long, long search! I didn't want my card to be too symmetrical so I offset the 'happy birthday' part of the sentiment and added some coordinating enamel dots and star.
 
 
I was sending a gift with this card and, after making the card, decided to make a pouch to put it in. A quick look in the designer paper drawer brought this fabulous paper to light - a pretty good match wouldn't you say! Love when that happens :)

Okay, so now it's your turn to interpret the word Shapes - I can't wait to see what you come up with :) Do hop over to the Addicted to CAS challenge blog to check out all the great samples the design team have made to inspire you. You'll find the Linky Tool at the bottom of the post and you can use it to share your creation with us when you're ready. Do remember that we are a clean and simple challenge and make sure there's plenty of nice clear space on your card and minimal layers. Have fun!

CHALLENGES
I'm linking this card up at Seize the Birthday where Glenda's optional Topping is book-related themes or you can go for an Anything Birthday Goes. My mind jumped to a fable called How the Zebra got his Stripes but my more colourful stripes fit in better with Anything Goes! I'm also joining in at Little Red Wagon where Doni has chosen the theme of Boys Will Be Boys or in other words masculine cards!


AND IN OTHER NEWS
The story of the Zebra really sent me down memory lane. If you have small children or grandchildren and are looking for a great story with a good message, look no further than this one - How the Zebra Got His Stripes!
 
 
The story is about a greedy baboon who decides that the watering hole that all the animals need to survive is his property and he isn't going to share. The zebra, who had a plain white coat in those days, tells the baboon that his behaviour is unjust and that he will fight him for the right for the animals to use the pool. The baboon lights a fire next to the pool to ward the animals off but the brave zebra goes to fight him. Zebra defeats the baboon by kicking the baboon away from the pool but gets too close to the fire as he does so. Some of the sticks burn into his coat. I love the message that some things are worth fighting for and that we bear those scars with honour. Zebra's sacrifice bought back the life-giving pool for the other animals.

Sending hugs,

Sunday, 4 June 2023

Hen Party Favour bags

Hello, crafting friends!
 
If you popped by yesterday you'll have seen the cards I made for my daughters hen party. They were slipped into little favour bags which I'm showing you today:
 

The bags themselves are little 'mini lunch sacks' left over from my Stampin' Up demo days all those years ago - knew they'd come in handy one day! I decorated them with Funky Fossil's In The Meadow stamp set, stamped in black and doodled in gaps and in areas where they didn't stamp well.
 

The tags were made entirely with snippets and left overs! The biggest snippets were offcuts of a dark kraft card which I cut with a small arch nesting die. I decorated these with flowers and leaves cut from green, yellow and coral snippets. I stamped hens on white snippets with a hand-carved stamp that my daughter bought in Paris years ago when she was studying there and gave to me as a gift. They needed to be fussy cut - a labour of love! I cut small black circles from black offcuts and glued them to the tags, made a hole in them using my cropadile and threaded them with some coordinating twine from my stash. I attached the tags to the bags with little coloured library clips that I've had in my stash for years.
 

They were an easy design for multiples (although I ran out of time - I had meant to use green washi tape to ground my hen and finish the flowers with a black marker. Aaaargh!)
 
CHALLENGES
I'm linking my tag up with the Cut It Up Challenge where the theme is Tag You're It - Make A Tag; I'm also galloping off to the Snippets Playground to share this project as it was made entirely with left overs and snippets! I feel like a proper womble!! Since this is the first time I've used the hen stamp, I am linking up with Darnell's NBUS challenge where we are inspired to use our Never Before Used Schtuff!
 

AND IN OTHER NEWS
As one of the activities at the party, the Head Bridesmaid showed us how to make perfume. It was such fun! We all selected our preferred mix of essential oils and mixed them in a spray bottle with gycerine, alcohol and water. By the end of the party, they had blended and there were some gorgeous signature perfumes! Each guest had their perfume added to their bag, along with the thank you card, a packet of little speckled candy covered chocolate eggs, and...
 
 
... an adorable little ceramic hen to remind the guests of when they were hens! They came in different colours and were made by a local potter. I wrapped them in coral coloured tissue, secured with yellow washi tape.

It was such a lovely party. We had lunch, played games, did plenty of Golden Retriever cuddling, and had a lot of fun laughing and chatting together. And then, right at the end, amid much laughter, the Head Bridesmaid produced a bag and from it dressed my daughter up in a 'Bride to Be' sash, a mini veil and some kind of crazy tiara!  I sent them off in a taxi bus, giddy with giggling, to go off to the evening party.
 

This was the photo that overset me. My daughter left home to go to university ten years ago and has been an independent young lady living in a flat of her own ever since, but there was something so touching about this picture that I had to reach for the tissues!

Sending hugs,

Monday, 30 May 2022

Bags of snippets

Hello, crafting friends!
 
Yesterday evening my sister took me out to dinner and I wanted to bring along a little thank you. I found quite a big off-cut of SU designer paper, which must have been around for quite some time, so I used it to make a little treat bag to fit a mascara I knew she had been wanting to try. There was just enough of the paper to get a thank you card out of it too.


Here's the bag and the card together. It was so quick to make them using just die cuts and no stamping.


THE BAG
I used my Simply Scored to create a simple bag shape. (For those that are interested, the paper was trimmed to 6.5" square, then vertical scores made at 1.5, 3, 4.5 and 6". The paper was turned 45 degrees clockwise and scored at 1.5".) I assembled the bag using strong red tape, popped the mascara inside and secured the top with a tiny enamel bulldog clip tied up with coordinating twine. I made a label from a scrap of vellum, cut with a stitched rectangle die by Heffy Doodle, and decorated with some leaves that were in my snippets box.
 

THE CARD
It was a tight squeeze, but I was able to trim the left-over bit of paper with another of the stitched rectangle dies. The same die was used to cut out a piece of green card from my snippets folder. I fussy cut the bottom of the designer paper along the scallop design, layered it over the green card and attached it to a card front. This was topped with a scrap of vellum cut with a stitched circle die by Waffleflower, and a sentiment die cut from a black snippet. Simple!

CHALLENGES
I'm linking these projects up at The Snippets Playground where Miss Di and Head Prefect Sarn are preparing for Jubilee celebrations; The Sisterhood of Crafters want to see Bag projects so I'm joining in there too. I'm sharing the card at Happy Little Stampers Die Challenge where Anything Goes, and at Addicted to Stamps and More where the theme is Die Cuts and/or Stencils.


AND IN OTHER NEWS
My sister and I dined at a posh restaurant where there was a 9 course 'tasting menu', and a waiter whose accent became more and more French as the evening wore on. There was even an 'amuse bouche' which made us go a bit giddy! 'Well, that certainly amused MY bouche!' we declared at regular intervals and giggled like silly school girls.


My sister had told the staff beforehand that it was my birthday and, at the end of the meal, this plate was brought out! Those little sweetmeats are handmade white chocolate fudge and passion fruit jellies - and oh my goodness they were delicious!

It was a lovely evening but I can tell you that staggering about in high heels used muscles that I had obviously forgotten I had!!

Sending hugs,

Sunday, 2 May 2021

In memory of Ruby the Westie

Hello, crafting friends!

I am very proud to be guesting at Pixies Snippets Playground today, particularly because it is a Ruby's Memory challenge. Ruby was a little Westie rescued by Lynne In NI, one of the Playground's regulars. The little dog was a much-loved family member for many years before sadly passing in December last year. With permission from Lynne, Di from the Playground decided to set up a challenge in her memory, where players could donate prizes and Di would match the amount as a donation to the charity that rescued Ruby.


The challenge is to make a card using up snippets of paper and/or card and any other little snippets you might have lying about. My card uses the last of some free papers I got from this year's Stampin' Up Sale-a-bration promotion. 


I loved the leafy paper and this is the very last piece! It was trimmed to size with a stitched rectangle die from Heffy Doodle. The sentiment is from WPlus9's Strictly Sentiments 2, stamped on an offcut of white card and cut out with a nesting label die from The Works. I've definitely stamped it wonkily but, as I said to Di, that seems appropriate for the times we're living in!


The flowers are cut out of another of the papers and I think they look so chubby and cheerful! There's always a design in a pack of papers that you're not so keen on and cutting elements out of it can often be a great way to use it.


As a little extra, I made a little Sour Cream container with another off-cut of paper and decorated it with one of the left-over cut-out flowers. These take very little paper and are so useful as gift wrapping for small gifts.


The prizes I donated are the sentiment set I used on my card, as well as the cutest little doggy set from Clearly Besotted called Dog Years.  To win them, you simply need to complete three steps:

• Use the Linky Tool there to enter ONE card using snippets of designer paper and/or card
• Leave a comment stating that you'd like to enter the prize draw. 

CHALLENGES
I'm linking this card up with Dawn's Occasions challenge at Watercooler Wednesday. Addicted to Stamps and More also have an Any Occasion challenge so I'm also playing along there.


AND IN OTHER NEWS
About four months ago, we met a little dog on the fields at the back of our house. She was found with her siblings in a cardboard box, abandoned on a Romanian street, and was rescued, brought to England and homed with a lady who lives locally. When we met this pup, she was terrified, hiding in a hedge and barking hysterically. I have never known any dog be able to resist Eva though and, sure enough, this little dog quickly understood that she was no threat. Humans though were a different matter and the dog made it quite clear that I was to keep my distance. It has been four months since we first met this dog and I can report that yesterday, for the first time, she came up to me, tail wagging, and allowed me to pet her. I am as proud as can be!

Sending hugs,

Thursday, 7 November 2019

A thrifty gift wrapping idea

Hello crafting pals!

While my daughter was with us last weekend, we showered her with gifts for her birthday! One of the things I gave her was a pair of pretty faceted black earrings. I had fun gift wrapping them! Come and see:


There are lots of thrift shops around here which sell items to raise money for charity. You can often find boxes or pots with lids and I think they make a great receptacle for small gifts. This pretty little lacquered box came from my local animal rescue charity shop. It cost 50p and just needed a clean up.


I cut a piece of Pool Party card stock a bit longer than the box, so that it would rest on the diagonal. I stamped it with flowers and leaves from Stampin' Up's Your Perfect Day (retired) and curved the corners with a corner rounder.


I added this lovely sentiment from Uniko's You Are Yes You stamp set before making two small holes with a punch and threading the earrings through.

I think this is such a pretty way to present jewellery, but the list of items you could present in this way is endless: sweets, money, vouchers, watches, ties, photos... There are so many different styles of box out there that you're sure to find something that will suit the personality of the recipient and you can handcraft your insert to coordinate - choosing the same colours or similar images.

Do let me know what you think in the comments below - and if you are inspired to gift wrap a present in this way, I'd love to see!

See you soon,

Thursday, 23 July 2015

All wrapped up - Stampin' Up Artisan blog hop

Hello and welcome to another Thursday blog hop brought to you by the official Stampin' Up Artisan design team! We've all got packaging on our minds this week so if you're looking for ideas, make sure you visit all of the designers around the world by clicking the button at the end of each post :)

BAGS OF FUN!
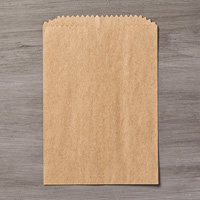
I always keep a stock of the Stampin' Up gift bags as they're so useful, especially when teamed with the Tag-a-Bag accessory kits. This year there are some new dotty glassine bags which are food safe and a bit like greaseproof paper but much prettier! Come and see some of my ideas for using them:

COOKIE MONSTER
My youngest son came home with his school report last week, justifiably proud of himself, and that made me think of making this little cookie treat:


I had a bit of a lightbulb moment when I realised the glassine bags fit perfectly inside the kraft bags and those kraft ones are a good, heavy quality too so they keep everything nice and firm. I used a circle framelit to cut windows in the outside bag so you can see the cookie in the glassine one.


There are sticky strips in the Tag-a-Bag kit and by using the one on the edge with one of the Coral strips, I got a nice striped edge! This was decorated with a tag and paper clip from the kit as well as some punched stars. 

PARTY WHIRL
Those glassine bags are just as useful on their own! 


This little treat bag could safely house homemade fudge, toffee or coconut ice, or you could fill it with small favours and hand it out to party guests.


My bag is closed with some of the sticky strip from the Tag-a-Bag kit and decorated with a pinwheel made with designer paper and attached to a wooden skewer. The label was stamped with the word 'Goodies' from the Stamp a Bag stamp set.


AND RELAX!
The bags are just as useful for wrapping non-food items with a high fat content, like candles or this gorgeous, fragrant, handmade soap. 


I opened out my bag first and cut it to size before using it to wrap the soap tightly. The circles cut from the Cookie Monster kraft bag above were used to create a shaped 'sleeve' - don't you just love it when nothing gets wasted!


To decorate the package, I wrapped the soap in the linen thread which comes with the Tag-a-Bag kit and added one of the heart-shaped labels. The delicate little stamped flower on the label comes from the Stamp a Bag stamp set.

These glassine bags have SO many uses and I've just scratched the surface here. Click the button below to check out the rest of the Artisan blog hop for more fab ideas from the rest of the team - starting with the amazing Allison Okamitsu :)


If you have any queries, or prefer to speak to me, I'm happy to help.
You can contact me by email or phone on 01280 820593.

Thanks for visiting today. Do come and join me tomorrow when I'll be rounding up the latest Stampin' Up special offers :)

Thursday, 23 April 2015

Moonlight DSP triangular treat pouches - Stampin' Up artisan blog hop

Hello! It's Thursday and time to welcome you to another fab blog hop full of beautifully designed projects conjured up in the minds of the Stampin' Up artisan design team! We've had some wonderful goodies in our April boxes but today we're all ganging together to inspire you with designer papers! Are you ready?

TRULY, TRIANGULARLY, TREATY!
I chose to use the Moonlight paper stack which comes in a pad of 48 double-sided sheets of designer paper. One thing I love about this is the size of the sheets - 4 1/2" x 6 1/2" or 11.4 x 16.5 cm.This is a great size for card-making but it's also brilliant for making treat boxes - like this one:


A triangular one! Isn't it cute? And the best thing about it is that you don't need to cut the paper to size - a couple of folds and you're done! Would you like to know how? It's SO simple - come and see:


Start off by choosing a sheet of the designer paper. (This will probably take you longer than making the box because there are so many delicious designs to choose from!)


Next, fold the card stock in half making sure the design you want is on the outside. Open it up again and mark the halfway mark top and bottom before folding all four corners in as shown above.


Turn the folded sheet round 90 degrees so that its widest side is facing you and take the top two corners and pull them together. Allow one piece to overlap the other slightly and fasten them together with a touch of glue.


Repeat with the bottom corners and punch a hole through the overlap at the top and bottom.


Thread some ribbon through the holes and pull gently together to close the box and add a tag - I made mine with stamps from Amazing Birthday and the gorgeous stitched satin ribbon in Blackberry Bliss.


The only trouble with these little boxes is that...


... they're ever so slightly addictive to make!

NEED A MALE CARD WITH THAT?
I've realised that I've only shown you the papers that are in Hello Honey, Basic Grey and Blackberry Bliss but, you know, there's a whole load of papers with a Lost Lagoon vibe in the same pad! You can see some of them on this inchie card I made:


I thought this would make a nice male card, one inch square samples of designer paper topped with the cute fox from the hostess set Life's Adventure holding, instead of his usual umbrella, a birthday balloon!


This fox makes me giggle - he SO doesn't want to hold that balloon! This is what our cat would look like if we asked her to wear a hat! Actually this is what our cat looks like sometimes when she just plain disapproves of us!

Would you like to see loads more ideas for using this fabulous paper stack? Well the rest of the artisan design team has that covered! Head over to the brilliant Allison Okamitsu next by clicking the button below:


BUY THE SUPPLIES TO MAKE MY PROJECTS NOW!
Click on any item to be transported to my online shop!

If you have any queries, or prefer to speak to me, I'm happy to help.
You can contact me by email or phone on 01280 820593.

Okay, I couldn't resist a pic of our cat Tuppence with 'The Look'.


Thanks for joining me today. I'm off to visit my daughter for a couple of days but I'll be back on Tuesday with some of my favourites from the Retirement List. Have a great weekend!