Pages

Showing posts with label Boys' birthday. Show all posts

Thursday, 23 April 2015

Moonlight DSP triangular treat pouches - Stampin' Up artisan blog hop

Hello! It's Thursday and time to welcome you to another fab blog hop full of beautifully designed projects conjured up in the minds of the Stampin' Up artisan design team! We've had some wonderful goodies in our April boxes but today we're all ganging together to inspire you with designer papers! Are you ready?

TRULY, TRIANGULARLY, TREATY!
I chose to use the Moonlight paper stack which comes in a pad of 48 double-sided sheets of designer paper. One thing I love about this is the size of the sheets - 4 1/2" x 6 1/2" or 11.4 x 16.5 cm.This is a great size for card-making but it's also brilliant for making treat boxes - like this one:


A triangular one! Isn't it cute? And the best thing about it is that you don't need to cut the paper to size - a couple of folds and you're done! Would you like to know how? It's SO simple - come and see:


Start off by choosing a sheet of the designer paper. (This will probably take you longer than making the box because there are so many delicious designs to choose from!)


Next, fold the card stock in half making sure the design you want is on the outside. Open it up again and mark the halfway mark top and bottom before folding all four corners in as shown above.


Turn the folded sheet round 90 degrees so that its widest side is facing you and take the top two corners and pull them together. Allow one piece to overlap the other slightly and fasten them together with a touch of glue.


Repeat with the bottom corners and punch a hole through the overlap at the top and bottom.


Thread some ribbon through the holes and pull gently together to close the box and add a tag - I made mine with stamps from Amazing Birthday and the gorgeous stitched satin ribbon in Blackberry Bliss.


The only trouble with these little boxes is that...


... they're ever so slightly addictive to make!

NEED A MALE CARD WITH THAT?
I've realised that I've only shown you the papers that are in Hello Honey, Basic Grey and Blackberry Bliss but, you know, there's a whole load of papers with a Lost Lagoon vibe in the same pad! You can see some of them on this inchie card I made:


I thought this would make a nice male card, one inch square samples of designer paper topped with the cute fox from the hostess set Life's Adventure holding, instead of his usual umbrella, a birthday balloon!


This fox makes me giggle - he SO doesn't want to hold that balloon! This is what our cat would look like if we asked her to wear a hat! Actually this is what our cat looks like sometimes when she just plain disapproves of us!

Would you like to see loads more ideas for using this fabulous paper stack? Well the rest of the artisan design team has that covered! Head over to the brilliant Allison Okamitsu next by clicking the button below:


BUY THE SUPPLIES TO MAKE MY PROJECTS NOW!
Click on any item to be transported to my online shop!

If you have any queries, or prefer to speak to me, I'm happy to help.
You can contact me by email or phone on 01280 820593.

Okay, I couldn't resist a pic of our cat Tuppence with 'The Look'.


Thanks for joining me today. I'm off to visit my daughter for a couple of days but I'll be back on Tuesday with some of my favourites from the Retirement List. Have a great weekend!

Thursday, 9 April 2015

Birthday Surprise pop up card for a boy - Stampin' Up Artisan blog hop

Hello and a great big welcome to Stampin' Up's weekly Artisan blog hop where this week the whole team is putting the fabulous Birthday Surprise stamp set through its paces!

BIRTHDAY SURPRISE!
The very title of the set got me thinking about cards that incorporated surprises and here's what I came up with:


Here we go, a clean and simple card with a bold greeting and a bunch of birthday balloons. So far, so predictable - but wait...


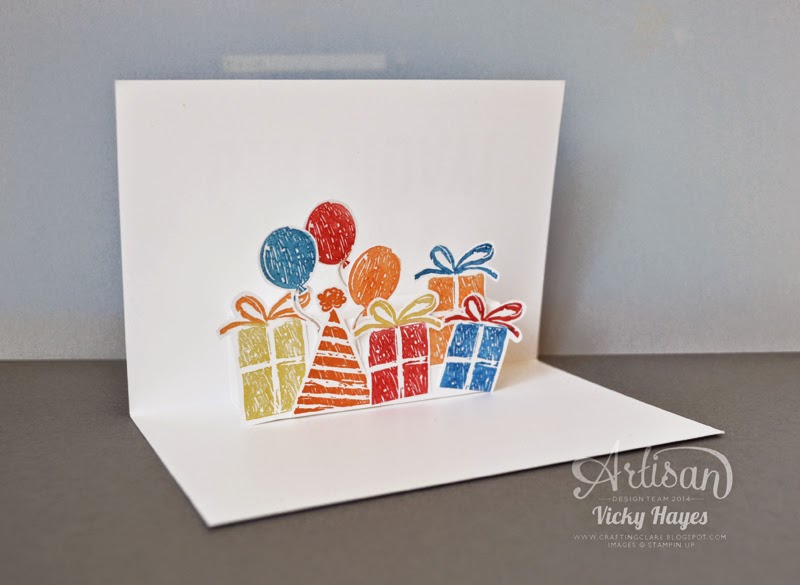
... open it up and woohoo! Surprise!

So how do you make a pop up card like this? It's simple!


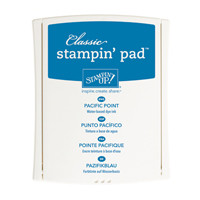
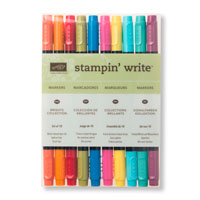
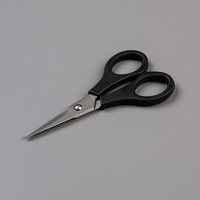
First take one of Stampin' Up's ready cut and scored note cards and stamp the front with the Happy Birthday greeting in Pacific Point ink. Use markers to ink up the balloon and use it to embellish the greeting. For a bit of extra interest, I stamped an extra one and cut it out with Stampin' Up's fabulous sharp paper snips - LOVE these!


Ready for the inside? Ok, cut a piece of whisper white card stock 4 1/4" x 2 3/4" (10.75cm x 7cm) and score at 1", 2", 3" and 4" (2.5cm, 5.1cm, 7.6cm and 10.2cm).


You'll be left with a narrow tab - glue that to the side to create a square shape and attach to the inside of the card.


Now start decorating! I stamped lots of prezzies, balloons and a party hat, cut them out and arranged them on the front of the pop up section.

I hope I've inspired you to get popping up with Birthday Surprise but I know the rest of the team will have heaps more ideas for using this set! Allison Okamitsu is next on the blog hop so click the button below to take a look at her fabulous creation!


BUY THE SUPPLIES TO MAKE THIS CARD NOW!
Click on any item to be transported to my online shop!

If you have any queries, or prefer to speak to me, I'm happy to help.
You can contact me by email or phone on 01280 820593.

I ran this card past Quality Control (that's my youngest son!) "Cool," he said politely when he saw the front. Then he opened it up and became quite lively. "Yay!" he said enthusiastically. "Parteeeeeee!"

I'm still on holiday with my family at home but I'll be back on Tuesday with more crafting fun. See you then!


Thursday, 22 January 2015

Hey Valentine, it's a male birthday! - Stampin' Up Artisan blog hop

Hello and welcome to another Thursday hop round the world to see what the Stampin' Up Artisan Design Team has been up to!

HAPPY BIRTHDAY VALENTINE?
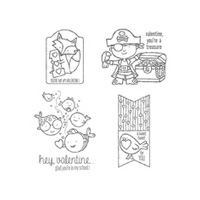
Are you getting excited about Valentine's Day yet? Of course you are! A day dedicated to letting your loved ones know how much you care is the best idea ever! There are some gorgeous new Valentine stamp sets in the new Stampin' Up spring/summer catalogue - including Hey Valentine, which is perfect for children's birthday cards too. Come and see:


I got my blendabilities markers out for these cards - and if you haven't yet discovered the therapeutic effect of colouring with these, you are seriously missing out! You can even earn packs of these as a free item with Sale-a-bration, just by spending £45!


Mr Fox is doing a great job of wishing someone a happy first birthday! I coloured him with Stampin' Write markers before stamping so that I could omit the hearts from the number one. TIP: Stampin' Write markers are water-based, so it's fine to use them on your stamps, but don't try it with the alcohol-based blendabilities markers because they'll dry too quickly to stamp and will just stain the rubber. Once I'd stamped the image, I coloured it with blendabilities to create beautifully blended shadows, then added pattern to the number with Stampin' Write markers over the top - see how the markers work wonderfully together!


There's something a little fishy going on with my next card...! (*slaps thighs and wipes eyes* Dear me, the old ones are the best aren't they?! ) The heart has mysteriously disappeared and a birthday present has turned up in its place! I covered the heart with a tiny gift snipped out of card stock (TIP: A square punch is best for this job!) The gift was coloured with Stampin' Write markers and given a 'ribbon' with a few strands of the two tone trim - SO pleased this carried over into the new catalogue!


Any aspiring pirate would be delighted with a birthday card made with this swashbuckling buccaneer! Ooh arr me hearties, extra rations of grog on the poop deck! I snipped his treasure chest away and gave him a present to hand over to the birthday boy instead (but WILL he hand it over?!!!) The greeting I used for all three cards is from the brilliant sentiment set Hey You - LOVE this set!

I had great fun making this trio of cards and I hope you like them too. You'll find plenty more bright ideas on the Artisan blog hop so click the button below to whizz over to Allison Okamitsu and check out her latest offering!


BUY THE SUPPLIES TO MAKE MY CARDS NOW!
(Click on any item to be transported to my online shop!) 
If you have any queries, or prefer to speak to me, I'm happy to help.
You can contact me by email or phone on 01280 820593.

We always have great fun celebrating birthdays in our family. Now that everyone is older, we tend to come together for a special meal and maybe a games evening, but when they were little I'd organise fun parties for them.


This photo is of me preparing a jungle party for my youngest son's 4th birthday We got hold of some netting from somewhere and filled it with balloons before attaching the netting to the ceiling. To make vines, I cut streamers from crepe paper and threaded them through the netting, adding paper flowers and leaves. There were pop up tents, toy jungle animals, animal-themed music and games, all of which were a big hit. At the end of the party, we let the netting down and encouraged the children to let off steam with the balloons before delivering them back to their parents to calm down...!

See you tomorrow,

Thursday, 19 June 2014

Gift idea and a quick, no stamping card for a boy

Do you know a boy who is mad about the Minecraft game? I do - and it was his birthday this week! Sometimes it's tricky to think of a card for a young boy but in this case I just reached for two pieces of Stampin' Up card stock and made the quickest card ever... Come and see:


Ugly old chap isn't he? Apparently he's called a creeper  - oh yes, now you can even impress the lads with your Minecraft terminology!

My 1" square punch came in handy for cutting two Basic Black squares for the eyes; I then cut two more pieces with my trimmer, 1" x 1 1/2" this time, and divided one of them in two lengthwise. These pieces were arranged as shown in the picture on a Gumball Green background panel. (Stampin' Up's Gumball Green is the ideal colour for this but it's only available until 30th June. Click here to find it in my online shop.)

And that's all there is to it! You may not think it looks much but I can assure you it made an eight year old boy VERY happy indeed and I got 'cool auntie' brownie points!

Click here for more inspiration for a boy's birthday


HERE'S WHAT YOU'LL NEED TO MAKE THIS CARD
(Click on each item to find it quickly in my shop) 
Click above to place an order any time, day or night,
but if you have any queries, or prefer to speak to me, I'm always happy to help.
You can contact me by email or phone on 01280 820593.

Some of the items in the annual Stampin' Up catalogue are retiring to make way for new products. Don't miss out on your favourites! Some of these items have been discounted too - check availability by clicking on the banners below and click here to buy retired items from my online shop.


If you're looking for a gift to go with your Minecraft card, there are plenty of t-shirts available online - like this one I got for my own son a year or two ago.


Be warned though: I had to lie in wait for my son, leap out at him and tear the thing off his back in order to wash it as he refused to wear anything else! Thankfully he's recovered from his addiction now - in fact, while we were turning out my son's room, we rediscovered the t-shirt in a sad, crumpled heap at the back of a drawer!

Do you fancy another sneak peek from the upcoming Stampin' Up UK annual catalogue 2014-15? Well I may have a little something for you to see here tomorrow! See you then,