Pages

Showing posts with label Springtime Vintage DP. Show all posts

Friday, 29 July 2011

Nature Walk wedding

The latest challenge over at Make My Monday had me flummoxed for a while. There is an ongoing vintage theme at the site and this week the challenge is to use lace and pearls on your vintage card. Well I don't actually have any lace although I do have plenty of my beloved self adhesive pearls! Anyway, I've finally come up with something but I don't know whether it'll be okay for the challenge... Is there such a thing as clean and simple vintage? Because I think this might be it!


It's a wedding/engagement card! I didn't actually set out to make one - it just happened! Does that ever happen to you?!!


To get round the fact I didn't have any lace, I used my eyelet border punch to make some faux broderie anglaise. Does that count? I added a thin strip of one of my favourite papers from the Springtime Vintage designer paper range and then a border of these beautiful pearls. There are some strips stuck together on the Stampin' Up sheets to make this kind of thing very quick and easy.


Weddings are very special and deserve a bit of extra time to cut out this beautiful sprig from Nature Walk. I threaded a piece of Very Vanilla taffeta ribbon through the stem and tied it in a simple knot. I like the way it echoes the colour of the pearls and also provides contrast with the pure white of the Whisper White card base. The sentiment from Perfect Punches was coloured with markers to match the blue of the paper and the purple of the flowers.


Supplies needed for this card:
Stamps: Nature Walk, Perfect Punches
Ink: Subtles markers
Card stock: Whisper White
Other: Basic Pearls, Springtime Vintage designer paper, eyelet border punch, modern label punch, Very Vanilla taffeta ribbon
You can buy any of these supplies from me and I can have them delivered to your address in the UK. Just send me an email or give me a call on 01280 820593.

We had an International Incident here yesterday when my eldest son found an earwig which must've strolled in during the day while we had the French doors open. My son took one look at it and quite literally screamed. "Aaaaaargh! There's a scorpion in the living room!" he yelled. Of course in his head he is the hero walking through a land teaming with dangerous beasts but I'm rather relieved we don't have to cope with scorpions!

Thank you once again for coming to visit me and for all the comments and emails you leave for me. I really love getting them and always try to reply (although sometimes, frustratingly, I can't if there's no link back). I hope you have a wonderful weekend and that the sun shines on you!


Saturday, 14 May 2011

Springtime Vintage cards

Edited to add: Blogger was down all day yesterday, and some of the day before, and I lost this post I'd prepared for Friday. Today it turned up though! So here it is - just a little late...


To borrow a phrase from the popular 80s TV sketch series The Fast Show: This week I have been mostly been making cards with the Springtime Vintage designer papers! And loving it too, I have to say! Today I'm going to show you a couple of simple cards I put together when I first opened the pack.

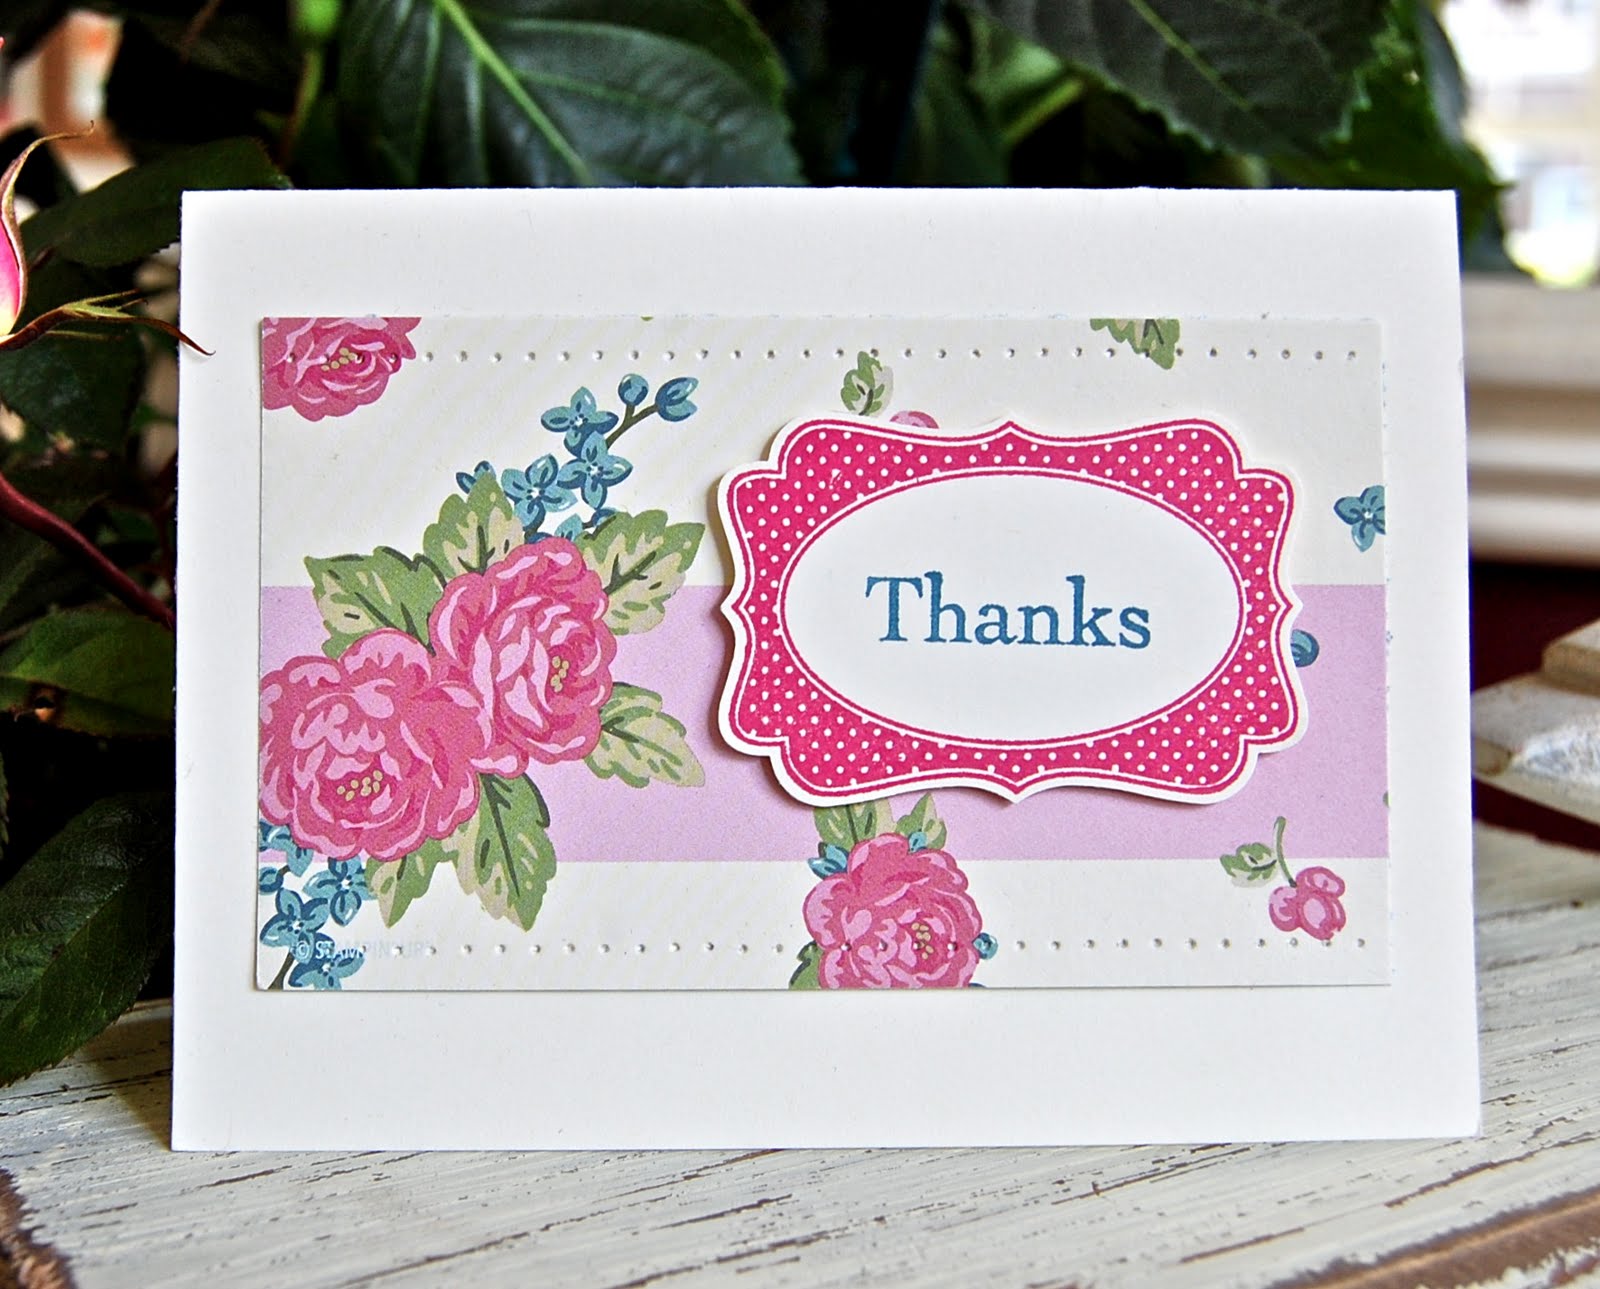
The first uses the gorgeous striped chintzy paper in the pack:


You couldn't get much simpler than this card - but it works because this gorgeous paper pretty well speaks for itself! I cut a piece of the designer paper, pierced a decorative border along the top and bottom edges and stuck it onto a Very Vanilla card base. The sentiment from Thank You Kindly is stamped into one of the frames from the Four Frames stamp set. This set coordinates with the decorative label punch so it was easy to punch the sentiment out and attach it to the card front using dimensionals.

Supplies
Stamps: Four Frames, Thank You Kindly
Ink: Not Quite Navy, Rose Red
Card stock: Very Vanilla
Other: Springtime Vintage designer paper 

The second card uses the blue florals I love so much.


The three background panels were supposed to be the three different blue florals but I glued one of them on upside down like a loon! You get the general idea though...


I've used another of the fabulous stamp-it-and-punch-it-out sentiments that Stampin' Up do so well - this time from the Perfect Punches stamp set and cut out with the scallop oval punch.

Here's how to make this card:

  • Cut a 14cm x 8.5cm of Not Quite Navy card stock. Trim one of the short ends with the scallop border punch.
  • Cut three 2cm x 11cm pieces of different blue floral designer paper and glue them to the scalloped panel.
  • Tie a piece of Baja Breeze seam binding round it and tie in a bow.
  • Attach this panel to a card base made with an A5 piece of Very Vanilla card stock scored and folded in half.
  • Stamp the sentiment from Perfect Punches using Always Artichoke ink. Cut it out using the scallop oval punch and stick it to the card using dimensionals.
  • Decorate the card with a flower cut from a scrap of the designer paper, embellished with a self-adhesive rhinestone, and some leaves cut with the two-step bird punch out of Always Artichoke card stock. 

Supplies
Stamps: Perfect Punches
Ink: Always Artichoke
Card stock: Very Vanilla, Not Quite Navy, Always Artichoke
Other: Scallop border, scallop oval, two-step bird punches, Baja Breeze seam binding, self-adhesive rhinestone

I am loving this trend for all things vintage this spring! I took another trip to the dentist yesterday and enjoyed walking up the high street spotting clothes and homewares in wonderful nostalgic prints.

If you were reading my blog last week you may well be wondering how my daughter got on with her Duke of Edinburgh challenge trip. Well, after a weekend of walking and camping in the wind and rain, she fell off the coach looking less than glamorous, and hobbled over to me. She has enlivened our meal tables ever since with hair-raising tales of bulls in fields and wrestling with tents. By yesterday my oldest son, who is the strong silent type, had heard enough. Getting up from the table, he shot his sister a withering look and said: "Get over it!" We haven't heard any more about it but my daughter is planning a nice shopping expedition this weekend...

Hope you have a lovely weekend.
See you soon

Friday, 13 May 2011

Three Minute Thursday - Springtime Vintage in a frame

It's Thursday and I've come up with another three minute idea! Not a card today - although you could make either of these into a quick card - but some framed pieces.  Come and have a look:


Those Springtime Vintage papers I've been using over the last couple of days are beautiful enough to frame on their own, but I think this blue floral, mounted onto plain card stock, topped with a die-cut initial and tucked into this driftwood-style frame, makes a gorgeous little gift for a young girl to hang in her room.


Using the same idea you could decorate a notebook or make a clothes peg label. Everyone loves a personalised gift!

Supplies:
Springtime Vintage designer paper, Not Quite Navy card stock, Timeless Type junior alphabet dies

The next piece was inspired by the shabby-chic frame which was given to me by a lovely friend with impeccable taste!


The window in the frame is tiny and I couldn't think what to put in it for a while, it occurred to me that this beautiful woodcut heart from the hostess set Cute by the Inch would be perfect.


I stamped it twice using Early Espresso ink - once on Very Vanilla card stock and once on this tone-on-tone pink paper from the Springtime Vintage series. The woodgrain background on the Vanilla card stock was given a quick wash with my aqua painter and cut out, then the designer paper heart was cut out and popped it up on dimensionals over the background. I mounted this onto textured Very Vanilla card stock and love the scale of it in the frame.

Supplies:
Stamps: Cute by the Inch (hostess set)
Ink: Early Espresso
Card stock: Very Vanilla smooth and textured card stock
Other: Springtime Vintage designer paper

There we are! I hope you've enjoyed these speedy gift ideas. Now, if only I could think of a speedy way of getting the housework done...!

See you tomorrow,

Wednesday, 11 May 2011

Springtime Vintage birthday box tutorial

Did I mention my father was 85 last month and, on the same day, my sister was 50? What a very special occasion that was! And what a very special present that must have been for my dad - to have his first daughter born on his birthday! Next week, I'll show you the 85th birthday card I made for him but today I thought you might like to see a box I made for my sister.


While my lovely sister is very feminine, she isn't a frilly person so I thought this paper would be lovely for her. I love the way it looks with the roses frame from Four Frames.


It's so easy to colour these stamps directly with markers, stamp them and cut them out with the coordinating Decorative Label punch. I attached the label to the box lid with dimensionals.


Lots of you have asked me how I make my boxes and I've been promising a tutorial, so here it is at last:

The box tutorial:
I started with a 10.5cm x 11.5cm piece of designer paper and an identically sized piece of Crumb Cake card stock.

Here they are! The Crumb Cake card stock is going to become the base of the box.


Score 2cm in from each edge - I'm using my beloved Fiskars trimmer with a scoring blade. Now, you're going to want to make your lid a little bigger than the base...


... so take the designer paper and score in from all four edges a scant millimetre LESS than 2cm. Can you see where I've got the paper?


Okay. It's time to fold all your creases with a bold folder to make them nice and crisp. And when you've done that, you need to make four snips in the base and the lid to create fold-in tabs.


I like to make little indents in my lids with a 3/4" circle punch to make them more comfortable to take off.


To make sure your boxes stay together, I recommend the brilliantly strong Sticky Strip! Put some on the tabs as shown...


... and assemble the box. If anything overlaps, trim it off with sharp paper snips - the Stampin' Up ones have fantastic long, thin, sharp blades and are a brilliant investment at £7.95.


Time for more Sticky Strip! Put some on the lid tabs - and now for the clever bit:


Wrap your lid around the base and stick the tabs at one end down. Then do the same on the other end. Wrapping the lid around the base ensures you get a nice, snug fit every time!


Here we go! All ready to decorate!

I placed my sister's box on another prezzie, wrapped with pink paper in the same design, and tied Certainly Celery grosgrain ribbon round them both. The tag was made with this gorgeous chintzy paper mounted on Crumb Cake card stock, decorated with a jumbo eyelet and stamped with a sentiment from Sincere Salutations. I tied it onto the pile of presents with Crumb Cake seam binding - which is just perfect for tying into floppy bows!


Goodness - what a long post! But I hope you've found this tutorial useful. Do let me know if you use it -and I'd love to see your projects! And don't forget that I can supply any of the items you need to make my designs. Just email me or give me a ring on 01280 820593 - I'm always happy to help.

Thank you for popping in today - I really do appreciate your visits. Three Minute Thursday is back tomorrow if you're looking for fast inspiration, so I'll hope to see you then.

Tuesday, 10 May 2011

Springtime Vintage birthday card

The gorgeous Springtime Vintage papers in the mini catalogue have proved to be incredibly popular. They don't look much in the catalogue but you only have to glimpse them in real life to fall in love with them. They conjure up visions of 1940s frocks worn with white gloves, rose red lipstick and rolled hair, bone china tea sets... I can almost hear Vera Lynn being cranked up on the gramophone!

Here's a card inspired by that era:


The pink ditsy print floral is one of the prettiest papers ever! I mounted it on embossed Early Espresso card stock to ground it. Have you noticed how often I've been using the Square Lattice embossing folder? It's become a real favourite of mine!


I made the flower with the fancy flower punch. I love the design of the tone-on-tone pink paper I used - there's a great mixture of stunning florals and more sober prints in the Springtime Vintage series. The flower centre was made with one of the three little punches in the Itty Bitty Shapes punches pack.


There's a trend for these ruffled ribbons at the moment. I'm not really a fan but it's good to try new things! If you like this ribbon treatment, it's very easy to do: Just fray the end of a piece of the seam binding and gently pull a thread in the middle, gathering the ribbon with your fingers - that's it!


This sentiment stamp is one of my most used birthday greetings as it's a really useful width and it works very well for all genders and ages. It's one of the stamps in the Occasional Greetings set which covers most other occasions too. It costs £30.95 for 12  stamps - that's only £2.58 each - and I think it's a sound investment.

Here's how to make this card:

  • Cut a 12cm x 21cm piece of Very Vanilla card stock. Score and fold it in half to make a card base. (Note: this isn't a standard size although you can use a standard C6 envelope for it.)
  • Cut an 8cm x 8.5cm piece of Early Espresso card stock, tuck into the Square Lattice embossing folder and run through the Big Shot.
  • Cut a 6.5cm square piece of the pink floral paper. Cut a 5cm length of coordinating green paper and trim it with the scallop edge border punch. Glue this under the floral square so that just the scallops show. Attach this to the embossed card stock.
  • Cut a length of Crumb Cake seam binding. Fray the edge and select a thread from the centre. Gently pull the thread and gather the ribbon softly. Use Snail adhesive to attach it around the embossed card stock, running it over the floral paper.
  • Now make the flower: Punch three fancy flowers, snip between each petal and curl the petals under. Punch a tiny flower from an off-cut of the embossed card stock, using one of the Itty Bitty punches. Layer this on top of the three flower shapes and pierce a hole through all the layers. Secure with an Early Espresso brad.
  • Arrange the flower over the top of the ribbon with leaves from Certainly Celery card stock using the two-step bird punch.
  • Stamp a sentiment onto the card front, using a stamp-a-majig to make sure it's straight. Glue the flower panel above the sentiment.

Supplies
Stamps: Occasional Greetings
Ink: Early Espresso
Card stock: Early Espresso, Certainly Celery
Other: Springtime Vintage designer papers, punches, Square Lattice embossing folder, Crumb Cake seam binding, brad.

I visited a Vintage and Handmade fair at the weekend which was such a visual treat. The sun was shining, the vintage or vintage-style things being sold were beautifully laid out and the morning was enlivened by a trio of ladies singing Andrews Sisters songs. They, and many of the stall holders, had dressed up in vintage clothing and looked wonderful with their printed frocks, carefully styled hair and bright lips. I came away with this gorgeous little wicker hamper (which I shall fill with edibles as a gift) and the most gorgeous cream coffee pot.

There's nothing like a bit of vintage fun is there?! I'm bowled over by the Springtime Vintage range of papers and have plenty more ideas for them. Do come back tomorrow when they'll feature again in my long-promised box tutorial.

Hope to see you then,

Tuesday, 3 May 2011

A note card using Strength and Hope

One of the things I like about crafting is that I feel a part of a truly caring community. Card makers all over the world have been using their craft to raise money for good causes for many years and whether they're selling cards, donating cards to sell, getting involved in craftathons or whatever - it's all good news. I was so pleased when Stampin' Up brought out their Strength and Hope set to support breast cancer research. If you are thinking of getting a new set, please consider this set as the company are donating £1 to the Breast Cancer Research Foundation for every set sold. The set costs £15.95 in wood mount or £12.95 in clear mount - and you can order your set or get more information by clicking here to email me.

Yesterday I showed you a masculine card made with this beautifully designed set and today I've made a more feminine card.


This card show-cases the incredible butterfly (or is it a moth?) which is so detailed it gives an instant wow to projects! Stampin' Up stamps are made with very deeply etched rubber, so you get a really crisp impression.


Look - here it is in close-up. Can you see how I've stamped it onto the background then layered another cut-out version over the top? One advantage of this is that the antennae show on the bottom stamped image so there's no need to cut out that intricate part!


The background is stamped using the H stamp and my stamp-a-majig. I used Baja Breeze ink but stamped it off onto my scratch pad before adding it to the card stock. This gives a paler version of the colour. The background is layered onto some of the exquisite Springtime Vintage designer paper - but have you seen what I've done to it?


If I zoom in you can just about see the texture - I ran it through the Big Shot with my Square Lattice embossing folder and I love the quilted effect it gives!

Here's how to make this card:

  • Take a piece of A5 Very Vanilla card stock. Score and fold in half to create a card base and set aside.
  • Cut an 8cm x 7.5cm piece of Very Vanilla card stock.
  • Ink the H image up with Baja Breeze ink and stamp a background with it. TIP: Stamping off once on scratch paper will make a paler background. Use a stamp-a-majig to line the Hs up accurately.
  • Sponge the edges of the card stock gently with Baja Breeze ink - using a sponge dauber makes this easy.
  • Stamp the butterfly onto the background using Not Quite Navy ink. Stamp it again on a scrap piece of Very Vanilla card stock and cut it out - no need to cut out the antennae. Layer the cut-out butterfly on top of the stamped one using a thin piece of Sticky Strip. 
  • Stamp a sentiment in Not Quite Navy ink using your stamp-a-majig to make sure it's straight.
  • Cut a 9cm x 11cm piece of designer paper. Tuck it into the Square Lattice embossing folder and run through the Big Shot. Attach the butterfly panel to this using dimensionals, then glue it to the card front.
  • Finish the card by gently easing the butterfly wings up and adding self-adhesive pearls.

Supplies
Stamps: Strength and Hope, Trendy Trees (sentiment)
Ink: Baja Breeze, Not Quite Navy
Card stock: Very Vanilla
Other: Springtime Vintage designer paper, Square Lattice embossing folder, self-adhesive pearls

Thank you for dropping in to have a look at my Strength and Hope projects. I'll be back with a 3D project tomorrow so I'd love it if you can join me then. Meanwhile, all my children have gone back to school today so it's time for me to roll my sleeves up and get this house back into some kind of order!

Have a lovely day!

Friday, 1 April 2011

New Stampin' Up Mini Catalogue unveiled for 2011!

What a fabulous day I had yesterday at my Open House event to celebrate the launch of Stampin' Up's new mini catalogue! It was great to see everyone who came to see the wonderful new goodies on display. If you weren't able to make it, I'll have all the pictures next week but first...


...here I am with the star of the show! I am absolutely in love with my fabulous Big Shot and the stunning dies and folders available in the mini. Of course you can use all your other dies and folders in the Big Shot too but there are some fabulous ones exclusive to Stampin' Up - you'll find them outlined in yellow in the mini catalogue. (There's one on my side bar you can look at or, if you live in the UK and want a copy to curl up with, do email me and I'll send one out to you free of charge.)

My ladies were entered into the free prize draw as they arrived. Would you like to see the prize? Well here it is:


Three stamps, a full-sized ink pad in Melon Mambo, a Stampin' Write marker, card stock, assorted ribbon and some pretty felt embellishments - all arranged in a box and tied up in a cellophane wrapper! Who would be lucky enough to win it? Well, I was exhausted after a busy day but not so exhausted that I didn't want to know! And so, at 11pm the tickets were shaken up in the tin and my daughter asked to pick one out... and... (drum roll here...)

THE WINNER IS:
Jane Cliff

Congratulations Jane!  I know you'll enjoy adding these goodies to your collection!

Now, I can't possibly go without showing you a project, so how about these cute, Cath Kidston-esque chocolate wrappers? 


This was the make and take at my open house yesterday - very simple but so very pretty! This gorgeous new Springtime Vintage designer paper was a real hit with my guests and made perfect little wrappers along with the Four Frames stamp set and coordinating punch. 

Here's how to make them:
  • Cut a piece of designer paper 10.5cm x 11.5cm
  • Apply Sticky strip to one short side and both long sides. Remove the tape backing.
  • Put a Ritter Sport chocolate in the centre of the paper and wrap the non-sticky edge over it. Bow pull the opposite edge tightly over the chocolate and stick down firmly.
  • Pinch the ends of the wrapper together, making sure the paper doesn't overlap.
  • Put the ends of the parcel through the crimper and make two or three crimped lines each side.
  • Stamp a label onto Very Vanilla card stock. Use the stamp-a-majig to add a sentiment.
  • Use the decorative label punch to cut the label out and attach it to the chocolate wrapper using dimensionals.

Supplies:
Stamps: Four Frames, various sentiment stamps
Ink: Rose Red/Always Artichoke/Not Quite Navy
Card stock: Very Vanilla
Other: Springtime Vintage designer paper, decorative label punch, markers

Thank you so much to all the lovely ladies that came to my open house yesterday and to my blog readers for visiting today too  - I've really enjoyed your company! Do take a look at the mini catalogue and send me an email when you're ready to order your new goodies. 

Have a great weekend!