Pages

Showing posts with label Vintage Vogue. Show all posts

Tuesday, 21 June 2011

Growing Green roses!

Oh dear! I just can't leave the Growing Green set alone! Today I made another birthday card using the rose image. Come and have a look:


Now this may look a bit like this design that I showed you last week but it uses a different technique. I stamped the rose image onto Confetti White card stock, using Rich Razzleberry ink, and washed the colour into the petals using an aqua painter. When this had completely dried, I added the leaves and then sponged over the whole card with Bashful Blue ink.


Here's a close-up to show you the purplish tinge you get when the blue ink brushes over the Razzleberry - quite subtle but I rather like it.


I stamped a stitched frame in Cherry Cobbler ink using one of the stamps I made from the In Stitches wheel (see here for how I did it!) and then sponged the edges of the card front with a touch of Rose Red ink. The sentiment is from one of this year's Sale-a-bration sets, retired now.

Supplies needed for this project:
Stamps: Growing Green, Vintage Vogue, So Happy For You (retired), 
Ink: Rich Razzleberry, Bashful Blue, Cherry Cobbler, Rose Red, Basic Black
Card stock: Confetti White
Other: In Stitches wheel
You can buy any of these supplies from me and I can have them delivered to your door. Just send me an email or give me a call on 01280 820593.

I might just have finished making things with Growing Green for the time being because my friendly UPS man has just delivered a box which contains a certain French Foliage set that I've had my eye on for ages! Or perhaps I can combine both... now there's a thought! Thank you for looking at my card today and if you'd like to pop back tomorrow, I'm sure I'll have something a bit leafy going on!

Wednesday, 29 December 2010

Thank you using Vintage Vogue

Hello again! I hope you've all had a wonderful Christmas and are all relaxed and ready for the new year. We've had such a lovely few days - a thoroughly enjoyable family Christmas day and then a little entertaining over the following couple of days. Our guests departed yesterday evening leaving the house strangely quiet!

We have all received some beautiful and thoughtful gifts and I do like to make cards to say thank you. The one I want to show you today is a flat note card which fits in a standard DL envelope.


Can you see? - you just write your note on the front!


I love this beautiful border image from the Vintage Vogue stamp set and feel that it's sometimes overlooked in favour of all the other gorgeous stamps in the set.


Here's how to make this card:

  • Cut a piece of Whisper White card stock 20.5cm x 9.25cm.
  • Using markers, colour the border stamp and, using a stamp-a-majig for accurate placement, stamp the image about 2.5cm from the top of the note card. Ink up the stamp again with the markers and stamp it about 1.5cm from the bottom of the card.
  • Use the stamp-a-majig again to stamp the sentiment.
  • Cut a piece of Soft Suede card stock 21cm x 9.8cm and mount the notecard onto it.

Supplies
Stamps: Vintage Vogue, Thank you Kindly
Ink: Cherry Cobbler
Card stock: Whisper White, Soft Suede
Other: Real Red and Old Olive markers

Now, if you're planning on spending your Christmas money on the Vintage Vogue stamp set or any other Stampin' Up crafting supplies, my advice is... WAIT!!! I am really excited because there's an incredible promotion coming up and tomorrow I'll be able to share it with you! I can hardly wait!
See you tomorrow!

Monday, 8 November 2010

Inspiration from convention

Good morning! Yes - even Monday mornings are good when you're a Stampin' Up demonstrator!

If you are a regular reader of this blog you'll know that I've been away at the Stampin' Up European convention. This event brings demonstrators from the UK, France and Germany together and was held at the beautiful Addington Palace in Surrey.


My goodness did I learn a lot there! I can't wait to show you some of the tricks and techniques I've learned - so now is a great time to get your stamping parties booked!

When demonstrators get together, we like to swap the things we've been making - a wonderful idea as we then have a huge library of styles and ideas to inspire us and our customers. Here are some of the things I made.


This is a tag made from Notably Ornate with a touch of Vintage Vogue, and personalised using my Schoolbook Serif and Just Perfect alphabet sets. I used More Mustard to stamp that fabulous frame and I love the contrast with the Rich Razzleberry of the flowers and the touches of Old Olive. You can't see very well in the photo but I decorated the centres of the flowers with basic rhinestones for a touch of sparkle.

And here's my swap:


There's more than a touch of the US about this card isn't there? I must have been thinking of my American crafting friends when I came up with this design and wishing they could join us at Addington Palace! I used Seeing Stars and Solid Stripes for this card along with the incredibly useful Thank You Kindly sentiment set of four.

I have had the most wonderful few days, sharing what I love doing with so many other ladies who are as passionate about crafting as I am. It was lovely to meet up with friends from around the UK and Europe and I've made new friends too. When I joined Stampin' Up as a demonstrator earlier in the year I had no idea that it would become such a special and fulfilling part of my life - I really cannot recommend it highly enough.

If you've been wondering about joining Stampin' Up, whether to enjoy your hobby at a discount or to turn your hobby into a business, I would love you to join my team. I'm not interested in pressurising you but I can give lots of information, share my own experiences with you and give you the time and space you need to make an informed decision. It only costs £119 to buy the starter kit and you get an astonishing £230 worth of products! Click here to email me.

I'm closing this post with a picture of me (on the right) with my very special upline and friend Michelle Last who walked away from convention with the top prize - UK demonstrator of the year. I am so thrilled for her and she truly deserves her title - she is the loveliest person and it's a pleasure to work with her.


Thank you for dropping in today.
I'll be back tomorrow for a little Christmas gift inspiration.
Hope to see you then.

Wednesday, 3 November 2010

A bunch of Bag-a-lopes!

It's Bag-a-lope week on Crafting Clare's Paper Moments this week! I've never stopped making these quick and easy gift bags, but a friend recently asked me to demonstrate them at her party so I've spent some time experimenting with new designs. Come and see!


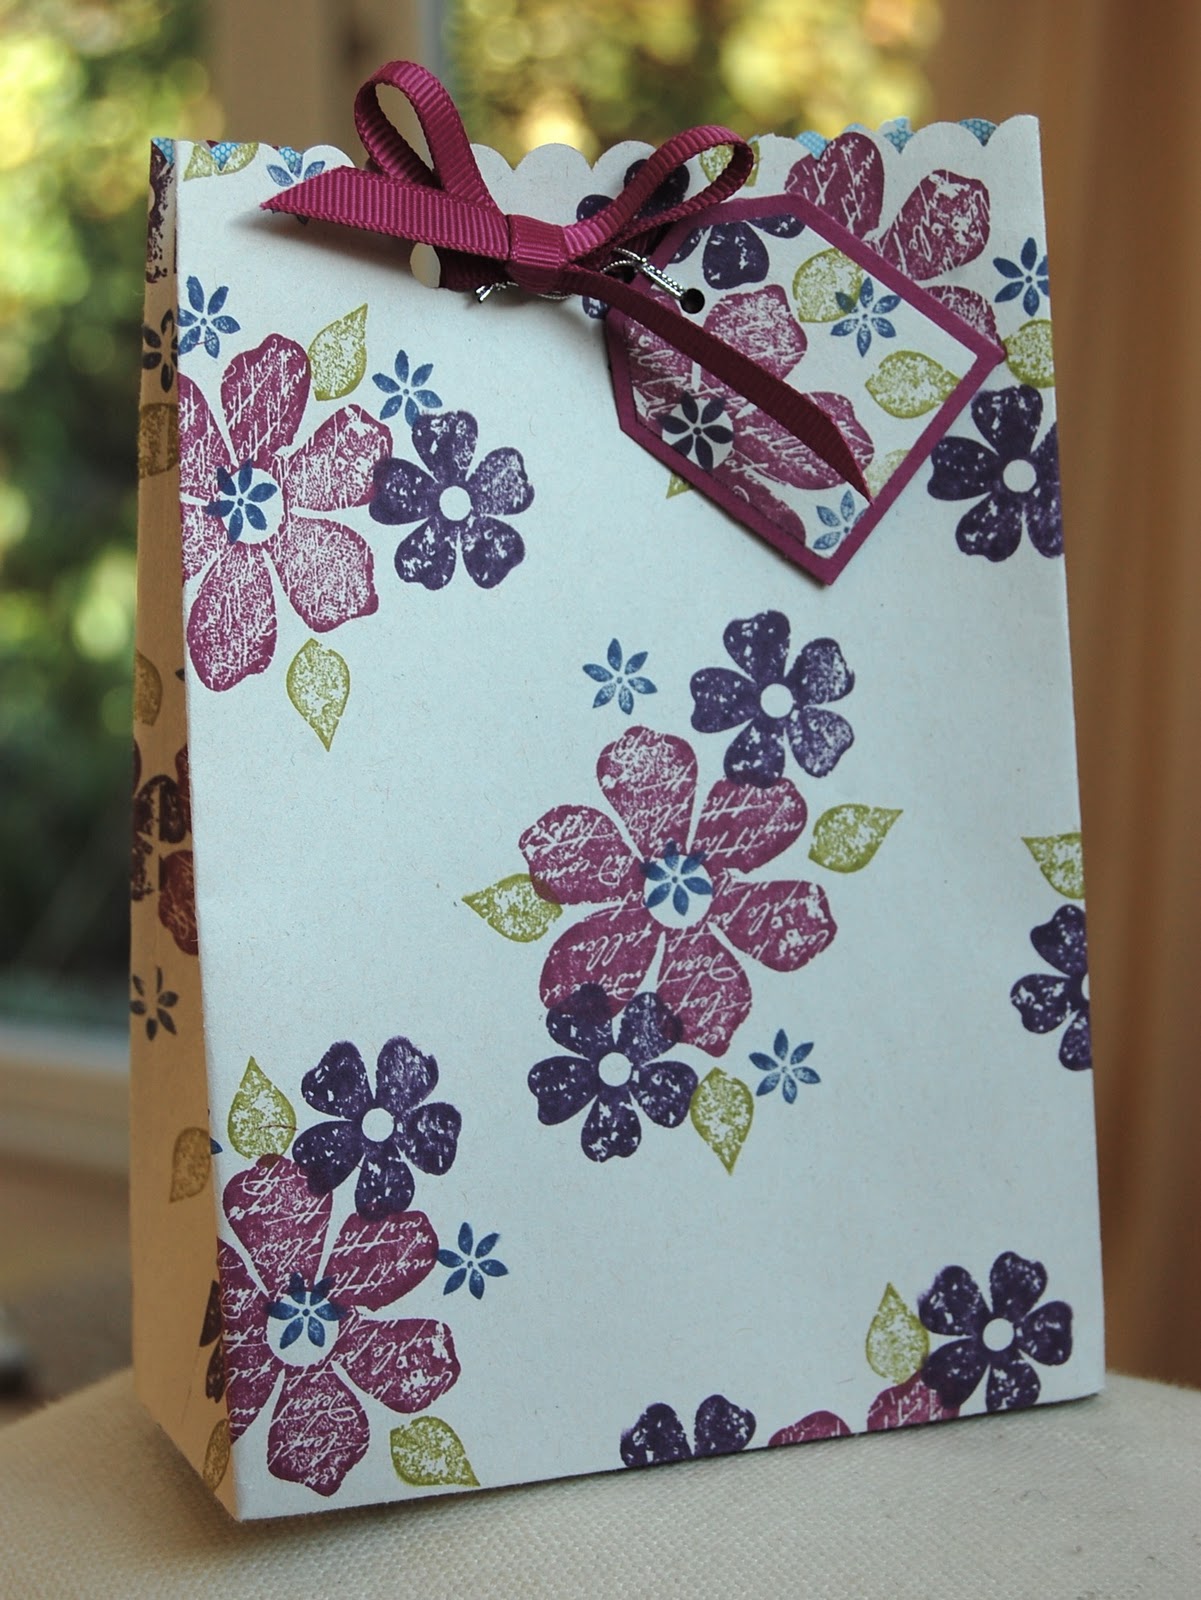
I gave instructions on how to make the basic bag in this post. For the bag above, I scalloped the open edge with my scallop border punch once I'd chopped off the sticky part of the C5 envelope. I used Vintage Vogue for the design along with the tiny flower from Season of Joy - those tiny flower stamps are always so useful. The colours remind me of blackberrying - Rich Razzleberry, Elegant Eggplant, Night of Navy, Old Olive - yum!


This bag was made out of a C4 envelope scored at 2", which makes quite a tall, square shape - the beauty of these bags is that you can make them pretty much any shape and size you choose. I used the scrumptious new Wild Wasabi green and the Medallion background stamp to decorate this bag-a-lope and I thought it was pretty effective. The handles are made from matching strips of card stock fastened onto the bag with silver brads. I stamped an extra Medallion onto a piece of Whisper White card stock and cut it out with the 1 3/4" circle punch to make this coordinating tag. Stampin' Up's elastic cord is perfect for attaching tags to your gifts as well as being very decorative in its own right!


Here's a bag-a-lope which would work well for almost anyone. I stamped it all over with the Circle Circus stamps - and very therapeutic it was too! I used a variety of blues - Pacific Point, Marina Mist, Baja Breeze, Night of Navy and Not quite Navy - and it reminds me of blue and white china.


I love using Autumn Splendor at any time of the year but doesn't it look gorgeous in its Autumn colours?! Always Artichoke, Cajun Craze, Pumpkin Pie and Chocolate Chip were used for this bag and the handle made by punching an oval shape into the top. I made a quick tag using an off-cut of the stamped envelope, some Chocolate Chip card stock and the large and small tag punches. These punches are so incredibly useful - they are an investment you will never regret.


Here's another bag-a-lope inspired by all the beautiful Autumn colours we are seeing around us. The top of this bag is scalloped like the first one but this time I made a tag with a circle punch. I think this 5/8" grosgrain ribbon looks magnificent in Pumpkin Pie and teams beautifully with the Tangerine Tango, More Mustard, Bravo Burgundy and Old Olive of the floral design.


Well, I could go on for hours about bag-a-lopes but you've probably had enough now. I'll leave you to imagine the endless possibilities of what you might put in them!

That reminds me of when my youngest son attended a fantastic music class for pre-schoolers here in Buckingham called Crash, Bang, Wallop! There was always a moment in the proceedings when my friend who ran the class would ask the children "what's in the bag?" The children would all guess what was in the bag and there would be suspense and excitement until all was revealed and a special song was sung about the contents of the bag! My son adored this moment and his guess was always the same. When the question was asked he would always yell out "bees!" with great confidence. Of course, it never turned out to be bees - a strange thing to imagine being in the bag - until my son's last day at the group when my lovely friend arranged for it to be bees (not real ones thankfully!) and my son was amazed and delighted. Sigh. I've gone to what my daughter calls Mumland.

If you're still with me after all my ramblings, have a great Wednesday. I'll be back tomorrow when I'll have come back from Mumland and will be absolutely focused on producing a card in three minutes flat!
Hope to see you then,

Tuesday, 28 September 2010

Vintage Vogue thank you

I've always had a bit of a bee in my bonnet about vintage fabrics and am constantly trying to recreate the feel of them with stamps and ink. Here's a thank you card I made with a fabric in mind:


I think I'm feeling wistful for summer with this colour scheme which reminds me of hot nasturtiums tumbling over a sunbaked Cotswold stone wall...

Here's how to make this card:

  • Cut a piece of Whisper White card stock 11cm square. Make a grid pattern on it using the Fiskars trimmer and scoring blade. Sponge So Saffron ink over this to give a shabby chic look.
  • Use the grid pattern as a rough guide to stamp flowers in. Don't use a stamp-a-majig for this as you want the flowers to look slightly haphazard but still in a square shape! Add leaves.
  • Stamp the flower centres accurately using a stamp-a-majig this time.
  • Use the stamp-a-majig again to stamp the sentiment.
  • Mount the panel onto a 12cm square Very Vanilla card base.

Supplies
Stamps: Vintage Vogue, Season of Joy, Pocket Silhouettes (for the sentiment)
Ink: So Saffron, Pumpkin Pie, Old Olive, Always Artichoke
Card stock: Whisper White, Very Vanilla

I can't get over the many different looks you can get with Vintage Vogue! What a fabulous set! (To see more cards I've made with Vintage Vogue take a look at my index on the side bar to the right.)

Now, don't forget that there are only a couple of days left to take advantage of the bargains on the Last Chance List! Many items are now half price with others at 25% off so it really is well worth a look. Check the updated Last Chance List here and click here to email me your order. Remember, if your order is £30 or over, you will get a brand new Idea Book and Catalogue - bursting at the seams with fabulous ideas and inspiration! - sent to you absolutely free!

Thanks for visiting me today!
Hope to see you again tomorrow.

Friday, 17 September 2010

Vintage Vogue thank you

People really appreciate a hand-stamped thank you and I like to have a stash of them so that I'm prepared at all times. Here's one I made with the Vintage Vogue stamp set:


This set first made its appearance in the summer mini catalogue and has been so popular that it will definitely be carrying over to the new catalogue (OUT SOON! See the top of my blog for details on how to get your copy!) I absolutely adore this set and of course it's not just for vintage-style cards. I'm using the classic Old Olive and Rich Razzleberry colour combination today.

Here's how to make this card:

  • Cut a piece of Crumb Cake card stock 6cm square. Stamp it with foliage and a large flower. Sponge the edges of the card stock with Whisper White craft ink.
  • On a separate scrap of Crumb Cake card stock, stamp another large flower and a small one. Cut them out and attach them to the square with rhinestone brads.
  • Cut a piece of Old Olive card stock 7cm x 8cm and tear it on the diagonal. Attach a loop of ribbon to the front, letting the length of the ribbon fall slightly further than the edge of the card stock. Mount the floral panel on top.
  • Ink up the En Français background stamp with versamark ink. Cut a 9cm square card blank and press it down onto the stamp (this is often the best way of using a background stamp.) Sponge the edges with Whisper White craft ink and add the floral panel.
  • Stamp a sentiment on another scrap of Crumb Cake card stock, cut out using the word window punch and sponge the edges. Attach to the front of the card.

Supplies
Stamps: Vintage Vogue, En Français, Occasional Greetings
Ink: Old Olive, Rich Razzleberry, Whisper White craft ink, versamark
Card stock: Old Olive, Crumb Cake
Other: Rich Razzleberry grosgrain ribbon, Clear rhinestone brads

I'm off to a big Stampin' Up training event later so I've got a few bits and pieces to prepare for that. Demonstrators will be coming from all over the country and we always get very excited when we get together. It's always lovely to chat to people that share our passion!

Whatever you have lined up for the weekend, I hope you have a wonderful time.
See you very soon.


PS STOP PRESS! Stampin' Up have just announced further discounts on the Last Chance List! Some of these prices are just totally unbelievable now! Check the Last Chance List here for your chance to bag a bargain!

Friday, 10 September 2010

Vintage Vogue coordinated gift set

If the weather where you are is the same kind of grey as we're having today, today's post is sure to cheer you up! I made this bright card for a lovely friend of mine to celebrate her birthday and decorated a matching gift box to wrap her gift. Inside the card I wrote 'this card reminds me of you: bright, positive and just a bit dotty... ' Luckily, she has a good sense of humour as well!


The Vintage Vogue stamp set I used to stamp the focal panel is perfect for those beautiful, distressed, vintage cards that are so popular at the moment but, as you can see, works just as well for a more contemporary card. Here's a close-up of the card:


And here's how to make it:

  • Cut a Melon Mambo card blank and stamp it with the Dot Dot Dot background stamp and Whisper White craft ink (I used a stamp-a-majig to position the stamp.) Sponge the edges of the card blank with the ink.
  • Cut a piece of Whisper White card stock 7cm x 11cm and stamp a design using the Vintage Vogue flowers and leaf. Decorate the centres of the Melon Mambo flowers with felt.
  • Mount the panel onto a piece of Taken With Teal card stock 7.5cm x 11.5cm, then onto the dotty card blank.
  • Finish with Melon Mambo polka dot ribbon tied into a bow and adhere to the card with Sticky Strip.

Supplies
Stamps: Vintage Vogue, Dot Dot Dot
Ink: Melon Mambo, Taken With Teal, Old Olive, Whisper White craft ink
Card stock: Melon Mambo, Taken With Teal, Whisper White
Other: Sweet Pea felt pieces, Melon Mambo polka dot ribbon

Vintage Vogue is not on the Last Chance List so it will carry over into the new Idea Book and Catalogue launching on 1st October (see the top of my blog for information on how to get your copy). But that yummy polka dot ribbon will not be available after the end of September, or those fabulous felt embellishments and the Taken With Teal card stock and ink will be retiring too. Click here to take a look at the Last Chance List and if you see something you'd like, give me a call on 01280 820593 or click here to send me an email - I'll be happy to help!

Have a wonderful weekend!

Saturday, 14 August 2010

FTL Challenge 103 with two step bird punch robin

Another Saturday - another FTL challenge! For challenge 103,  Natasha has posted this sketch on the Clean and Simple Stamping site:
And here is my offering this week:


Yes, a Christmas card! The weather has been so lousy in the last couple of days that it's been all too easy to imagine those long winter nights... but it's been great for crafting and doing indoors kinds of things with my fabulous children, so I'm not complaining!

I love sponging with ink but haven't done it for a while, so I really enjoyed using this easy technique today. The background is sponged with Bashful Blue, Pretty in Pink and Old Olive inks, then the ivy and the branch are stamped over the top. The robin is an inked two step bird punch bird popped up on dimensionals (I'm hoping to show you how I made him in my very first video tutorial. EDITED TO ADD: The video tutorial has now been uploaded - please go to the next post to view it.) I stamped a sentiment, distressed the edges of the focal panel and mounted it onto Ruby Red card stock before finishing with some of the lush satin ribbon in Chocolate Chip and attaching it to a Chocolate Chip card base.

I had so much fun that I made another version using a different layout!


Supplies
Stamps: Bird on a Branch, Vintage Vogue, Occasional Greetings
Ink: Bashful Blue, Old Olive, Pretty in Pink, Ruby Red, Creamy Caramel, Chocolate Chip
Card stock: Whisper White, Ruby Red and Chocolate Chip (1st card) or Kraft (2nd card)
Other: Two step bird punch, Chocolate Chip marker

I have a real soft spot for robins so you can expect to see more of this little chap on this blog!
Hope you're all having a happy weekend.
Hope to see you very soon.

Thursday, 22 July 2010

Three Minute Thursday - using Circle Circus

Haven't got time to rustle up a card? Of course you have! Here's another card that took just under three minutes:


It's a one layer card using a favourite colour combination of mine - Rich Razzleberry and Old Olive. Here's how to make it:

  • Cut, score and fold a 9 cm square Whisper White card base
  • Stamp the circle flower image from Circle Circus in Rich Razzleberry ink, stamping off to get colour variations
  • Add leaves using the tiny leaf from Vintage Vogue and Old Olive ink
  • Use Old Olive ink to stamp a sentiment from Sincere Salutations
  • As a final touch round the top right hand corner with a corner rounder.
If you've been looking at my blog for the last couple of days you'll have seen a variety of projects made with Circle Circus. Isn't it versatile? I'm loving it! And I certainly haven't finished yet. I'll be back tomorrow with more Circle Circus cards and A SPECIAL OFFER - Don't miss it!


Monday, 12 July 2010

One layer card using Vintage Vogue

Hello to you! I'm back from a hectic weekend all ready for action! Remember last week I was seeing what I could come up with using Vintage Vogue? Well today I'd like to show you my favourite card from that batch. It's a one layer card - and I am a big fan of those, although I do think they can be the hardest to pull off successfully. I'm pleased with this one:


I used the long border image from the Vintage Vogue set for this, colouring the stamp directly with Regal Rose and Olive Olive markers and positioning it with my stamp-a-majig. The sentiment image has long been a favourite of mine - it's such a strong design. I inked it up with Rose Red ink, slightly darker than the Regal Rose to bring it to the front of the card. And that's it!

Supplies
Stamps: Vintage Vogue, Occcasional Greetings
Ink: Rose Red
Card stock: Whisper White
Other: Old Olive and Regal Rose markers

Hope you had a lovely weekend.
Thank you for coming to visit today.
I'll be back tomorrow with a little gift set.
Hope to see you then.
Friday, 9 July 2010

Vintage Vogue thank you card

If you visited my blog yesterday, you'll know that I was VERY excited to be making cards with the Vintage Vogue stamp set. Today I have another card to show you.

The beautiful flowers in this set immediately suggest pinks and blues but I thought I'd branch out into neutrals. Here's what I came up with:


The larger flower was stamped in Basic Black, the smaller one in Basic Grey... Actually let's stop there! Were the naming colours department of Stampin' Up on holiday when these colours turned up? I love the names of SU colours - Chocolate Chip, Pumpkin Pie, Apricot Appeal (oh dear, hungry again...) and can't imagine why we don't have Beguiling Black or Gracious Grey! Okay, rant over, let's go back to the card: I layered the flowers over a background of Old Olive leaves, adding a little bling. The panel was matted onto Basic Grey card stock and adhered to a Very Vanilla card base.

Supplies
Stamps: Vintage Vogue, Occasional Greetings
Ink: Basic Black, Basic Grey, Old Olive
Card stock: Very Vanilla, Basic Grey
Other: Rhinestone brads from the Pretties kit

Don't you just love this Vintage Vogue set? What I love about it is that you can use this stamp set on its own to make beautiful and very different cards - just add ink and card stock. I've added brads here but I could easily have just punched out a centre for the flowers (see yesterday's post). The set costs £19.95 for   a set of eight stamps and it's certainly all set to become one of my top favourites! If you'd like to order it - or anything else - just email me and I will be happy to help.

I must dash as time as I have a barbecue to go to this evening and could do with a major scrub up! (Although a make-over with Gok Wan might be better!)
Whatever you're doing this evening, have a lovely time.
See you soon!

Thursday, 8 July 2010

Vintage Vogue cards

What a very great pleasure it is to receive a new stamp set! Multiply that by five and the excitement levels go off the scale... yes! I have five gorgeous new stamp sets AND a little bit of time to experiment with them.

Today, I've been having a look at Vintage Vogue and I have to say I'm bowled over by it. I made four cards straight away and I assure you it could have been many more if other duties hadn't beckoned. I thought I'd show you two of them today.

My first idea was to go with vintage blues:


I used Versamark ink to stamp a panel of Bordering Blue card stock with the script image from my Rustic Rooster hostess set, giving a subtle watermark effect. The leaves from Vintage Vogue were stamped with chocolate chip over the top of the script. The flowers were inked up in Bordering Blue and then the edges rolled in Night of Navy ink (this is the Rock n Roll technique). I stamped them, cut them out with paper snips and added pearls from the Pretties kit, then layered them onto the leaves with dimensionals. The panel was matted onto Whisper White card stock and adhered to a Bordering Blue card base, sandwiching a length of blue taffeta ribbon between the layers. I didn't add a sentiment but thought its subtle tones would work well as a sympathy card.

The other card I'm showing you today was such fun to make:


I used an Old olive marker to ink part of the stalk image from Autumn Days and stamped it six times on Whisper White card stock. The small flower from Vintage Vogue was stamped three times in Pale Plum and Rich Razzleberry ink using the Rock n Roll technique, then cut out and adhered to the tops of the stalks. I stamped the tiny leaf onto the stalks using my stamp-a-majig and also three more times on a scrap of Whisper White card stock. I punched out a 1/4" circle from these for the flower centres.  The ribbon was Whisper White 1/4" grosgrain once but with the help of a few markers and a ruler has become a gorgeous stripy ribbon to match my card! LOVE this technique! Here's a close-up:


I made a 'bow' with it by pinching a loop in a brad from my Hodge Podge kit. I matted my main panel onto some Cottage Wall designer paper and finished the card with a sentiment from Sincere Salutations.


Supplies
BLUE CARD
Stamps: Rustic Rooster, Vintage Vogue
Ink: Bordering Blue, Night of Navy, Chocolate Chip, Versamark
Card stock: Bordering Blue, Whisper White
Other: Pearls from the Pretties kit, taffeta ribbon in Bashful Blue

POSY CARD
Stamps: Vintage Vogue, Autumn Days, Sincere Salutations
Ink: Pale Plum, Rich Razzleberry, Old Olive
Card stock: Whisper White
Other: Cottage Wall DP, Whisper White grosgrain ribbon, Soft Subtles markers, brad from the Hodge Podge kit

Well I have had tremendous fun today! And of course, as a demonstrator, it is my duty to do so! If you live in the UK and like the idea of sharing your love of crafting with others, it's time you became a Stampin' Up demonstrator too - and I'd love you to join my team. If you're interested, give me a call on 01280 820593 or drop me an email and I'll happily discuss it with you with no pressure or obligation.

If you're passing this way tomorrow, I'd love to show you the other Vintage Vogue cards I made today.
Hope to see you then.