Pages

Showing posts with label Card in a box. Show all posts

Sunday, 25 April 2021

A box full of spring

Hello, crafting friends!

A lovely crafty friend of mine was celebrating her birthday this weekend and I wanted to make her something a little bit special. This is what I came up with:


I've been admiring the MFT Outside The Box dies (wistfully, from afar!) The cards they make don't have the extra flaps of the traditional box card and I like the simplicity of that. This is a square version I made manually (just until I can convince my bank manager that the dies are essential!)


I cut and scored the box and inserts (and I've put the measurements at the bottom of the post in case you fancy having a go.) All the outside panels of the box were stamped except the tallest panel which was left blank for a message - but the INSIDE of that panel was stamped. I used a neutral ink and a variety of flowers from Clearly Besotted which were then watercoloured in pastel shades.


For the background, I washed in a sky and suggested grass with brush strokes. The grass treatment was also given to the inside of the box and to the inserts, front and back. When everything was dry, I assembled the box with strong double-sided tape, spacing out the inserts evenly.


I stamped, coloured and cut out more of the flowers and glued them to the inserts. I thought a bird might enjoy nestling in there so I added the branch and one of the birds from Stampin' Up's Birds and Branches.


Hmm, bit tricky to post, you may be thinking... but no,  it cunningly folds flat!

Here are the measurements:
For the inserts:
Cut 4 pieces of card stock 1" high x 3" wide (2.5cm x 8.5cm)
Score at 1/4" and 2 3/4" (1cm x 7.5cm)

For the box:
Cut a piece of card stock 4" high x 10 1/4" wide (10cm x 26cm) 
Score and crease at 2 1/2", 5", 7 1/2" and 10" (6.5cm, 13cm, 19.5cm and 26cm)
Turn the card stock 90 degrees and score down the length of the card stock at 2" (5cm)
Cut away the shaded areas as below.


CHALLENGES
I'm linking this card up with Just Add Ink where they theme is Just Add 3D; I'm also squeaking in at the last minute at The Flower Challenge where the theme is Pretty Pastels; We Love Chocolate Baroque has a Springtime theme so I'm joining in there;  Addicted To Stamps and More has a theme of Birthdays so I'm playing along there; and I'm also linking up with Happy Little Stampers Watercolour challenge.


AND IN OTHER NEWS
The sun continues to shine here and I've done some extra long walks with Madame La Floof. I've also indulged myself in another great pleasure - curling up with a good book in an armchair in the garden, surrounded by spring flowers and nesting birds. It's been like a little holiday :)

Sending hugs,

Thursday, 5 February 2015

Sending love in a box From the Garden - Stampin' Up Artisan blog hop

Hello and welcome to the first Artisan blog hop of February! Stampin' Up has sent all the Artisan designers a brand new box of gorgeous products from the spring/summer catalogue and each member of the team will have a completely different take on them! Are you ready to hop?!

A CARD IN A BOX OF LOVE
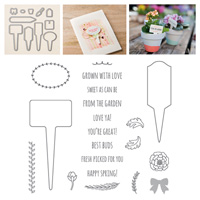
I chose to use the From the Garden stamp set and coordinating Handpicked framelits to make a special valentine or anniversary card. Come and see:


If you're a regular reader of my blog you'll know that I don't do fiddly, time-consuming crafting - clean and simple is my motto! It did take a little bit of time to make this card-in-a-box though but I was able to spend the extra time thinking loving thoughts! Bonus!


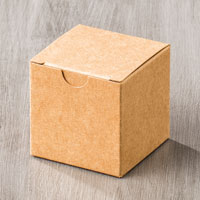
The box bit didn't take any time at all at any rate, because I used one of the ready-made tiny treat boxes! I decorated it with lines of the beautiful leafy border stamp in From the Garden and used more of the images to stamped a label for the front.


See how my garden of love is flourishing inside the box?! Those heart flowers were made from thin strips of Pear Pizzazz card stock for stems and glued punched hearts to the tops. The Stacked with Love designer papers have a lovely textured look and a variety of tones.


To make it look as if these are growing out of the box, the heart flowers were attached to three strips of window sheet fastened to the inside of the box.  (If you'd like to do this yourself, cut 3 pieces of window sheet measuring 3" x 1/2" and score each one at 1/2" and 2 1/2". Fold the little tabs at each end and stick them inside the box with glue dots.)


I'm in love with the garden markers in this set! With its implication that love has grown with the passing of time, wouldn't this sentiment would be perfect for an anniversary?!


If you love the idea of a box full of love but are thinking how tricky it would be to post - don't worry! This card-in-a-box folds flat for posting or giving by hand, which gives the recipient a lovely pop up surprise!


I slipped mine in an ordinary C6 envelope, made a little less ordinary with a border stamped with that gorgeous leafy stamp again!

I hope you enjoyed my project today. Are you ready to send a little love over to my talented teamie Allison Okamitsu? Just click the button below and enjoy!


BUY THE SUPPLIES TO MAKE THIS CARD NOW!
Click on any item to be transported to my online shop!
Don't forget you'll get a free Sale-a-bration item for every £45 you spend
If you have any queries, or prefer to speak to me, I'm happy to help.
You can contact me by email or phone on 01280 820593.

When my youngest son arrives home from school he's got into the habit of grabbing something to eat, then changing and coming out for a walk with the Eva-puppy and me. Yesterday I was pulling my gloves out of my coat pocket and a doggy poo bag fell out. Naturally, Eva grabbed it thinking I had devised an excellent new game for her! "No Eva, that is not for puppies!" I said, extracting it from those teeth. "No," said my son. "It's for poopies!"

I'll be back tomorrow with more crafting fun. See you then!

Friday, 5 September 2014

Card in a Hardwood box using Flower Patch from Stampin' Up

I'm a clean and simple girl at heart so I don't tend to make many shaped or novelty cards but, a little while ago, it was a friend's birthday and I wanted something to make her feel special, so I thought the time was right for my very own Stampin' Up card in a box! Come and see:


Tada! There are lots of tutorials on the internet for making these box cards - I used this one over at Splitcoaststampers and found it surprisingly quick and simple.


I wanted my box to look like a wooden box so I masked off each panel and stamped it with Stampin' Up's Hardwood background stamp. (This stamp is getting a lot of use in my Crafting Square Metre - check out some more of my samples here!)

Once I'd made my box, I needed some flowers to put in it!


Out came my Flower Patch photopolymer stamps and, since Stampin' Up has thoughtfully designed framelits that coordinate with this set, I had lots of flowers and leaves stamped and cut out in no time! These were stuck onto strips of acetate and arranged in the box.


This sentiment makes me giggle and I'm sure my friend, who has a lively sense of humour, will appreciate it too! Bloomin' birthdays eh?!


This style of card folds flat for popping into an envelope, so it's quite practical and, I must say, I thoroughly enjoyed making it. In fact, I'm already thinking of other themes... watch this space!

BUY THE SUPPLIES TO MAKE THIS CARD NOW!
(Click on each item to find it quickly in my online shop) 
If you have any queries, or prefer to speak to me, I'm happy to help.
You can contact me by email or phone on 01280 820593.

Life seems to be happening rather fast in our family at the moment. My eldest son enrolled at college yesterday and starts next week, my youngest son returns to school today and my daughter will be moving out and starting her new life at uni very soon now. I know all three are looking forward to their new routines and I'm sure I will have become used to everything in a month or two but for the moment I can't help wishing I could apply a little gentle pressure to the brakes!

Hope you have a wonderful weekend and I'll see you back here on Monday.

Hugs,