STAMPIN' ON DESIGNER PAPER!
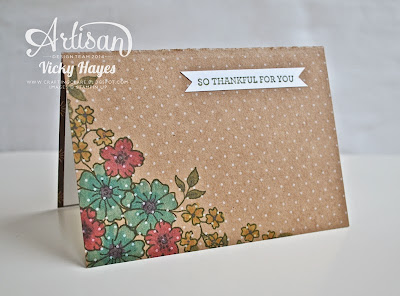
I'm loving the Under The Tree speciality designer paper. It's extra thick which makes it brilliant for boxes but it makes fabulous card bases too! I wondered what would happen if I stamped on the subtle white-on-kraft patterned side, and maybe coloured it with blendabilities... Well, this is what happened:
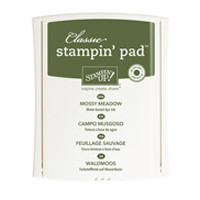
Isn't that pretty?! I used my Mossy Meadow classic ink pad to stamp an outline image (from the hostess set I Like You) and coloured the flowers with various blendabilities markers. Have you tried colouring with these markers yet? You need no skill at all to use them and they give your projects loads of depth!
The dotty design shows through the colouring and I love the extra dimension it gives. The designer paper is double sided but, as you can see in the photo, I lined the inside of mine neatly with Whisper White card stock panels.
This little gift set was made to welcome a lapsed demonstrator back to my team - did you know that if you give Stampin' Up a try but decide it's not right for you at that time, you can always rejoin when it suits you? Well you can - and because the starter kit is completely customisable, you won't double up on any of your supplies!
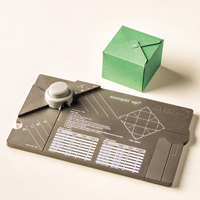
Did you spot this cute little box with the matching label? I was short on time when I was making this but that was okay because the Gift Box Punch Board puts together a box in no time at all! I'll show you how in a minute but first, are you curious to know what's in the box?
YUM! A girl has to keep her strength up of course and I hear that this chocolate is full of antioxidants! It's practically health food!
You're definitely going to want to make some of these quick and easy boxes (they're brilliant as little gifts, favours or stocking fillers!) so here's a video showing you how.
I hope you've enjoyed this project. There's heaps more Artisan inspiration on our blog hop - just click the button below and whizz over the Atlantic to where the lovely Allison Okamitsu has been crafting up a storm!
BUY THE SUPPLIES TO MAKE MY GIFT SET NOW!
(Click on any item to be transported to my online shop!)
(Click on any item to be transported to my online shop!)
My shop is open 24/7 so you can buy Stampin' Up products from me any time, day or night.
If you have any queries, or prefer to speak to me, I'm happy to help.
See you tomorrow,


refreshing flowers in all this snow we are having here! :)
ReplyDeleteHi Vicky . . . I just know you will enjoy your trip to Outer Mongolia(!) or wherever your son thinks you've gone to today!
ReplyDeleteAbsolutely gorgeous gift set containing essential foodstuffs to keep strength up!
Hugs, Sarn xxx
Can't view video as it my computer says NO!
ReplyDeleteNOTHING to do with your video . . . I just have to tweak my computer safety settings somewhere!
xxx
Love the look of the blendabilities right on the kraft!
ReplyDeleteAdorable gift set! Need to get out my Blendabilities and play along!
ReplyDeleteThe colors pop on the kraft! So pretty!
ReplyDeleteBeautiful use of this great DSP.
ReplyDeleteLove these, then again, I think you knew I would, LOL :) xxx
ReplyDeleteVicky, these are darling. I love the paper and the trims you used. Thanks for the video. I hope you and your daughter have a terrific time today.
ReplyDeleteWhat a lovely project, have fun with your daughter
ReplyDeleteJackie x
WOW!! I love those little bitty boxes. I will be making about 30 of them for my nieces treat for school for Christmas...Your directions are pretty clear. But I am hard of hearing...altho with my hearing and your lovely accents, sometimes I don't always hear a lot of Videos. but may I ask the size of the paper, please? Is all sides the same measurements? I just might use a couple of your other projects also.. Thank you much for sharing the boxes..Love em!
ReplyDeleteGorgeous Vicky, love the colouring. Xx
ReplyDeleteooooo.. you're tempting me with that new punch board, those cute boxes look lovely :0)
ReplyDelete