Pages

Showing posts with label Video tutorials. Show all posts

Thursday, 26 March 2015

Little cupcake shaped treat boxes - Stampin' Up artisan blog hop

What amazing creations my team mates from the Stampin' Up Artisan Design Team made for March - and we haven't finished yet! Get ready to climb aboard for another crafty hop round the world!

INTRODUCING THE NO BAKE CUPCAKE!
For my project this week I've made a little something to help someone celebrate a birthday. Come and see:


I can imagine popping this on a colleague's desk, to surprise them when they arrive at work!


Isn't this the cutest little fairy cake?! It's easy to make with card stock and punches and the icing on the cake (yes, the pun IS intended!) is the gorgeous 'sprinkles' design from the Birthday Bash speciality designer paper pack topped with a pom-pom trim 'cherry'.

The cake is even cuter when you take off the top and discover...


... a single Ferrerro Rocher chocolate nestling inside! Very understated!


I made the coordinating card with the Balloon Bash stamp set. The candles on the stamp were coloured with markers and stamped in a row; the card was finished with the wonderful 'celebrate' banner from one of the other stamps in the set.


If you'd like to have a go at making the cupcake favour box, it's very quick and simple to make - I've made a short video to show you how.


I know you'll be excited to see what the talented Allison Okamitsu has to show you today. Click the button below to hop over and see!


BUY THE SUPPLIES TO MAKE MY CUPCAKE SET NOW!
Click on any item to be transported to my online shop!
Don't forget you'll get a free Sale-a-bration item for every £45 you spend
If you have any queries, or prefer to speak to me, I'm happy to help.
You can contact me by email or phone on 01280 820593.

I'm really enjoying having my daughter home for the holidays. Yesterday she had me in stitches describing what happens when she phones home on the land line and her father picks up the phone:

DD: Hello, it's me!
OH: Who is this?
DD (indignantly): It's me, your daughter!
OH: Oh hello, it's daddy here!"

See you tomorrow,

Thursday, 13 November 2014

Blendabilities on Under The Tree card bases - Stampin' Up Artisan blog hop

Hooray! It's Thursday and that means the Stampin' Up Artisan Design Team gets together to show what we've been making with all the gorgeous products that were sent to us this month. You might want to pour yourself a nice cup of coffee, sit back and hop around the world with me!

STAMPIN' ON DESIGNER PAPER!
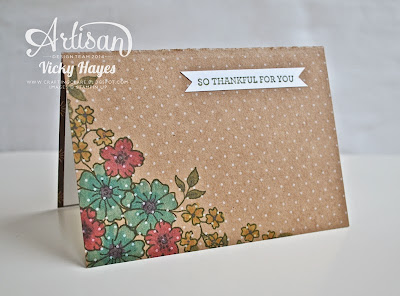
I'm loving the Under The Tree speciality designer paper. It's extra thick which makes it brilliant for boxes but it makes fabulous card bases too! I wondered what would happen if I stamped on the subtle white-on-kraft patterned side, and maybe coloured it with blendabilities... Well, this is what happened:


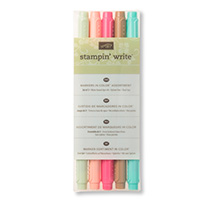
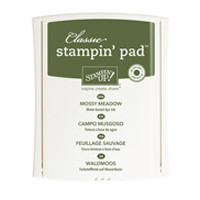
Isn't that pretty?! I used my Mossy Meadow classic ink pad to stamp an outline image (from the hostess set I Like You) and coloured the flowers with various blendabilities markers. Have you tried colouring with these markers yet? You need no skill at all to use them and they give your projects loads of depth!


The dotty design shows through the colouring and I love the extra dimension it gives. The designer paper is double sided but, as you can see in the photo, I lined the inside of mine neatly with Whisper White card stock panels.


This little gift set was made to welcome a lapsed demonstrator back to my team - did you know that if you give Stampin' Up a try but decide it's not right for you at that time, you can always rejoin when it suits you? Well you can - and because the starter kit is completely customisable, you won't double up on any of your supplies!


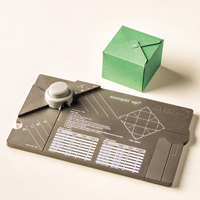
Did you spot this cute little box with the matching label? I was short on time when I was making this but that was okay because the Gift Box Punch Board puts together a box in no time at all! I'll show you how in a minute but first, are you curious to know what's in the box?


YUM! A girl has to keep her strength up of course and I hear that this chocolate is full of antioxidants! It's practically health food!

You're definitely going to want to make some of these quick and easy boxes (they're brilliant as little gifts, favours or stocking fillers!) so here's a video showing you how.


I hope you've enjoyed this project. There's heaps more Artisan inspiration on our blog hop - just click the button below and whizz over the Atlantic to where the lovely Allison Okamitsu has been crafting up a storm!


BUY THE SUPPLIES TO MAKE MY GIFT SET NOW!
(Click on any item to be transported to my online shop!) 
If you have any queries, or prefer to speak to me, I'm happy to help.
You can contact me by email or phone on 01280 820593.

I'm off to see my lovely daughter in Manchester today and I'm so excited! When I spoke to her yesterday she had all sorts of plans for us. "And I have some plums!" she said obscurely. "So I can ply you with tea and plums!" Hmm. Might just take one or two little snacks in my handbag!

See you tomorrow,

Friday, 31 October 2014

Another no sewing canvas bag using Build a Banner flags from Stampin' Up

The Stampin' Up Build a Banner kits are fabulous for setting the scene at a celebration but you don't always need all the flags - so what do you do with the left over ones? I came up with the idea of making a no sewing required gift bag/pouch with a pair of them (see the original post here) and I've taken the idea a step further today. Come and see:


This time I stamped the canvas with a floral design using Memento black ink and coloured it in with Stampin' Up's fabulous blendabilities alcohol markers.


I'm delighted with the way it turned out and yet again those fab markers have proved that they really deserve a place at the top of your Stampin' Up wish lists! The stamp set is a hostess set appropriately named I Like You - and I must say I certainly do!


I love the way the eyelets on the flags form the perfect place to thread a handle through. I made this bag's handle with the gorgeous Blackberry Bliss stitched satin ribbon.

The Build a Banner kits are great fun - and there's a refill pack too containing just blank flags and twine for stringing them together....


... and now you can make bags out of the left over ones! Watch out for a video tutorial coming very soon! EDITED TO ADD: And here it is:


BUY THE SUPPLIES TO MAKE TODAY'S CANVAS BAG NOW!
(Click on any item to be transported to my online shop!) 
If you have any queries, or prefer to speak to me, I'm happy to help.
You can contact me by email or phone on 01280 820593.

I  have filmed a video tutorial for my canvas bag but just need to edit and upload it.. I meant to have it on this blog post but yesterday, I got back from the chores to find my youngest son not feeling well. He was running a temperature so I ran him a tepid bath and made him a nest on the sofa afterwards. It was then that he melted my heart by saying "Thank you for being with me." Well it's my privilege - the video will wait. EDITED TO ADD: Video now uploaded because my poorly pudding has been asleep for much of the day. Poor old chap being ill in the holidays :(

I hope you have a lovely weekend with happy trick-or-treating for those that celebrate Halloween. See you very soon,

Monday, 27 October 2014

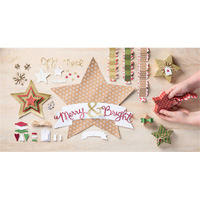
NEW! Many Merry Stars kit from Stampin' Up!

If you were to ask me what's super-hot at Stampin' Up at the moment I'd have no hesitation in telling you - it's definitely the Many Merry Stars Kit!


Inside the kit is everything you need to make 26 star boxes in varying sizes and includes fabulous embellishments and die cut words.


The only extra thing you'll need is glue to attach the embellishments but the star boxes themselves have sticky strip already applied. They are easy to make and fun to decorate!

There are so many ways to use these boxes:

• Decorate your house with them for Christmas
• Attach string to the smaller ones and hang them on the tree
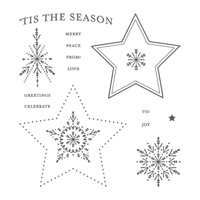
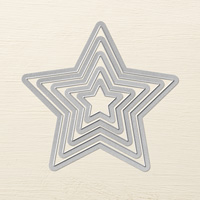
• Use Stampin' Up's coordinating star framelits to make a window in the boxes
• Stack them in decreasing sizes to make a stylised Christmas tree
• There are 26 boxes and they work brilliantly as an advent calendar!
• Children will love making these boxes in the holidays
• Homemade edibles and other gifts will look fantastic in them!

The boxes don't require any stamping but, if you're like me and get withdrawal symptoms if you aren't tapping a stamp into some ink, you'll be glad to know that there are coordinating stamp sets available. You can use Bright and Beautiful from the Stampin' Up autumn/winter catalogue or Many Merry Stars from the brand new supplement.

And talking of the new supplement, come and have a look through it with me and someone very special:


BUY THE MANY MERRY STARS KIT AND OTHER STARS NOW!
(Click on the pictures to be transported to my online shop!) 


My shop is open 24/7 so you can buy Stampin' Up products from me any time, day or night.
If you have any queries, or prefer to speak to me, I'm happy to help.
You can contact me by email or phone on 01280 820593.

It's been another hectic weekend but I'm happy today because it's half term this week and that means that I get to spend a bit more time with my super stars!

See you tomorrow with some Christmas inspiration!

Friday, 4 April 2014

My Easter bunny box with ears

You may have noticed that I'm ever so slightly obsessed with rabbit ears... well they're so cute! Do you remember my chevron bag treat bag with ears? well I thought my latest little box would be great for place settings for an Easter Sunday meal or as a treat for anyone who melts at the sight of rabbit ears (even my eldest son forgot to be manly when he saw these!) Come and see:


How adorable are these little cuties?! To make them I've used two different patterns from the wonderful tone-on-tone designer paper stacks that come in all the Stampin' Up colours.


The bunny noses are tiny hearts cut out with the Owl punch and I like the way the bakers twine looks like whiskers!

These boxes are so quick and easy to make that it would be a shame not to make some! And I've even provided a step by step video tutorial for you:


HERE'S WHAT YOU'LL NEED TO MAKE MY RABBIT BOX
(Click on each item to find it quickly in my shop) 
Punches: Large oval, Owl punch (for the tiny heart nose!)
Click above to place an order any time, day or night,
but if you have any queries, or prefer to speak to me, I'm always happy to help.
You can contact me by email or phone on 01280 820593.


My children once had a toy called Bun Bun. It wasn't a rabbit though, it was a mouse! It was probably intended as a toy for a cat - you pulled the string and the mouse was supposed to creep along realistically, providing endless pleasure for some savage feline.  I don't know if Bun Bun had been on the cooking sherry or something but when you pulled her string, she just went round and round in circles and our cat showed no interest in her at all! She featured as a heroine in many of the boys' games  and was very much loved and, although she lives up in the attic now, we do impressions of Bun Bun sometimes!

 See you tomorrow,

Friday, 21 March 2014
Getting inky with the Wetlands goose

I had a phone call the other day from a lovely lady who mentioned Stampin' Up's Wetlands stamp set and got me all fired up about it again; on the same day I was experimenting with acrylic block inky backgrounds and I came up with a 'kissing' technique. These seemingly unconnected events explain why this gorgeous goose has popped his head up to say hello today - come and have a look:


The acrylic block was inked up and then the circle stamp from Geometrical was stamped onto the block - the 'kissing' technique. When the block was sprayed, the circles softened and turned into arty bush shapes as you can see in the close-up below:


Isn't that the perfect home for the Wetlands goose?! I used a masking technique to enable his tail feathers to poke out of the frame so I'm linking up with Less is More for the second time this week - the challenge there is Masking and Stencilling. My goose will also enter the Make Your Mark challenge at Addicted to Stamps and More.

For those that like a video, here's how I made this card (with the bits where I dropped everything and stuck my elbows in the ink edited out!)


HERE'S WHAT YOU'LL NEED TO MAKE THIS CARD
(Click on each item to find it quickly in my shop) 
Card stock: Whisper White
Click above to place an order any time, day or night,
but if you have any queries, or prefer to speak to me, I'm always happy to help.
You can contact me by email or phone on 01280 820593.

CHOOSE A FREE SALE-A-BRATION GIFT WITH EVERY £45 YOU SPEND (excl. p&p)

I remember when my children were tots, taking them down to the river in the winter with bread for the ducks and geese that live there. I would tell them how difficult it was for the birds to find enough food and how grateful they would be for our scraps. In fact Buckingham is a place with a lot of young families, many of whom had the same idea, so the reality was that we would arrive at the river to find the wildlife practically reclining on lilos in the river, sipping champagne and snacking on caviar blinis!

Have a fantastic weekend and I'll see you very soon.