Pages

Showing posts with label Nesting Arches dies (The Greetery). Show all posts

Friday, 28 June 2024

The greatest gift

Hello, crafting friends!
 
Despite apparently living in tropics this week, I've been thinking about Christmas! The 25th of the month rolled round again, sparking another 'Aaargh! We're halfway through the year and my festive stash has failed to grow' panic. So I consulted some challenges and got to work.
 

Recently, I had a big clear out of my designer paper drawers and donated a whole load of tone-on-tone papers to some resourceful local children who were raising funds for their school by making and selling paper flowers. While I was sorting, some beautiful old Stampin' Up Christmas papers came to light and I used this cheerful stripe from them to create my gift. I cut a red card panel, and a smaller paper panel; the paper was cut into four pieces which were glued to the edges of the red panel. This revealed a 'ribbon' as the red panel showed between the paper pieces.
 

The tag was cut out of white card using an arch die from The Greetery. I stamped it with two sentiments from Reverse Confetti's The Best Gift of All and heat embossed in gold before mounting on another arch cut out of red card this time. The tag was glued to the 'gift' at a jaunty angle, decorated with various foliage and berries and finished with a die cut bow and a matching enamel dot. I attached the panel to a kraft card base to pick out the kraft colour in the paper design.

CHALLENGES
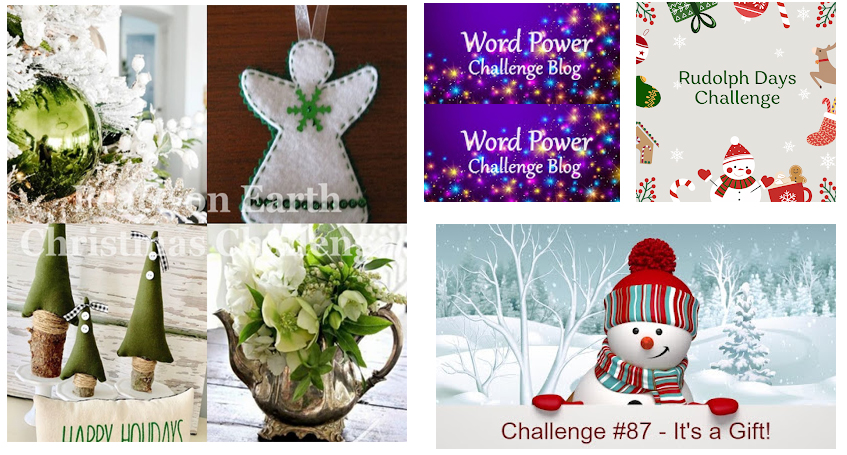
I was inspired by the Christmas Kickstart Challenge where this month's theme is It's a Gift; also Peace On Earth Challenge where there's a lovely kraft and green mood board; also Word Power where the sentiment is required to be the focus of your card; and last, but not least, Rudolph Days where Anything Christmas goes - this challenge has been triggering me to make Christmas cards on the 25th of each month for years now!!
 

AND IN OTHER NEWS
Lulu has learned some useful tips from her fluffy sister since she's been here. One of them is that the hallway is a cool and shady spot when the temperatures soar...
 

... and it's also an excellent surveillance spot - she knows EXACTLY where everyone is at all times, even if she does have a little snoozle!

Sending hugs,

Monday, 27 May 2024

Peaceful village

Hello, crafting friends!
 
It was the 25th of the month on Saturday and I rolled up my sleeves to make a festive card ready for that 25th later at the end of the year! 
 

I started with an arch, cut from an offcut of white card with one of the nesting Arch dies from the Greetery. I blended ink over it (Misty Moonlight from Stampin' Up) then wet my hands with water and clapped them over the panel, blotting with a paper towel to create a subtle starry sky.
 

The Winter Village dies from Tonic (that I won as a prize draw at the Snippets Playground) were still out on my table, and I used the line of houses and church from it to create a village scene. I cut one from watercolour card, one from yellow card and several from black card - all snippets! The watercolour die cut was coloured with ink and water and I added snow with a white acrylic pen when it was dry; the yellow die cut was used to replace some of the windows on the watercolour scene to make them look lit up; one of the black die cuts was used to back the whole scene to give it some dimension; the remaining black versions were cut up and used to create the illusion of houses behind the main street.
 

The sentiment is from The Best Gift of All by Reverse Confetti, stamped in versamark ink and heat embossed with white embossing powder. I added a crescent moon, cut from the yellow card with a circle punch.

CHALLENGES
I'm linking up with Rudolph Days which has instilled into me the habit of making a Christmas card on the 25th of every month! I took my colour palette from Peace on Earth's lovely mood board so I'm joining in there too. And of course this is a snippety card so I shall romp over to the Snippets Playground and actually remember to link it up this time!!!

 
AND IN OTHER NEWS
This aristicratic lady, who lives in the neighbourhood, is currently occupying some of my time.
 

Her interests include having her furs brushed, plaintively ordering rich dishes (such as Dover sole with a prawn cream sauce) and telling me long and complicated stories about hunting exploits in her distant youth!

When I return home after attending to her requirements, the golden girls sniff me suspiciously!

Sending hugs,

Thursday, 25 April 2024

Late daffodils

Hello, crafting friends!
 
It's time for another Tic Tac Toe challenge! There's loads of lovely inspiration on today's board so I do hope you'll want to come and join in with us :)
 

I've opted for the diagonal from top left - Flowers/Free/Die Cuts and made a belated birthday card for a pal whose birthday had disappeared under a load of random boxes in my chaotic little brain - aargh!
 

I started with Altenew's Daffodil Delight embossing folder, positioning my card panel in the folder at an angle and using my squidgy mat to avoid hard lines. I then decided to cut the panel into a tag with a nesting arch die from The Greetery which flattened my embossing a little but hey ho! Next time I will die cut first and THEN emboss!


I'd used watercolour paper as my panel so I could use my Arteza watercolour brush pens to colour the image - yes I managed to plan ahead for that bit! The watercolouring is what is called 'loose' when the professionals do it but that when I do it is probably more accurately described as 'messy'!
 

The little tag was stamped with a sentiment from Altenew's Birthday Greetings and cut out with a circle punch. I used a couple of small punches to make a hole and a hole strengthener, then threaded some yellow ribbon through it and secured with glue dots. Finally, the tags were attached to a card base.

Okay, so now it's your turn! Here's how to play: First, hop over to the Tic Tac Toe blog to check out the amazing inspiration from my team mates; Next make your own creation using the suggestions from a row, column or diagonal on the board; Finally, use the Linky Tool at the bottom of the challenge blog and share your creation with us - we can't wait to see what you make!

CHALLENGES
Jaydee's challenge at The Paper Players this week is Clean and Simple spring flowers, and I have used the fresh green, yellow and aqua colour palette at The Color Throwdown; I'm also visiting Can You Handle the Pressure as I used an embossing folder and am joining in with the All Occasions challenge at Krafty Chicks with my belated birthday card.


AND IN OTHER NEWS
After mentioning how fluffy Lulu is getting, I thought you'd like to see 'before and after' photos of her:
 

Here she is in November last year, looking very thin and short haired, and with no 'feathers' on her legs. 
 
 
And here she is yesterday, out on what I call 'a walk' but that the girls have decided is 'a rabbit hunt'!  Look at those floofy pantaloons and that luxuriant tail! What a beauty!

Sending hugs,

Tuesday, 9 April 2024

Floral notes

Hello, crafting friends!
 
There's a new colour challenge in Blogland! It's called AAA Colourful and is the sister challenge to AAA Cards and AAA Birthday which we all know and love. The challenges start mid-month and close on the 14th so there's time to join in. Come on you crafters - let's show some support!
 

I missed the first challenge but here is the mood board for this month and I couldn't resist these gorgeous colours. Here's what I made:
 

There was a discarded piece of white card that had been die cut with an Arch die on my table, so I stamped it with Waffle Flower's Poppy Hawthorn stamp set which was also out on my desk. (Do you think I should clear up?!) I coloured the flowers with Arteza  watercolour brush pens (also out on my table!!) and left the panel to dry.
 

Meanwhile, I trimmed a piece of Stampin' Up gingham DSP to size and glued it to a card base, adding a coordinating strip of card on the top. The dry floral panel was stamped with a sentiment and a line and secured to the card front with dimensional pads.

CHALLENGES
I'll be linking this card up at AAA Colourful :)
 

AND IN OTHER NEWS
Eva has disgraced herself I'm afraid. We went for a walk at a location we haven't been to for a long time and she was so excited she had a little roll in something very foxy indeed. The drive home was a little er, 'fragrant' and I don't think my OH will be coming out with us again for a while! After a full shampoo and blow dry, normal nasal service was resumed, but Eva looked like this:
 

Sending hugs,

Thursday, 14 March 2024

Birthday blossom

Hello, crafting friends!
 
Today I'm enjoying being the Surprise Party Guest at Seize the Birthday where Jules has chosen a fabulous new challenge and loads of inspiration from their talented design team! So what's the Topping?
 
It's a fun one - to make a coordinating tag and card set! There's a spring birthday coming up in my family so I couldn't wait to get started. Being a lazy crafter, I decided to stamp and colour one image and then divide it into two pieces with dies - cunning huh?!
 

Using Nesting Arch dies from The Greetery, I was able to created an inset panel on a card and a double layer tag for my gift. Here's a closer look at the card:
 

Isn't that blossom image beautiful?! The cherry blossom isn't out here yet so it gave me a lift to see it on a card!
 

The stamp is from Blossoms in Bloom by Clearly Besotted, stamped on watercolour paper, coloured and splattered with my Arteza watercolour brush pens, and left to dry before cutting the arch. To complete the card I cut the same size arch in a card panel and used it to position the blossom arch before popping it up on dimensional tape.
 

The sentiment is a favourite from The Greetery's Arched Sentiments set, positioned to overlap the 'frame'. The card was finished with a few clear gems.

Here's a close up of the tag:
 

There's a little bud sprig at the end of the blossom image which I thought made the perfect image for the coordinating tag - not the same but clearly a part of it. I added a sentiment and a gem and tied the tag with a larger arch onto the gift with coordinating ribbon from my stash.

I had so much fun making this card and tag set! I do hope you'll join in and enjoy yourself too :) Don't forget to go to the Seize the Birthday blog and check out all the samples the amazing design team have made to inspire you. You can use the Linky Tool at the bottom of the post to share your own creation. 

CHALLENGES
I'm linking up with Double D where the theme is First Signs of Spring - and I've gone for blossom!Make My Monday and Try it on Tuesday both also have a Spring theme so I'm joining in there; and Retro Rubber want to see a card featuring favourite spring flowers using stamps older than a year (Blossoms in Bloom was a 2019 release.)
 

AND IN OTHER NEWS
With Mothers Day taking place last Sunday and coinciding with a family birthday on the Monday, we've unexpectedly had everyone come to visit. What a joy it was to feast and laugh and chat and catch up! Going out to a restaurant to eat always triggers memories of our family holidays when our offspring were children and it always amazes me that what everyone remembers is different. One thing we all remembered from a holiday in Kent was when we came across a signpost giving directions to Ham on one arm and to Sandwich on another. This tickled us so greatly we must have laughed for about half an hour! What a blessing family is!
 
Sending hugs,

Saturday, 9 September 2023

Autumnal mushrooms

Hello, crafting friends!
 
Are you ready to do some Saturday crafting? Well have a look at the new Code Word at Addicted to CAS, brought to you this time by Ceal:
 

I was thrilled to see this word because it gave me a chance to get my Greetery Mushroom dies out and have a play! I think mushrooms make a lovely autumnal focal point and they're great for male cards.
 

This one is for my eldest nephew whose birthday is in October, and who will be celebrating with a slap up meal at my house this year! It's very simple. I made a stencil out of the waste from die cutting an arch and sponged inks into it. The arch was extended with sticky notes to form the banner and I continued the ink blending with those in place.
 

The mushrooms were die cut from snippets of white card stock and sponged with ink, then I assembled them and glued them to my background. The card was finished with a pair of sentiments I'm enjoying combining lately - Happy Birthday from Uniko's Floral Vines and Have a Wonderful Day from Clearly Besotted's Fly With Me.
 

Okay, so now it's your turn! I know you have some mushrooms in your stash somewhere... why not get them out and make a clean and simple card to share with us! You'll find loads of inspiration at the Addicted to CAS challenge blog and will find the Linky Tool at the bottom of the post to link up your own creation. Have fun!

CHALLENGES
This is my homework for The Snippets Playground - I used snippets of white card to die cut my mushrooms and used die cutting waste to make a stencil; I'm also joining in with Four Seasons where Anything Goes with a Fall Theme; it's Anything Goes with a birthday theme at HLS Birthday so I'm linking up there; also Less Is More, which also has an Anything Goes challenge and the cards must be clean and simple of course; I'm also sharing at Darnell's NBUS Challenge where we showcase our Never Before Used Schtuff.


AND IN OTHER NEWS
The summer in the heart of England has been odd this year. It's tended to be warm but damp and the combination has brought the mushrooms out like a rash!  We've seen proper fairy rings appear in the fields behind our house, and who better to frolic about in them...
 

... than our very own fairy queen! She's obviously been trying to magic up some extra treats but it's just not working... we have to watch that waistline madam!

Sending hugs,
 

Monday, 21 August 2023

Just keep swimming

Hello, crafting friends!
 
After a long walk on Saturday morning with Eva and her spaniel pal, I thought the rest of the morning would be good for ignoring the chores and instead having a catch up with some challenges that have caught my eye this week! Please don't judge! 
 

So this card was started by cutting a panel and taping an arch die cut upside down onto it. I then positioned Uniko's Tiger Print stencil over the top of that and sponged blue ink into it. The stencil was taken away but before removing the arch mask, I sponged more blue ink over the top of the stenciling. I wanted it to look like swirling ocean waves.
 

In the upside down arch shape, I coloured a sky and sea with more sponged ink and some coloured pencils. I stamped a fish from Clearly Besotted's Under the Sea on a snippet of white paper, coloured it with coloured pencils and fussy cut it. The sentiment is from MFT's You're Fin-tastic, stamped in dark blue ink and heat embossed and the fish was popped up on a dimensional pad next to it. The panel was glued onto a yellow mat, attached to a card base and the card finished with some lovely shiny enamel dots for a bit of extra detail :)

CHALLENGES
Jen Mitchell's sketch at Freshly Made Sketches intrigued me and I had to join in there; The inspiration photo at Inspired By dictated the theme, along with Allsorts where Brenda's challenge is All (Real) Creatures Great and Small; I'm also playing along with Happy Little Stampers Stencil challenge where Anything Goes.
 

AND IN OTHER NEWS
When Eva found out the title of this post, she assured me that she has every intention of keeping on swimming!
 

I think she's enjoying her summer!

Sending hugs,


Saturday, 17 June 2023

After the flood

Hello, crafting friends!
 
Happy Saturday and welcome to a new challenge at Addicted to CAS! Nancy has chosen the code word for this coming fortnight:
 

Everyone likes the colours of the rainbow don't they! I've based my card on the actual rainbow. In the story of Noah in the Bible, it appears after a cataclysmic flood and is a sign of God's promise that the world will never again be destroyed by flood.
 

My rainbow was made by tracing around the tops of The Greetery's Nesting Arch dies. I coloured it with coloured pencils and partially covered it with storm cloud cut from a snippet of grey card with one of Lawn Fawn's Puffy Cloud border dies. I added a sentiment from MFT's All Occasion Sentiments, stamped in red ink on an offcut of vellum, heat embossed with clear embossing powder and trimmed with sharp paper snips. The card was finished with bright enamel dots to pick out some of the rainbow colours.
 

Okay, so now it's your turn! Do hop over to the Addicted to CAS challenge blog and check out all the fabulous cards my team mates have made to inspire you. You'll find the Linky Tool at the end of the post and you can use it to share your own creation. Don't forget we are a clean and simple challenge so do make sure you include plenty of clear space when you design your card. We can't wait to see what you make!
 
CHALLENGES
I'm linking this card up with Happy Little Stampers Die Challenge, where Anything Using Dies Goes; Also the Snippets Playground, where we go to share cards using our snippets and there are amazing prizes to be won too!


AND IN OTHER NEWS
My eldest son is staying with us at the moment. He wandered in the other day and my husband asked how he was. "Just ticking along?" he enquired. My son assured him that he was ticking along nicely thank you. This exchange made me laugh. "You're like a little clock aren't you," I teased. "What do you mean?" asked my son. "Only right twice a day?!"

Sending hugs,