Pages

Showing posts with label Perfect Sentiments (Pinkfresh Studio). Show all posts

Sunday, 14 April 2024

Inspired by primulas

Hello, crafting friends!
 
I have been looking after a friend's cat while she (the friend, not the cat!) swanned off in search of fun and sunshine. To welcome her home, I arranged a bunch of spring flowers and made a card to go with them. I was short of time, so this is a very quick but cheery card, just right for the back-from-holiday blues.
 

I reached for a retired Stampin' Up set called Bloom by Bloom, which I've never inked up. It is absolutely perfect for quick stamping! The large flower reminded me of the bright pink primulas which come out in my garden at this time of year, with their happy yellow centres :) I stamped a pattern using a group of three of the flowers to anchor it, and positioned a bold sentiment from Pinkfresh Studio's Perfect Sentiments in the centre.
 

The panel was trimmed to size with a stitched rectangle die from Heffy Doodle and I mounted it on a Bermnuda Bay panel cut slightly larger. This was attached to a card front and decorated with a few matching gems.

CHALLENGES
The bright colour palette is from Claire's challenge at the Paper Players this week; I'm also linking up at Little Red Wagon where Kate wants us to be inspired by a photo (see In Other News below); and, since this set is seeing ink for the first time, I am visiting Darnell's NBUS Challenge


AND IN OTHER NEWS
I have a really tiny garden but I take great pleasure in it. It has a tiny patch of grass, just big enough for a pair of golden retrievers to sunbathe on, which I 'mow' with a little handheld electronic gadget. I don't like the look of naked fence, so I have grown ivy up the fences which attracts loads of little birds for feeding and nesting. And there are flowers (although never enough!) which brighten my days throughout the year :) There's the bright pink primula which inspired today's card and which was one of the first things I planted 23 years ago when we moved here. 


It has self seeded and the one in this photo has settled on the edge of the gravel path. It's not the ideal spot as we trip over it on the way to the water tap, but I thought it was so friendly growing there, close to the house, that I've let it remain.

Sending hugs,

Thursday, 4 April 2024

Playing with layers

Hello, crafting friends!
 
Welcome back to The Flower Challenge where we are going for layers this month!
 
 
I'm not usually very comfortable with lots of layers, but I've gone all out on this card with a layered background and a spring bouquet layered up with foliage and flowers!
 

The design started with a neutral background, layered with a strip of an ancient SU paper. I trimmed this to size with a stitched rectangle die from Heffy Doodle and stamped the bottom corner with my sentiment from Pinkfresh Studio's Perfect Sentiments.
 

The bouquet was made up of the Greetery's Inside Out foliage dies, cut from black card; and the Wildflower dies, also from the Greetery, cut from white card and coloured with inks and daubers and coloured pencils. I glued everything in place and finished with a rustic twine bow.
 

Okay, now it's your turn! Do hop over to The Flower Challenge blog won't you - there is some incredible inspiration from the design team! When you're ready to share your own design, you can use the Linky Tool at the bottom of the post. Do make sure flowers are the focus of your design and have fun creating!

CHALLENGES
I'm linking this card up with Seize the Birthday where Linda has chosen the Topping of Spring Floral. Also Addicted to Stamps and More where the challenge is to Use Dies and/or Stencils.
 
AND IN OTHER NEWS
There's lots of talk about spring but, after a reprieve of a day or two, the rain and the mud is back :/ But the golden girls don't mind a mucky walk and they get to have a spa treatment or two afterwards before a cordon bleu dinner in the Kitchen Restaurant and relaxation in The Lounge Area.
 

Lulu wonders what happened to those cucumber slices for her eyes...? You ate them Lulu!

Sending hugs,

Saturday, 3 June 2023

Adding dimension to one layer

Hello, crafting friends!
 
It's a brand new shiny Saturday and time for a brand new shiny challenge at Addicted to CAS! Here's the code word Sue has come up with to inspire you:
 

Most of my cards start off as one layer cards and then tend to morph into other types of cards! This one remained one layer though!! It was made to pop into the favour bags I made for my daughter's recent hen party (more about that in the Other News section at the bottom of this post.)
 

It's the simplest kind of one layer card that uses just stamping. On a 4" square card base, I stamped the bunch of flowers from The Greetery's Springtime stamp set. The flowers come separately so that you can make them nice and colourful! The sentiment is a favourite from Pinkfresh Studios' Perfect Sentiments set, stamped in crisp black. Note that sentiment overlaps the flowers to give the illusion of dimension - a neat trick for one layer cards.


It was easy to make multiples of this design using a stamping platform :)

Okay, it's over to you! How are you going to put together your own one layer creation? Do hop over to the Addicted to CAS blog to check out the wonderful samples made by the team. When you're ready to link up your own creation, you'll find the Linky Tool at the bottom of the post. Don't forget to keep your card nice and clean and simple with lots of clear space. We can't wait to see what you make!

CHALLENGES
I'm linking this card up at Less Is More where the theme is CAS One Layer Floral; and a new-to-me challenge Fab 'n' Funky where the theme is CAS One Layer.

AND IN OTHER NEWS
If you are a regular here, you'll know that my daughter is getting married this month. The wedding isn't going to be here but the hen party, which I was asked to host, has just taken place. It was lovely! My daughter and her friends helped decorate the house with crepe paper streamers.
 
 
We added loads of flowers, some hen banners I'd found on sale after Easter and some ceramic hens I'd collected from thrift shops. 
 
 
There was fizz and fruit juice to welcome weary travellers.
 

Everyone tucked into a cold buffet with different salads, patés, dips and quiches, a pavlova from our local farm shop and some gorgeous cup cakes made by a talented friend from church.
 

I made little favour bags to say thank you to our guests which I'll show you tomorrow :)

Sending hugs,


Thursday, 27 April 2023

Happy Honeysuckle

Hello, crafting friends!
 
Welcome to another Thursday of fabulous inspiration brought to you by the Tic Tac Toe Challenge! It's Elizabeth's turn to come up with the board for you and here it is:
 
 
I found myself drawn to the colour yellow in the middle of the board and decided to go diagonal from top left with Flowers/Yellow/Gems.
 

These striking flowers are created with a stencil from Uniko. I've used it once before HERE but was excited to use it as stylised honeysuckle this time! The stencil was positioned at different angles on a card panel, yellow ink sponged into it each time. I doodled stems from each flower head and added leaves using a MFT stencil. I added detail to the flowers and coloured in my leaves with coloured pencils.


The image was cut with a Spellbinders Hemstitch die and trimmed to size, and I sponged in a background using blue ink. One of Pinkfresh Studio's Perfect Sentiments was stamped in the corner and I finished with a sprinkling of gems before mounting the panel onto a yellow card base (a left over from an old Stampin' Up kit.)
 

Right - it's over to you! Which row or column or diagonal will you choose this week? Do hop over to the Tic Tac Toe challenge blog to check out the amazing inspiration my team mates have come up with. You'll find the Linky Tool at the bottom of the post and can use it to link up your own creation with us. We always look forward to seeing what you have made :)

CHALLENGES
I'm linking up with Addicted to Stamps and More where it's the Any Occasion challenge; I'm also joining in with Happy Little Stampers Stencil Challenge where Anything Goes; AAA Birthday has a Layer It Up challenge - I've added a layered panel so that the background shows through my frame, the colouring uses layers of colour and the sentiment is layered over the flowers.

AND IN OTHER NEWS
I have been spending lots of time sprucing up the garden ready for my daughter's 'hen' party - a get together for her girlfriends to celebrate her upcoming marriage. It's a tiny little space but I've been tidying things up and reviewing the borders because I'd like everything to be looking its best. The garden has so many memories of friends and family as so many of the plants were given as gifts. There's a honeysuckle, given by a friend as a moving in present over 20 years ago. A beautiful scented rambling rose was another gift that has kept on giving, as well as a rose from my family to celebrate my 50th birthday. There are foxgloves that my youngest son brought home from the garden centre in a backpack on his bike because he knew I loved them; hydrangeas that remind me of a place we used to holiday at; many geraniums because I can never resist them; and a peony that rose from the dead long after I had despaired of it! No pictures because it has poured with rain all day... Where is the spring?!

Sending hugs,

Thursday, 26 January 2023

Flowers in the snow

Hello, crafting friends!
 
It's Thursday and time for another fun board to inspire you at the Tic Tac Toe Challenge! Joanne is in charge of the board this time and we are certainly spoilt for choice!
 

I chose the diagonal from bottom left Pattern Paper/Flowers/Ribbon or Bow to make a winter birthday card.
 

I started with a snippet of 'plaster texture' paper from a favourite Stampin' Up pack. This was trimmed to size with a Crimped Frame die from the Greetery and stamped with a leaf spray (from a long-ago retired SU set) and a birthday sentiment from Pinkfresh Studio.
 

I topped the stamped leaf spray with my latest favourite thing: some die-cut wildflowers from a new-to-me Greetery die set. I cut these from white paper and coloured them with sponge daubers and then attached the flower heads to the stems and I can't tell you how much fun that was!! Finally, I added a bow from an MFT die set and attached everything to the card front.

CHALLENGES
I'm linking this card up at Little Red Wagon where the theme is Happy Happy Birthday; and also TGIF where there's a birthday challenge too.


AND IN OTHER NEWS
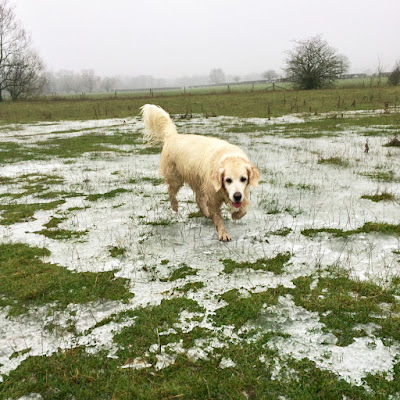
In early January we had a lot of rain and the river burst its banks as it often does in the winter. When the temperatures dropped below freezing, the floodwater completely iced over, creating a natural ice rink! It's wasn't deep so wasn't dangerous at all, so I took a couple of lads from church to play there. They had a wonderful time skating (with non-grip shoes) and playing 'ice hockey' with a pebble and two sturdy sticks. Eva tried to join in and made us all laugh by doing Bambi impressions!
 

We went back there today and it has pretty much all melted. Eva was able to walk on the ice that was left without her legs splaying about!

Sending hugs,

Friday, 19 August 2022

Waste not, want not

Hello, crafting friends!
 
I wore the pups out with a massive walk by the river this morning so, while they were busy snoozing, I used up some snippets to make a quick birthday card:
 

I'm quite pleased with this card as I've been passing over these snippets for ages. The little plant was once a version of THIS one layer card that went a bit wrong :/ I snipped it out to use on a future project. The woodgrain had been stamped on the back of another one layer card where I'd stamped a badly wonky sentiment, but then it turned out to be surplus to requirements - so it's a DOUBLE snippet!! The card base had had a topper badly attached and it got ripped as I removed it... Are you getting a picture of the kind of crafter I am?!!
 

I used one of Spellbinders' Hemstitch frame dies to trim the woodgrain snippet to size and sponged a little blue ink up from the bottom to coordinate with the plant. The sentiment from Pinkfresh Studios was stamped directly onto the woodgrain but (did I mention I was a bit of a clumsy crafter?!) it came out wonky so I stamped it on a white snippet, fussy cut it and glued it over the original, but straighter this time!
 

I did a bit of extra fussy cutting on the plant and popped it up on dimensional pads, then glued the panel over the spoiled section on the card base. For a finishing touch I added green enamel dots to the flower centres.
 

Here are the snippets I started with :)

CHALLENGES
I'm dashing off to the Snippets Playground with my homework - hope I make it in time (and that it might be cocktail hour!!; I'm also joining in with the Anything Goes theme at Seize The Birthday and the Happy Little Stampers Birthday challenge where Anything Goes.


AND IN OTHER NEWS
Eva's pal Koda has come to stay! We have known her since she was a tiny pup and she is a sweetheart who comes out for walks with us sometimes and often spends the day with us too. This is the first time she's come for sleepovers though and I can report she is being a Very Good Girl and is full of wags every morning! 
 

She's just having a quick nap here... It's quite full-on being in a house where there are loads of toys and a pal to play with, and a human to have cuddles with and more walks than you can shake a stick at!

Sending hugs,

Thursday, 18 August 2022

On a bright note

Hello, crafting friends!
 
I needed a quick note card for a keen grower of flowers so I whipped out a stencil, some inks and a bold sentiment. Here's what I came up with:
 

The stencil is Gerbera from Uniko's Pure Florals range - I cannot get enough of these gorgeous large, detailed stencils! I chose inks in yellow, pink and green and used them to create a bright floral arrangement. I love the way the inks blend on the flowers!
 
 
I originally stamped the sentiment directly onto the stenciling but (wouldn't you know it!) it came out slightly wonky despite using a stamping platform :/ So I stamped it again on a scrap of white card stock and fussy cut it and glued it over the first. Still a very quick card!

CHALLENGES
I'm joining in with Happy Little Stampers Stencil challenge where Anything Stenciled Goes; also Word Art Wednesday where Anything Goes.


AND IN OTHER NEWS
We are enjoying fun with our canine friends this summer! Here's one little cutie who had a whale of a time finding all the toys that I 'buried' under the cushion of her bed!
 

Peekaboo!

Sending hugs,

Wednesday, 10 August 2022

Hugs and farewell

Hello, crafting friends,
 
Today, I'm joining with many other crafters in Blogland to Pay tribute to one of our own, Lindsey, who died recently. She inspired so many of us through her work on many challenge design teams and I loved the warm and witty comments she left. She had already chosen her colour palette at Color Hues and the team there, and their sister challenge Seize the Birthday, are honouring their friend this challenge.
 

Blue and purple were the colours she chose and I've made a flowery card as she loved a floral. I used one of Uniko's large floral stencils, and sponged two shades of purple ink into it. Once that stencil was removed, I was able to position Funky Fossil's Brick Wall stencil over the top and stencil a fade-out wall effect in pale blue ink. The panel was trimmed to size with a stitched rectangle die from Heffy Doodle.


The sentiment is meant as a farewell to Lindsey herself and a comfort to her friends. I stamped it in versamark ink, then heat embossed it in gold before cutting it out and attaching it to the crysanthemum. The panel was then mounted onto a card base and I added a few mismatched sequins to tie the colours together.

CHALLENGES
I'm linking up with Color Hues which is running this tribute; I'm also joining in at Happy Little Stampers Stencil challenge, which was another challenge Lindsey designed for.
 

AND IN OTHER NEWS
I have some workmen in my garden today and this is the face of a golden retriever who isn't allowed to join in with all their jolly 'games'.


Poor baby. She just can't understand that they didn't come round to entertain her!
 
Sending hugs,

Thursday, 30 June 2022

Relaxing in the flowers

Hello, crafting friends!
 
It's Thursday and that means it's a Tic Tac Toe kind of a day! There's a fabulous board to inspire you, beautifully thought out by Felicita:
 

I've taken the top row, Friend/Summer Theme/Single Layer, and have used some of my favourite techniques to make a birthday card for a friend.
 

I used Fierce and Brave by Stamplorations on THIS card the other day and have been wanting to use it again. I used the other female image this time and had the idea of stenciling around her so that she would look as if she were relaxing in a sea of flowers! 
 

She was coloured with my coloured pencils and then I taped a mini stencil by Funky Fossil over the card base and blended yellow and pink inks through it avoiding my lovely lady. The stencil was just the right size for my 4" square card base and left a pleasing border around it. Finally, I stamped a friendly birthday sentiment from Pinkfresh Studios' Perfect Sentiments and embellished with a single pearl.

Okay, so now it's your turn to play! Do hop over to the Tic Tac Toe challenge blog and admire all the gorgeousness my teamies have made to inspire you. You'll find the Linky Tool at the bottom of the post and you can use it to share your own creation with us. Which row or column will you choose from the board? Or will you opt for one of the diagonals? We can't wait to see what you make!

CHALLENGES
I'm linking this card up at Allsorts where Lynn has chosen the theme of So Girly; I'm also joining in at Seize The Birthday where Barbara's choice of topping is Summer Activities - mine is relaxing in the garden (a goal of mine but rarely achieved!!) I'm also sharing at AAA Birthday where the theme is Flowers; And last but not least, I'm squeaking in late at Happy Little Stampers Stencil challenge where Anything Goes.
 

AND IN OTHER NEWS
I am currently feeling very sorry for myself as I'm in pain with that knee injury again. I was walking a young dog who hasn't been lead-trained yet and she pulled and I felt the knee go :/ Luckily, I have four days to rest it up. I thank my lucky stars every single day that my own fluffy girl is brilliant on lead, and that I can let her off so that she can have a good run out, and that her recall is excellent so I need not worry about her getting into trouble. 

A gold star for a Very Good Girl!

Sending hugs,